TL;DR: Should You Pull?
What Does It Do?
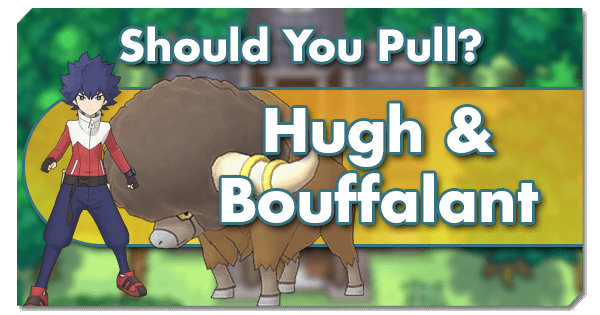
Hugh is the tragic rival from Pokemon Black and White 2; a young man who fights to see the return of his sister’s beloved Pokemon that was stolen by Team Plasma. The loss of this Pokemon took a terrible toll on Hugh, and caused him to re-evaluate the choices that led him to this point. And so, here on Pasio we see Hugh travel the land with his partner, Bouffalant. It’s here that we see Hugh finally attempt to atone for his sister’s loss, as he repeatedly orders his Pokemon to crash head-first into anything that he sees! Yeesh, maybe Team Plasma was right, afterall….
Hugh & Bouffalant comprise a Normal Type Striker unit with a weakness to Fighting Type attacks. They have good Attack, fairly low Speed, and low Bulk that’s mainly made up of their high base HP. Their kit starts with Headbutt, which is a 2-bar, Normal Type move that sports 30% odds of making the target Flinch when successful. Dire Hit + is next, with its classical 2-use method of maxing out Critical Rate. We follow this up with Head Charge, which is a 3-bar Normal Type move with decently high base power and a drawback of taking 25% of the damage done as recoil when successful. Finally, I’ll Take You On! is Hugh’s single-use Trainer Move, and it offers +4 Attack, +2 Defense and Special Defense, and the Free Move Next effect.
Skills are where we can really see the actual point of this Sync Pair shine through. Recoil Removal 4 has 50% odds of outright preventing Bouffalant from taking recoil damage after using Headbutt, while Hugh’s Determination fully restores Bouffalant to full HP before it faints once per battle. Both of these are defensively-oriented passive skills, but it’s the last one that makes all the difference: Reckless Boost 9. With this, Head Charge goes nuclear, and it becomes clear that it’s as dangerous for poor Bouffalant as it is for the bones of whoever it’s attempting to slam its head into like a semi-truck falling off of a bridge.
When it comes right down to it, Hugh & Bouffalant make up a glass-cannon unit, as should be pretty obvious from their set. Despite being incapable of dealing Super Effective damage, the boosts on Head Charge allow it to hit very hard, frequently hitting numbers comparable to some attackers that rely on Super Effective damage to break through. However, they’re also very risky, as any good hit runs the risk of deleting them with recoil in the process, and this game does not smile upon you if you let one of your units faint. To combat this inevitability, Hugh & Bouffalant have a 50% chance of negating Head Charge’s recoil on any given use, and they can also outright rise from the grave once per battle. With these odds, you’re basically guaranteed 2 uses of Head Charge, with 3-4 also being very reasonable, but this is a Sync Pair that demands a quick kill regardless, as not even team support can save poor Bouffalant from eventually caving its own skull in. But that’s not actually the end of the story! Despite the fact that Head Charge very much takes center stage on Hugh & Bouffalant’s build, they also have access to Aggravation 1 on their grid, which gives Headbutt solid odds of inflicting a Flinch, and making them… well, a somewhat mediocre pseudo-Tech unit, actually. But they can do it if they want to!
Ah, but we have one more role that is easy to overlook for Hugh & Bouffalant; they can actually tank! Yes, this is absolutely absurd to say about a Sync Pair that revels in throwing themselves off of a cliff as often as possible, but hear me out on this! It’s rare to see devastating attacks from the opposing team early on, and Hugh & Bouffalant do not care about damage that won’t outright KO them, so it’s possible to pair them with two fast-setup Strikers that have solid move Gauge management to triple up the devastation! This is the epitome of a high-risk strategy, and is generally not recommended, but it can obliterate some stages in very short order if executed correctly!
How To Use It?
Sync Grid Considerations & Lucky Skills
Sync Grid & Sync Levels
So let’s open this section by answering a question that a lot of you probably have at this point: no, Hugh & Bouffalant do not have any way to lessen or stop their self-inflicted damage. We just have to live with their fact that they choose to live a good life, not a long life. That said, they have most of their kit at ⅕, and don’t really gain much at ⅖ aside from Head Charge: Move Gauge Refresh 3. Sure, Healthy Healing is nice, but Hugh & Bouffalant probably won’t get much of a chance to reap its benefits.
⅗, meanwhile, has a few very nice tiles, including Sync Power Flux and Haymaker for more Sync Move damage, Furious Brawn for more easily-accessible Head Charge damage, Sharp Entry 1 for ease of setup, and even Headbutt: Aggravation 1 for some Flinch game and Recuperation 2 to hopefully make up for some recoil if Bouffalant survives it.
But this all pales when compared to Initial Punch Physical Boost 5. This skill is a bit hilarious as it grants five stacks of the Physical Attack Up Next effect when in a pinch. And considering the fact that Hugh & Bouffalant have no problem getting themselves to dangerous HP levels, this opens up a final-gambit play, where they are inevitably going to make their target regret every life decision that’s led them to this point when they get to enjoy a special solo act of Spain’s famed running of the bulls. But this spectacle also has 50% odds of sending Hugh & Bouffalant to the pearly gates thanks to their passive skill, so clicking on that attack after this has activated is always exciting! This tile is peak design in Pokemon Masters.
EX Viability
If you’re investing in Hugh & Bouffalant, definitely get them to EX. They have the potential to deal great neutral damage without resulting in a self-inflicted brain-hemorrhage, so making that into an AoE attack is definitely a plus!
Lucky Skills
Tried-and-true Critical Strike 2 is the way to go, as it’s a reliable way to help snap Bouffalant’s spine that’s been around since Lucky Skills were first introduced!
Games Modes
In general, Hugh & Bouffalant are best utilized in the Champion’s Stadium, where they can quick-burn their way into some hefty damage to the center or possibly take out one of the sides with ease before the opposing team has the time to process the fact that this afro-buffalo-bison-bull is attempting to Leeroy Jenkins itself and take them down with it. Sadly, this strategy of “UNGA BUNGA KAMIKAZE” doesn’t work quite as well in other game modes, where Hugh & Bouffalant are only likely to take down an HP bar or so in the Legendary Arena in particular, but not much else by way of sheer damage. In this game mode, it’s probably best to stick with Headbutt for reasonable odds at Flinches before letting Bouffalant go wild right before they were set to faint for the first time. Oh, but we’re not done yet, as we have likely discovered the single worst unit for the Battle Villa! Reliance on MP and a death-wish means that Hugh & Bouffalant probably won’t even see the first boss area of the villa, which is mildly hilarious. Still, I look forward to seeing the inevitable video of someone making a run through the Villa using only Hugh & Bouffalant and two non-attacking units!
Team Compositions
So this one… is a bit hard to pin down. First up, Hugh & Bouffalant are going to need some help patching up that last 2 Attack boosts so that they can more efficiently give themselves concussions. Hilbert & Samurott, Hop & Zamazenta, or Fall 2021 Caitlin & Sableye are all fine example choices for filling that need. Beyond that… bring some Speed support so that the team doesn’t suffer too terribly on the Move gauge front once Hugh & Bouffalant are laying in the corner unconscious. Sadly, not even giving them the Enduring effect can stop the power of Head Charge from breaking poor Bouffalant’s neck, so the best that you can do is supply some additional defensive support from units like Melony & Lapras, Evalyn & Entei, or Sygna Suit Aura Cynthia & Lucario to ensure that the final wounds are strictly self-inflicted.
Not even healing will work out most of the time, because a well-buffed Head Charge will tend to OHKO poor Bouffalant regardless. On that note, it is possible to lessen the impact of their damage so that they have a real chance to keep going beyond a few hits and get some healing in, but the loss of damage makes them even worse than they already are. Better to go all-in. Honestly, their best bet is probably to pair them alongside other powerful attackers that don’t have must-use 3rd-slot options like Special Costume Diantha & Keldeo or Sygna Suit Thunderbolt Red & Pikachu alongside Move Gauge support, and then let them go out in a blaze of glory.
If you want to try the pseudo-tank route, then you’re going to need attackers that set up fast and are light on the move gauge, with extra points if they can help the team setup quickly as well. For this role, Sygna Suit Steven & Deoxys - Attack, Sygna Suit Hilda & Victini, Dojo Uniform Gloria & Urshifu, Sygna Suit Korina & Marshadow, and Lucas & Dialga are all fantastic options. But, again, this is not really a recommended team comp, and more of a meme usage, although it’s arguably a decent application for Legendary Gauntlet runs.
Is It Worth Pulling?
If you don’t have a full set of powerful attackers at the ready, then Hugh & Bouffalant could potentially help out, as they do have high damage output without needing to worry about the opposing side’s type weaknesses. They can also put in work in the team’s 3rd slot with the goal of self-destructing in a blaze of glory while the team’s main attacker cleans up the mess left behind. However, this is definitely a Sync Pair worth passing up on. Despite having some bit of potential utility for some players, they’re very unwieldy and will be entering the general pool soon. Better to pick them up naturally at some point down the line.


