Why 252?
Compared to base layouts with 3 Power Plants, the 252 exchanges a Power Plant for an extra Trading Post or Factory. Many other facilities are left at low levels, but the extra facility’s production is well worth it. A 252 is able to produce significantly more EXP and LMD than other base setups.
Without 3 Power Plants, not all facilities can be fully upgraded. Dorms in particular are left at very low levels, mostly level 1. This is a blessing in disguise, though: slower Morale recovery means there is little benefit to more frequent Operator rotations, compared to triple-Power-Plant setups like 243. Even with intensive management (6-hour rotations), a 243 falls short of a 252’s production, since a 252 has an extra Factory. In other words, less management is needed for peak performance.
Lastly, since many facilities are left at low levels, it costs far fewer base materials and LMD to set up. Dorms in particular are extremely expensive to upgrade. By leaving them at level 1, you can save up to 384,000 LMD (worth 1536 Sanity) from crafting costs alone!
However, since not all facilities are fully upgraded, setting up a 252 can be somewhat complicated. This guide will walk you through the process of planning out and building your 252 base.
For information on other base layouts, and a basic overview of base facilities, click here:

252 Base Basics
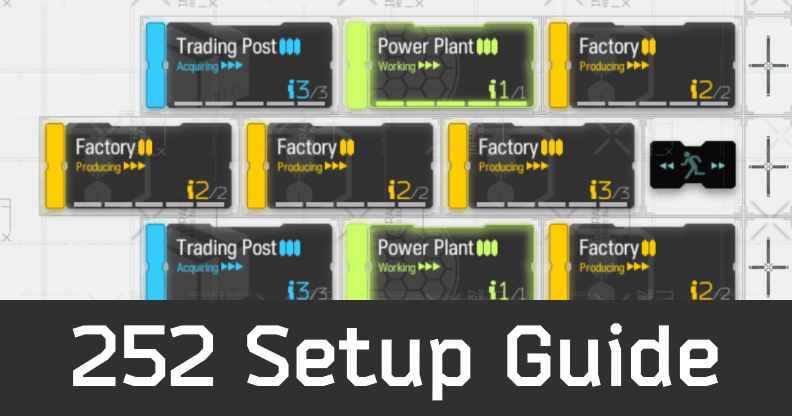
A 252 base setup includes 2 Trading Posts, 5 Factories, and 2 Power Plants. There are two ways to split up EXP and Gold production between the factories:
- 3 EXP Factories and 2 Gold Factories
- 2 EXP Factories and 3 Gold Factories
The 2 Power Plants can’t support a fully upgraded base, so some buildings have to be kept below max level. As a result, there are multiple variants of 252 setups, with different ways to distribute power between Factories, Dorms, the Office, and the Reception Room.
Budgeting Your Power
2 fully upgraded Power Plants yield 540 power. This isn’t enough to fully upgrade the entire base, so you’ll have to plan out how to level each facility. A table of example setups is given at the end of this section.
Data on facilities is provided by cube #1588's Base Information PDF.
Right Side Facilities
First, decide how much you want to upgrade the facilities on the right side: the Reception Room, Workshop, Office, and Training Room. Upgrading these facilities provides certain benefits, but leaving them underleveled lets you allocate more power to Factories, increasing their production. All of these facilities consume 10, 30, and 60 power each at level 1, 2, and 3 respectively, except for the Workshop (which always consumes 10 power).
- The Workshop should always be fully upgraded, to unlock recipes for higher tier materials.
- The Training Room should eventually be fully upgraded to enable Skill Specialization/Mastery, but isn’t necessary for newer players. If you aren’t looking to unlock Masteries for any of your Operators’ skills, you can leave the Training Room at low levels for now, and allocate more power towards Factories. You can max out the Training Room later on, downgrading some Factories if you need more power.
- The Office performs well enough at level 1. Upgrading it unlocks more Recruitment slots, but 2 slots is enough to keep up with the Recruitment Permits you get. Office upgrades also provide a small discount from the LMD cost of Recruitment, but it’s negligible. Leaving the Office at level 1 is recommended, but maxing out the Office doesn’t prevent you from running a decent 252.
- The Reception Room also performs well enough at level 1, but provides many more benefits when upgraded: more support unit slots, and more friend slots. Whether or not it’s worth the power cost is up to you.
Note that these facilities cannot be downgraded. If you change your mind down the line, you can upgrade any of these facilities, but this cannot be undone.
Trading Posts and Factories
With the power that remains, determine how you want to upgrade your Trading Posts and Factories. These facilities both consume 10, 30, and 60 power each at level 1, 2, and 3. Make sure to save at least 40 power for Dorms.
- It’s highly recommended to have both Trading Posts fully upgraded. Upgrading a Trading Post unlocks orders with higher volumes, which cost more Gold to fulfill and take longer to acquire, but give more LMD. These orders are slightly more time-efficient than the standard 2-Gold-for-1000-LMD orders.
- Factories, meanwhile, don’t gain anything special from upgrades, aside from extra Operator slots. Prioritize maxing out both Trading Posts, and spend any spare power on Factories. Set all Factories to level 2, and upgrade as many of them to level 3 as you can, without falling below 40 power.
Dormitories
This step is simple. With the 40+ spare power remaining, you will build 4x level 1 Dorms for 10 power each. If you have enough spare power, upgrade a Dorm to level 2.
It’s possible to run a 252 with only 3x level 1 Dorms, for only 30 power. However, the reduced Dorm space can make Operator rotations difficult to plan out.
Example 252 Setups
If you don’t want to plan out your base yourself, here’s a table of example 252 setups, provided by Forge #2341's spreadsheet. “Slots” refer to Operator slots in Factories. For example, 5x level 3 Factories can hold 15 Operators total, so a 252 with maxed Factories is called a “15-slot 252”.
| 252 variant | Trading Post levels | Factory levels | Dorm levels | Reception Room level | Office level | Training Room level |
|---|---|---|---|---|---|---|
| 11-slot | 3 3 | 3 2 2 2 2 | 2 1 1 1 | 3 | 3 | 3 |
| 12-slot | 3 3 | 3 3 2 2 2 | 2 1 1 1 | 3 | 2 | 3 |
| 13-slot | 3 3 | 3 3 3 2 2 | 1 1 1 1 | 3 | 1 | 3 |
| 14-slot | 3 3 | 3 3 3 3 2 | 1 1 1 1 | 2 | 1 | 3 |
| 15-slot | 3 3 | 3 3 3 3 3 | 1 1 1 0 | 1 | 1 | 3 |
| 15-slot, no Training Room | 3 3 | 3 3 3 3 3 | 1 1 1 1 | 2 | 1 | 0 |
| 15-slot, level 1 Training Room | 3 3 | 3 3 3 3 3 | 1 1 1 1 | 2 | 1 | 1 |
| 15-slot, level 2 Training Room | 3 3 | 3 3 3 3 3 | 1 1 1 1 | 2 | 1 | 2 |
- The 15-slot variant produces the most EXP and LMD, but doesn’t have the benefits of a max-level Reception Room. If you want more friend and support unit slots, choose the 14-slot or 13-slot variant.
- The 15-slot variants with low-level Training Rooms are viable for newer players who aren’t grinding for Masteries. Note that the Reception Room is level 2. If you want to eventually transition to a 15-slot with a maxed Training Room, leave the Reception Room at level 1.
- Players who have fully upgraded their Reception Room and Office (usually because they are transitioning from a 243) must use the 11-slot 252, since there isn't enough power to support more Factory slots. This variant still produces more EXP and LMD than 243 bases, but is less powerful than other 252 variants. Players who haven’t maxed their Reception Room or Office are better off with other 252 variants.
Building the Base
Now that you’ve got a plan, it’s time to build your 252. It’s fine to just upgrade whatever you want, as long as the end result is the 252 setup you’ve chosen. Here are some tips:
- Don’t blindly upgrade everything you can. Remember, not all facilities will be maxed out. Make especially sure that you don't over-upgrade the Reception Room or Office.
- Upgrade a Factory to level 3 as soon as possible. This will unlock the Tactical Battle Records, which are much more efficient to produce than Drill and Frontline Records.
- Don’t worry about not having enough Operators with base skills, especially for Factories. Operators without relevant base skills will still boost a facility’s effectiveness by a small amount.
The 5th Factory: EXP or Gold?
In a completed 252, 2 Factories always produce Battle Records (EXP), and 2 Factories always produce Gold. The remaining 5th Factory is flexible, and can be set to either one.
- If you want more EXP, set the 5th Factory to Battle Records (EXP). Use Drones to boost Gold production to keep up with your Trading Posts. Remaining Drones can be used on EXP.
- If you want more LMD, set the 5th Factory to Gold. Use all Drones on Trading Posts, since 3 Gold Factories can easily produce enough Gold to keep up. When you have a large surplus of Gold, change the 5th Factory to EXP and continue using Drones on Trading Posts. When your Gold surplus runs out, change the 5th Factory back to Gold.
Operator Rotations
A 252’s low-level Dorms are slow at recovering Operators’ Morale. 12-hour (twice a day) rotations provide good performance, and there is little benefit to more intensive management.
New players often make the mistake of rotating all base Operators at once. This strategy requires more base Operators, puts unnecessary stress on Dorms, and may not be feasible with 252’s low-level Dorms. You can significantly reduce the amount of base Operators needed with staggered rotations, only rotating about half of a facility at once. For example, here’s now to rotate Operators in a level 2 Factory:
| Time | Operator 1 | Operator 2 | Operator 3 |
|---|---|---|---|
| Start | Working | Working | Resting |
| 12 hours | Working | Resting | Working |
| 24 hours | Resting | Working | Working |
Level 1 Dorms restore at least 2 Morale per hour, while Facilities will drain 1 Morale per hour at most, often less. As such, an Operator only has to rest for 1/3 of the time, working for 24 hours and resting for 12. With these staggered rotations, this facility needs only 3 base Operators, instead of 4.
Control Center
Operators in the Control Center provide a 5% reduction to Morale loss to all base Operators, regardless of base skills. A fully staffed Control Center reduces Morale loss by 0.25 per hour, which makes your rotation timings a lot more flexible.
Stagger your Control Center rotations by swapping out at most 3 Operators at once. Amiya provides a 7% boost to Trading Posts, so make sure to keep her in the Control Center for at least 24 hours at a time. If you have Swire (who has the same boost), make sure at least one of them is in the Control Center at all times. (Amiya and Swire’s skills don’t stack.)
Trading Posts, Factories, and the Reception Room
As shown above, a level 2 Factory can be staffed with only 3 Operators. The Reception Room also has 2 Operator slots, and can be rotated similarly.
For level 3 Trading Posts and Factories, you have 2 choices:
- Rotate 2 Operators at once. Each facility will need 5 Operators to staff, but you have several hours of leeway in rotation timings.
- Rotate 1 Operator at once. Each facility will need only 4 Operators to staff, but you have very limited leeway in rotation timings. Operators will work for 36 hours at a time, instead of 24 hours.
Some Operators have base skills that synergize with other skills. For example, Texas/Lappland/Exusiai and Vermeil/Cuora/Noir Corne. For these trios, you may want to rotate the entire facility at once, even if it requires more Operators to do so.
More information on Operator base skills can be found here:


Power Plants
Each Power Plant only has 1 Operator slot. You can treat both Power Plants together as a single 2-slot facility, and rotate similarly with 3 Operators:| Time | Operator 1 | Operator 2 | Operator 3 |
|---|---|---|---|
| Start | 1st Power Plant | 2nd Power Plant | Resting |
| 12 hours | 1st Power Plant | Resting | 2nd Power Plant |
| 24 hours | Resting | 1st Power Plant | 2nd Power Plant |
| 36 hours | 2nd Power Plant | 1st Power Plant | Resting |
| 48 hours | 2nd Power Plant | Resting | 1st Power Plant |
| 60 hours | Resting | 2nd Power Plant | 1st Power Plant |