Mission and Clear Conditions:
Mission: Kill all enemies
Clear Guide:
Team Recommendations:
- 2 Combat Echelons Level 70 4x
- AR/SMG recommended
- This fights require a fair bit of Micro, especially the Molotov/Sniper stacks. Don't be afraid to swap and repair as needed.
Clear Steps
Equip your ARs with PEQs, as this is a night map, and put M4 and AR-14 together with a good main tank for a boss fight that is coming up. We'll talk about the Boss when we get there, but for now, know you need to bring your strongest AR/SMG echelon, and you will need some in battle control to prevail.
Beyond that, this map features some random movement, but we can account for it in the guide, but if you're enemies have been kind you might be able to truncate a few of the moves on turns 3 and 4. Enemy compositions here are fairly straightforwards. Mind the Jaguars that lurk in the back of a few enemy setups, but otherwise this battle is fairly straightwards.
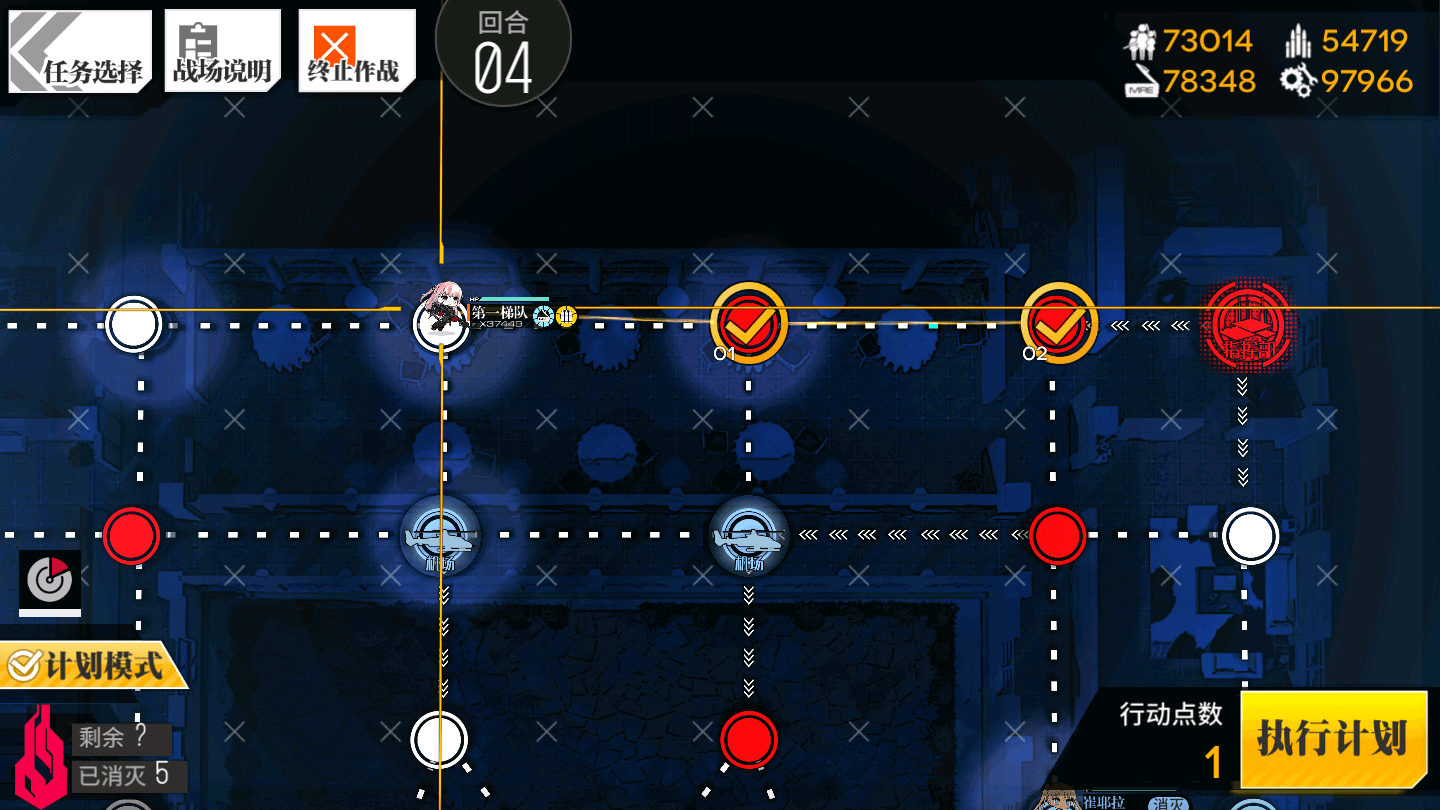
Turn 1
1.1

Deploy a Combat Echelon on the Command Post, and move to the upper left one node.
1.2
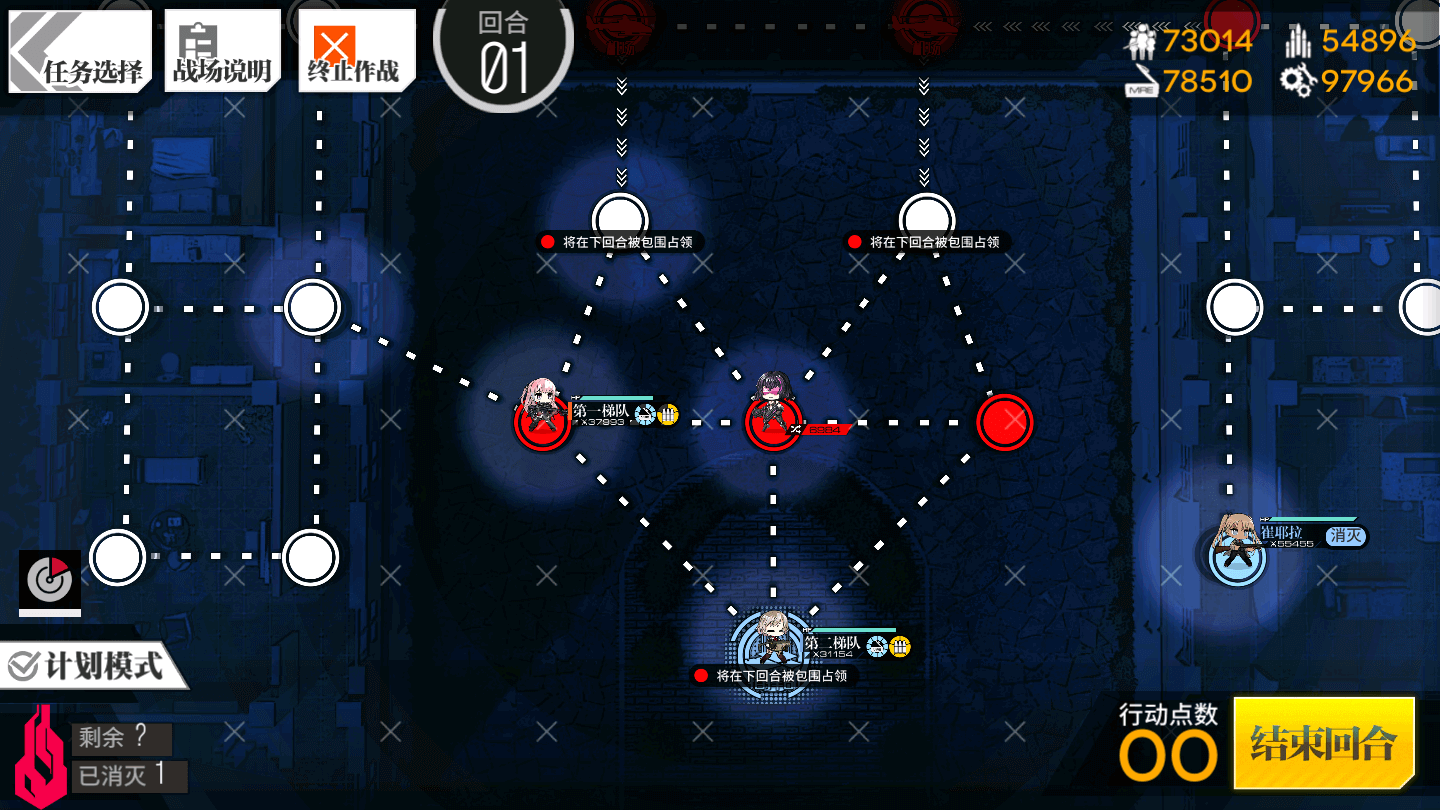
Deploy a second Combat Echelon on the Command Post. End your turn.

Turn 2
2.1

Move the upper Combat Echelon to the left one node, up one node, and to the right one node, and end your turn.

Turn 3
3.1
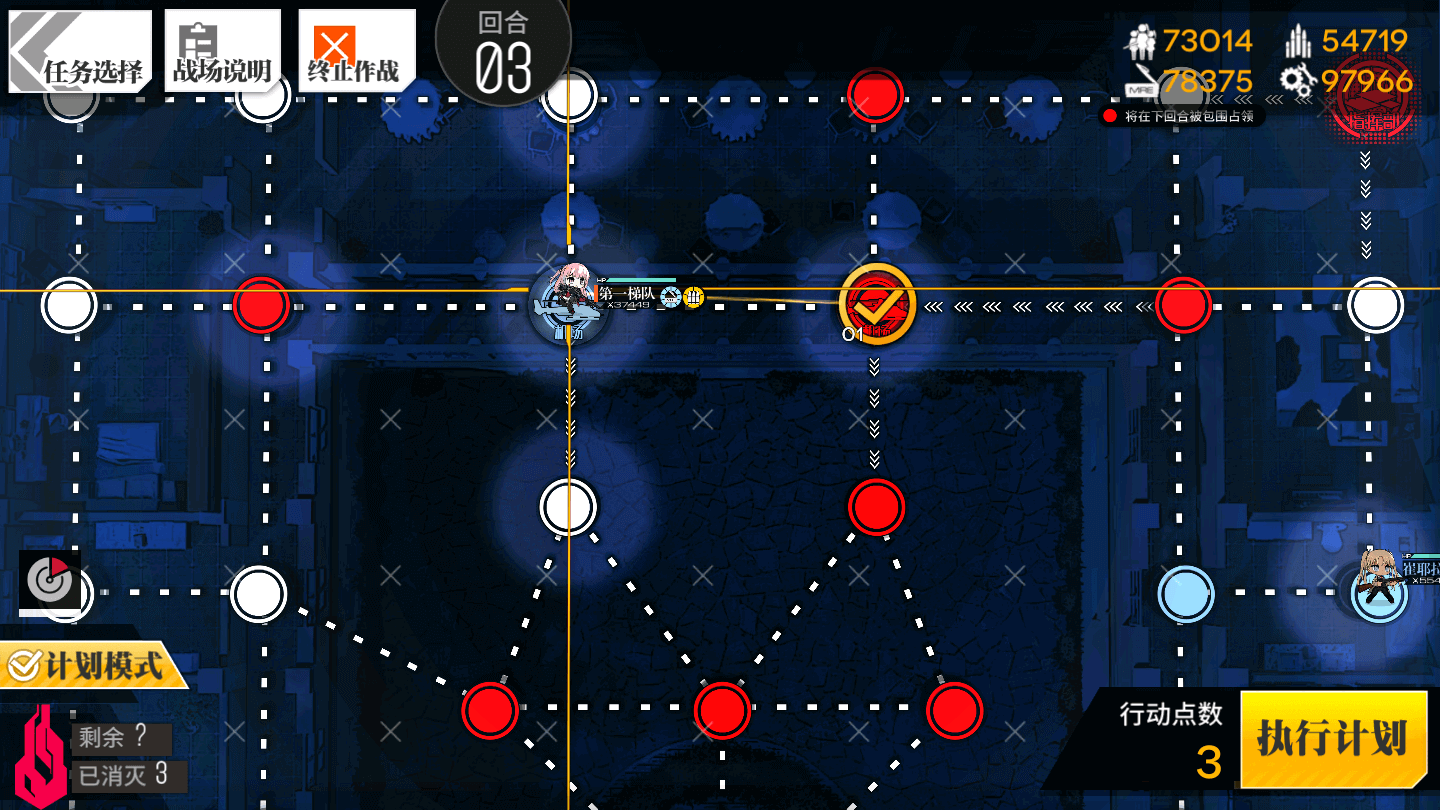
Move the upper Combat Echelon to the right one node.
3.2

Move the lower Combat Echelon to the upper left one node, then right two nodes.

Turn 4
4.1
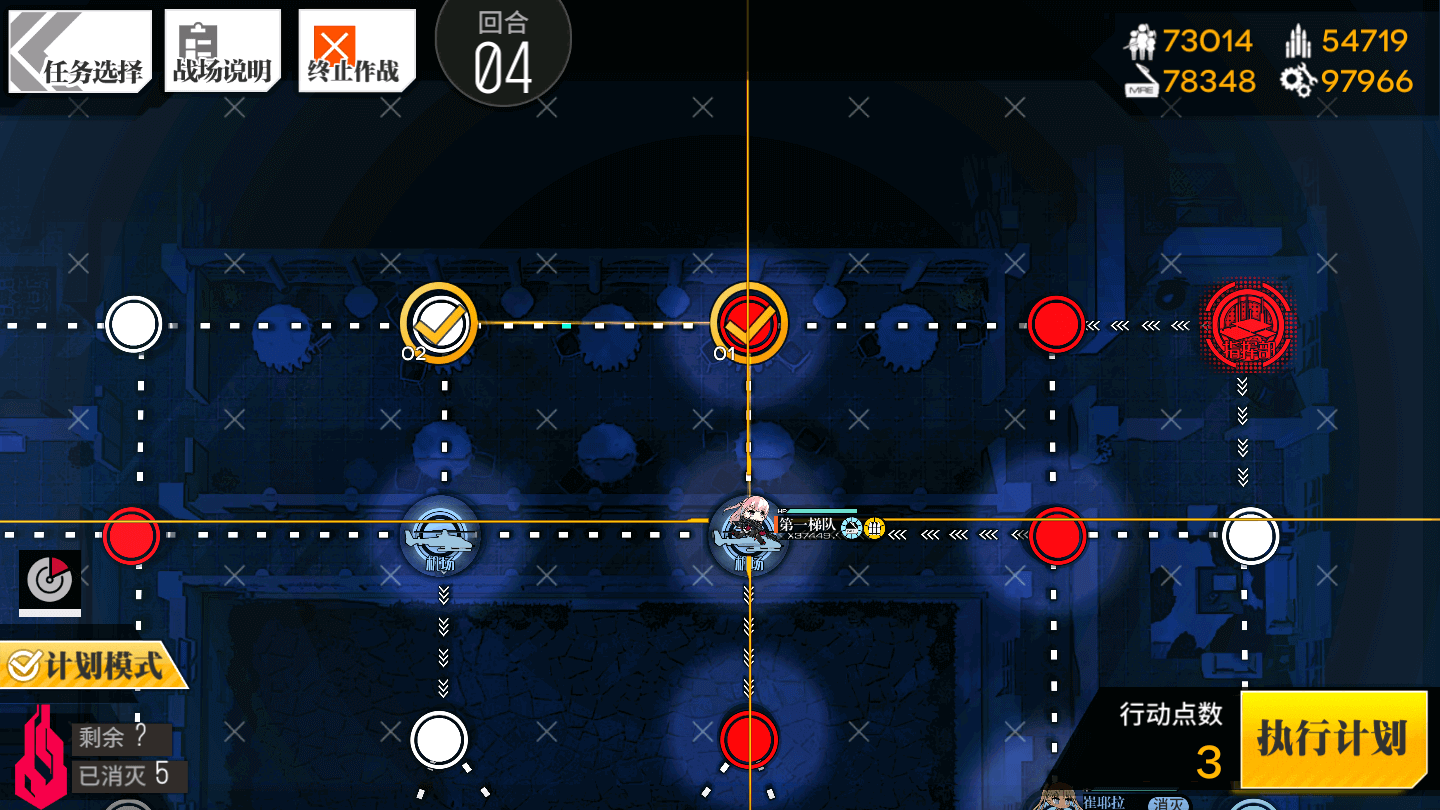
Move the upper Combat Echelon up one node, and left one node.
4.2
Move the upper Combat Echelon to the right two nodes.
4.3

Move the lower Combat Echelon to the left one node.
Who's that Boss!?


You sure about that?


Boss
Boss Summary
Lucky for us, this boss is fairly straight forwards. Every so often the boss will prepare a Charged Shot, and mark 3 nodes on the grid with purple. Move whatever Doll is being targetted onto the purple markings.


Video Guide:
Next Mission?
-
Normal
-
EX