Possible Drops:
--
Mission and Clear Conditions:
Mission: Capture Command Post
Clear Guide:
Team Recommendations:
- 3 Combat Echelons
- RF/HG recommended
- OPTIONAL: Gunboat or a similar type of Echelon to kill the Typhon. M4 Mod is quite useful for this.
- 1 Dummy Echelon
Clear Steps
Ready, set, weird map! Okay, not really. This mission is fairly straightforward. There are a few odd gimmicks running about, and unlike Normal, this Typhon doesn’t play around, having brought trash to soak up early damage, and a friend, leaving on the central row safe from harm. Once again, you can bombard the Hydra with the Artillery Emplacements, but this is not required, and the Normal mode clear method works just fine. The method shown below will not engage the Typhon, but if you are equipped to do so, there is no reason not to kill it.
If you want to fight the Hydra, the method is fairly simple. The two consoles on the bottom of the map control the set of Artillery emplacements in the center corridor. The bottom two emplacements are ‘friendly’, and can be controlled via Console to bombard the nodes in front of them. This is used to severely weaken the Hydra. Each Artillery may only fire once, so be careful to only blast the Hydra. The leftmost Console can also disable the enemy Artillery on the upper edge of the corridor.
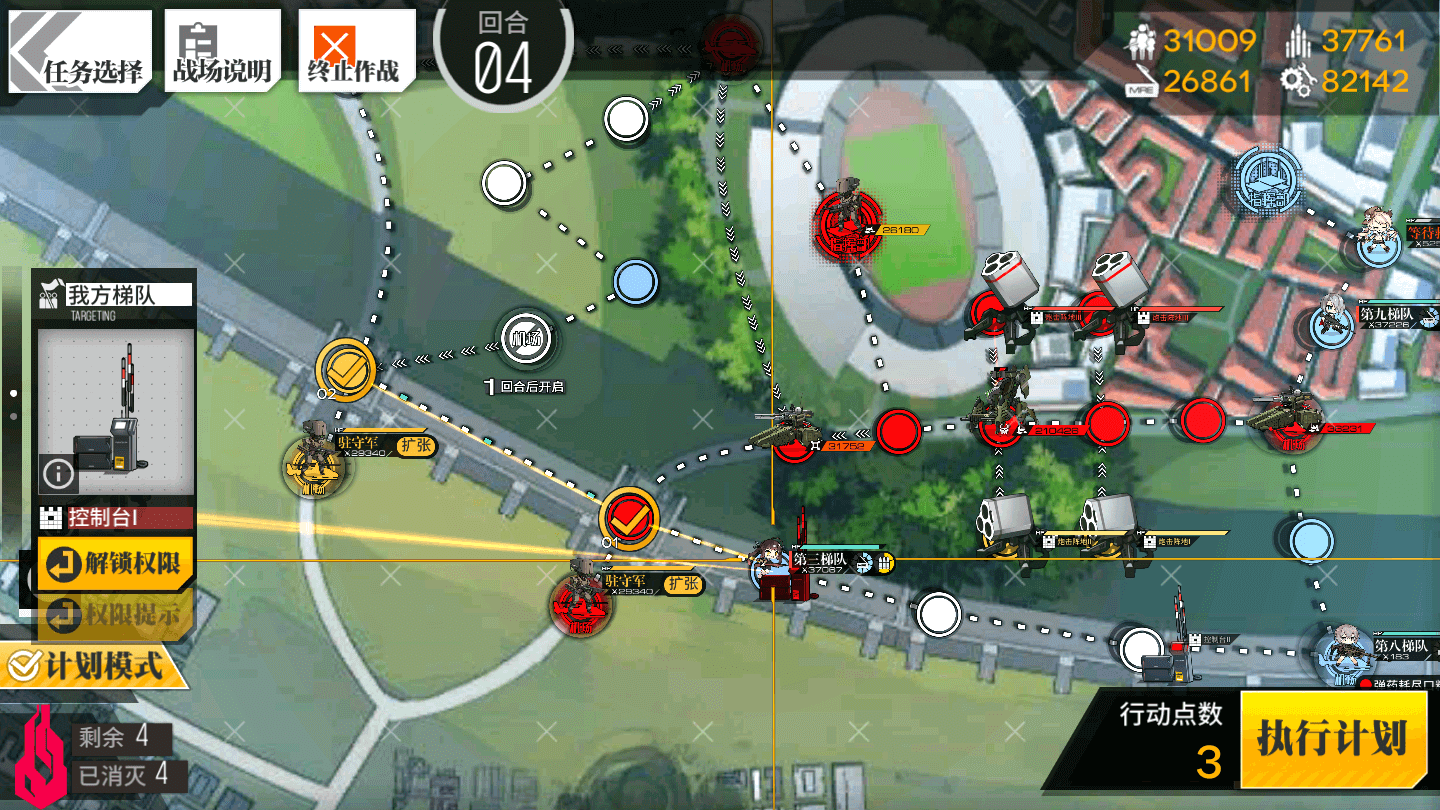
Turn 1
1.1
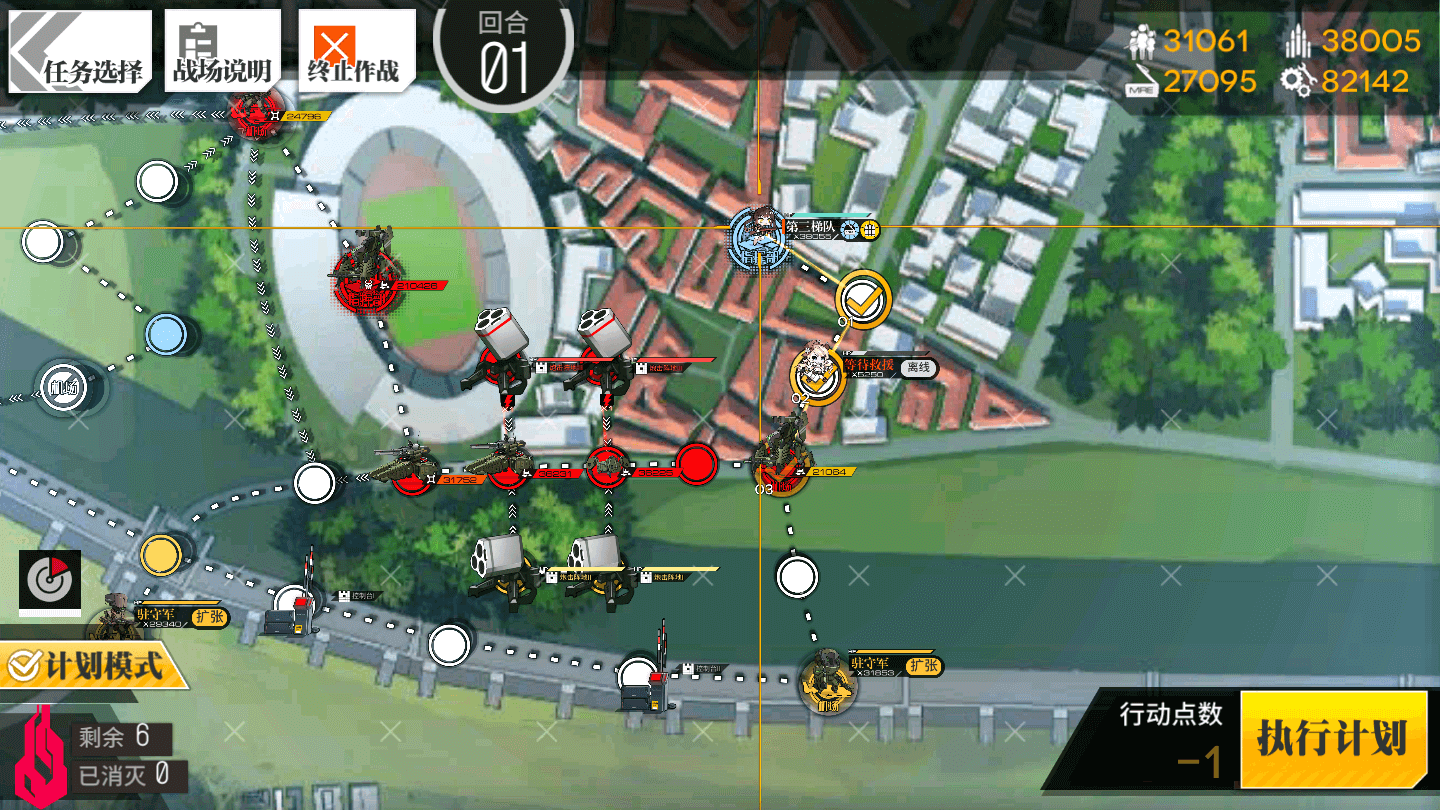
Deploy a Combat Echelon on the Command Post. Move to the right one node, SWAP with the SAA, and move down one more node to the Heliport.
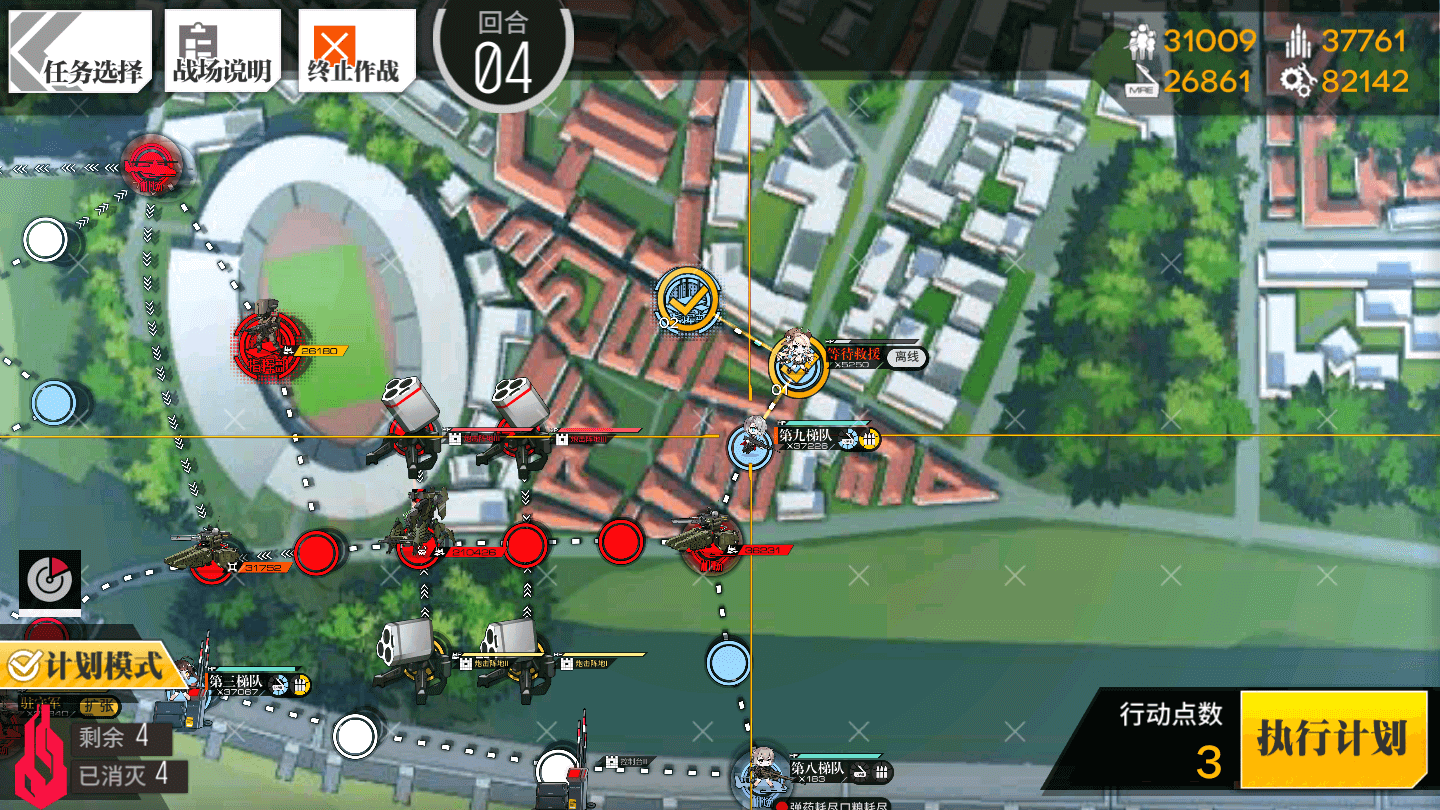
Turn 2
2.1
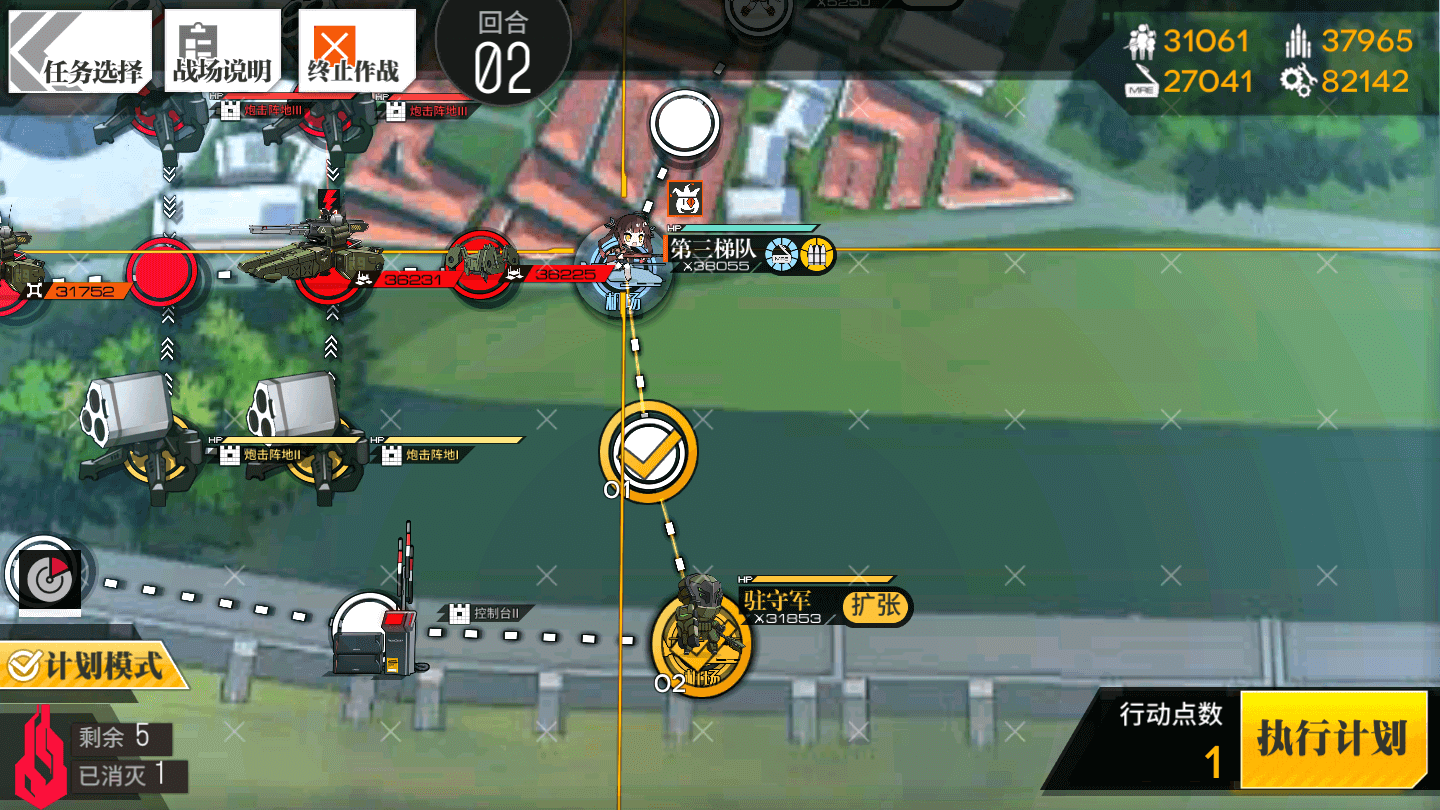
Move the Combat Echelon down two nodes to engage the Cyclops.
2.2
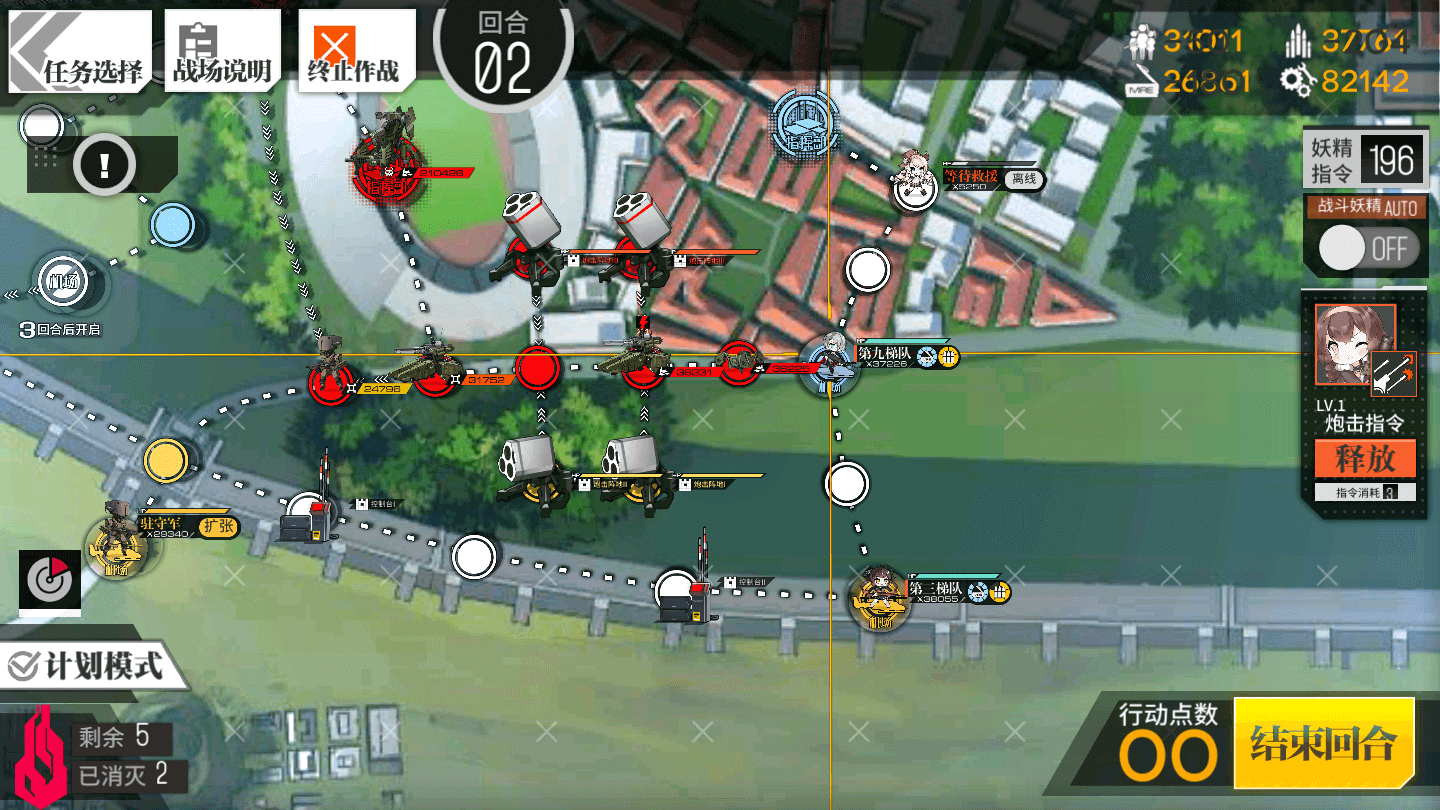
Deploy a second Combat Echelon on the Heliport. End your Turn.
If you want, you can create an Echelon capable of killing the Typhon moving towards the second Combat Echelon. Good old fashioned gunboats will work, as will a variety of Echelons using M4 Mod, and RFs. The central Row will be safe from lasers, as shown below:
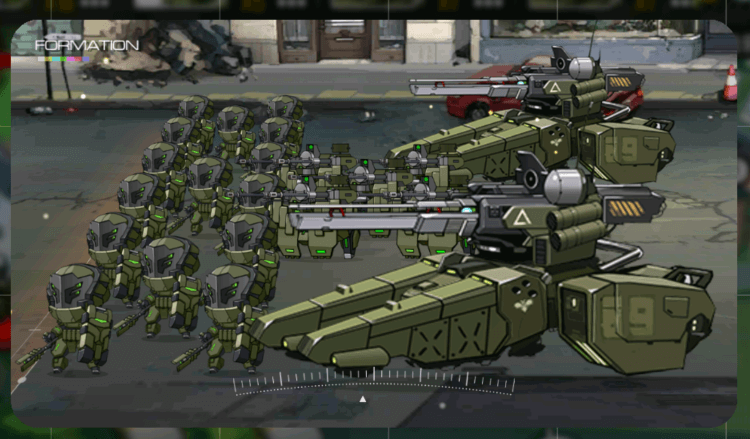
This fight is entirely optional, as as a result the guide skips it, but if you have the firepower it is 100% doable.

Turn 3
3.1
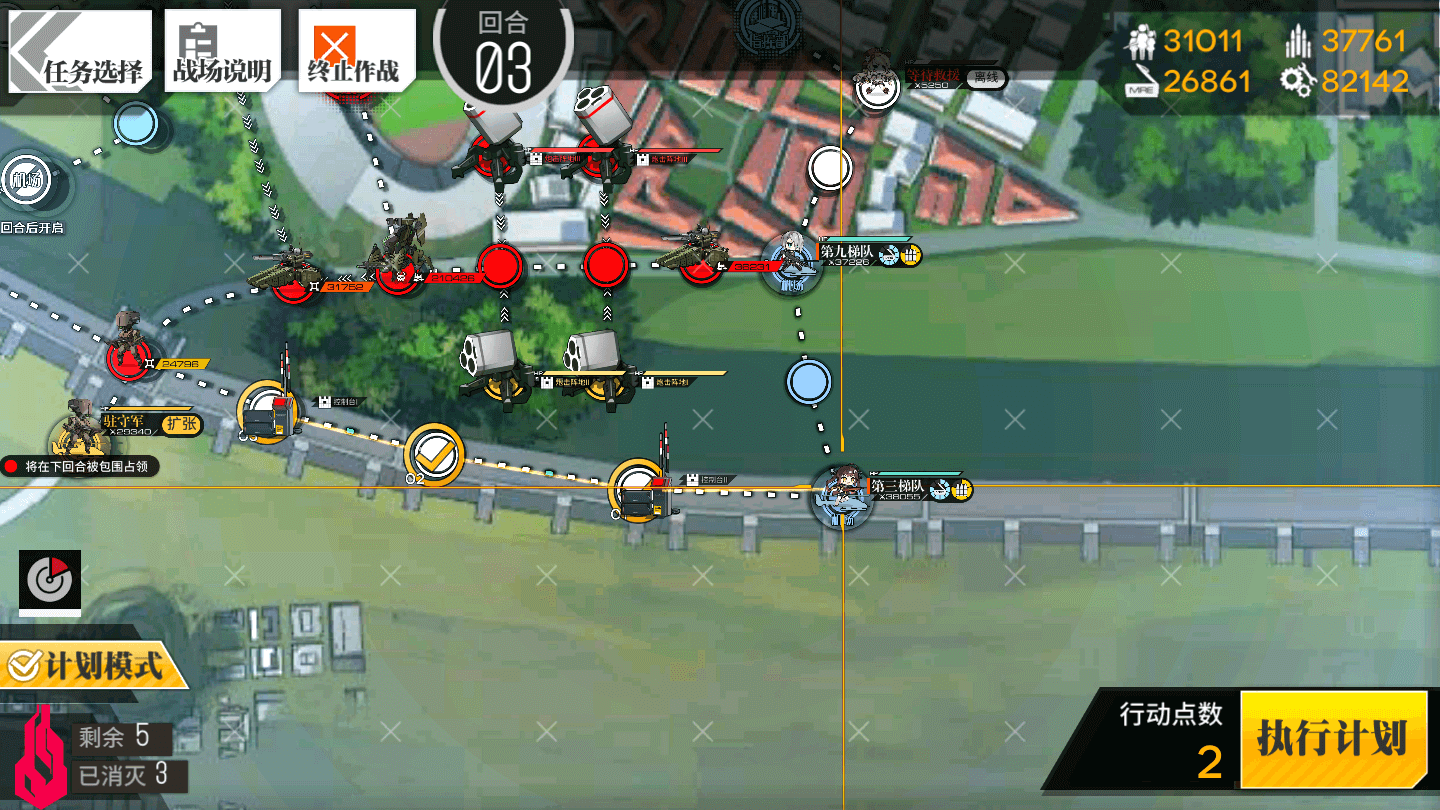
Move the bottom Combat Echelon to the left three nodes.
3.2

Move the 2nd Combat Echelon up one node.
3.3
Deploy a Dummy Echelon on the bottom Heliport.
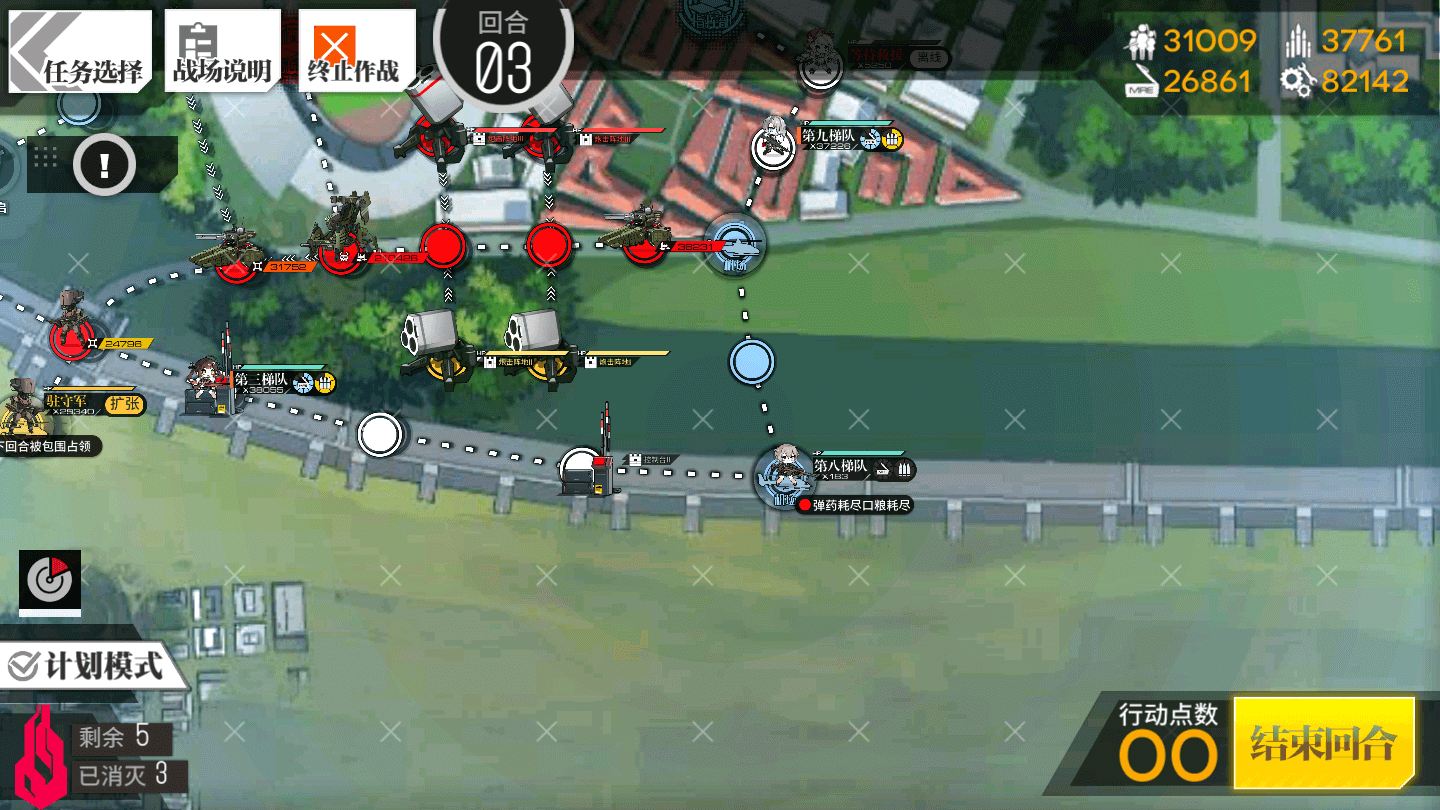
Turn 4
4.1
Move the lower Combat Echelon to the left two nodes.
4.2
Move the second Combat Echelon back onto the Command Post, swapping with the hostage on the way.
Turn 5
5.1
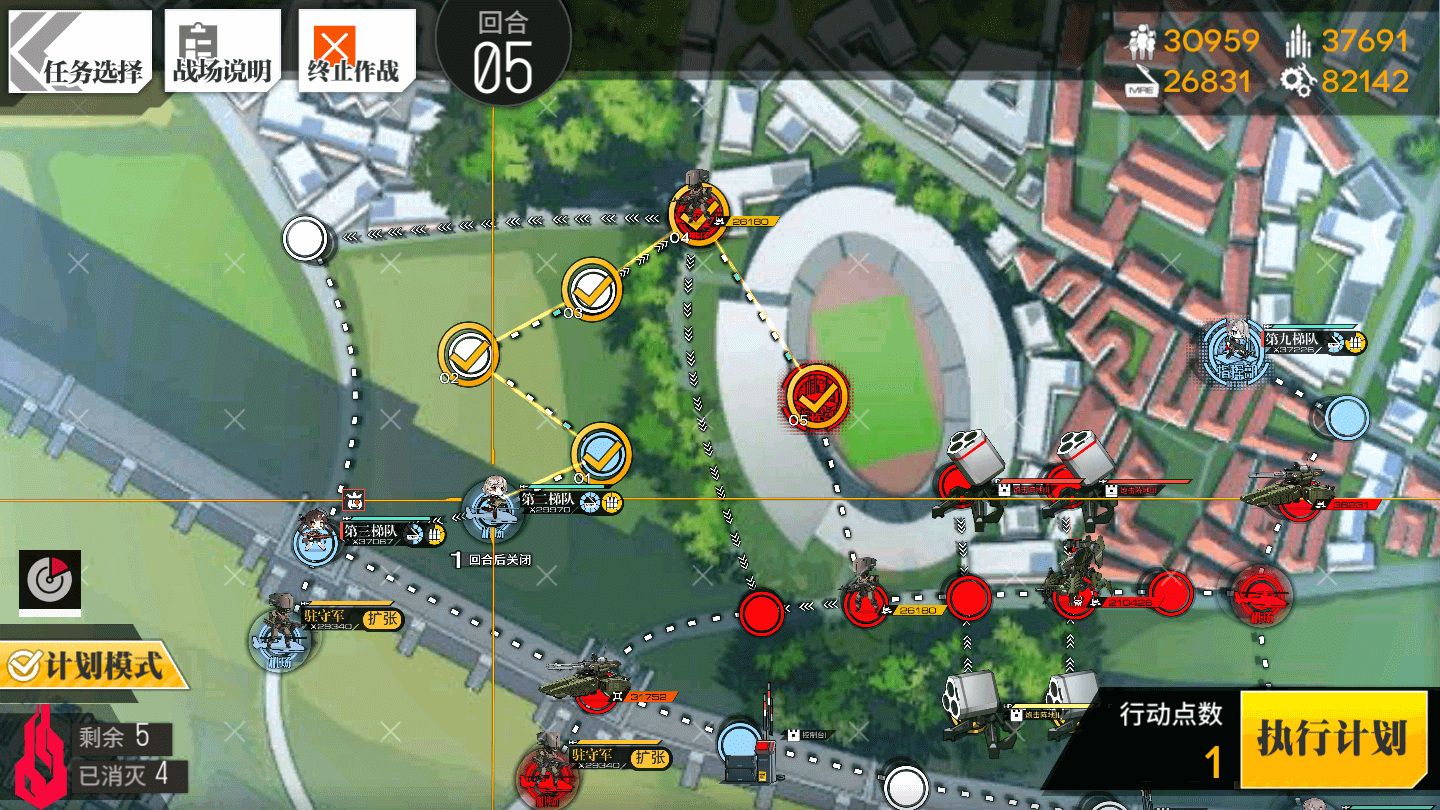
Deploy a third Combat Echelon on the recently captured timed Heliport, and move them right, left-up, right two nodes, and down onto the Command Post for the victory.
Video Guide:
Next chapter?
-
EX Guides
-
Normal Guides