

Overall Fight Mechanics

Golem, unlike the other hunts, is fairly easy to build for. Like the Wyvern, Stage 11 does introduce new mechanics, but luckily these don't justify rebuilding the entire team composition.
Unlike in other Hunts, you will need to pay slightly more attention to the supporting enemies in the boss room, specifically the Breeze Silva.
Golem 1-10
The bosses from Golem 1-10 are a lesser version than that in Golem 11. One of the main differences lies in the lack of its Protection of Nature passive. However, since the end goal should be Golem 11, it’s best to build a composition that will work in Golem 1-10 eventually leading to Golem 11 Auto completion.
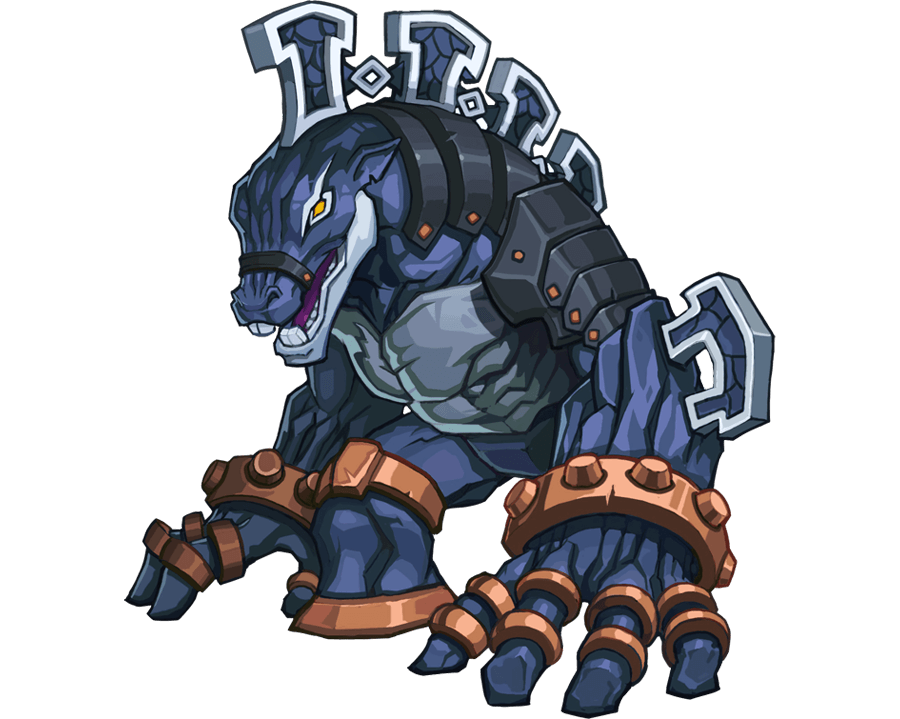
Steel Rubeta's Moveset
- Shockwave: Attacks all enemies Decreasing Defense for 2 turns, triggering aftershocks that deal additional damage.
- Earthen Wave: Counterattacks with an AoE attack when attacked with full cooldowns, randomly stunning one enemy for 1 turn. Decrease the caster’s skill cooldown by one turn when attacked.
- Protect: Grants the caster a stackable Defense increase buff every time they are attacked that will be removed when they attack.
- Natural Counter: Grants the caster a stackable Attack increase buff after attacking.
We recommend autoing all but Golem 10, as this one can be cleared manually to unlock Golem 11. Once 11 is unlocked, players can build for the different mechanics of that fight.
Additional enemies in the boss room:
Unlike other Hunts the other enemies in the boss room play an important role.

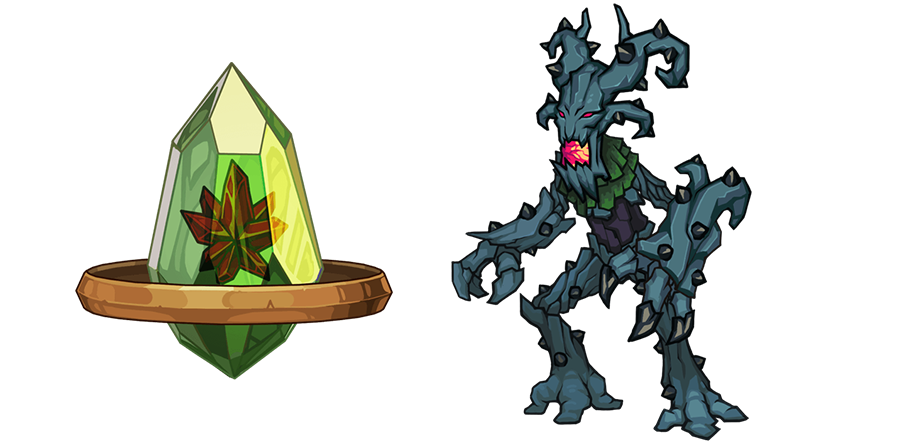
Green Klineode: This enemy will grant increased Attack and Defense to the Golem for 2 turns. It’s also immune to provoke, silence, and speed decreasing effects.
Breeze Silva: This enemy’s skill will recover the ally’s Health by 20%. It’s also immune to provoke, silence, and speed decreasing effects. Early on, this enemy can make killing Golem fairly annoying. If runs become lengthy or inefficient because of its healing, kill it before killing Golem or try to incorporate anti-Healing effects into your composition.
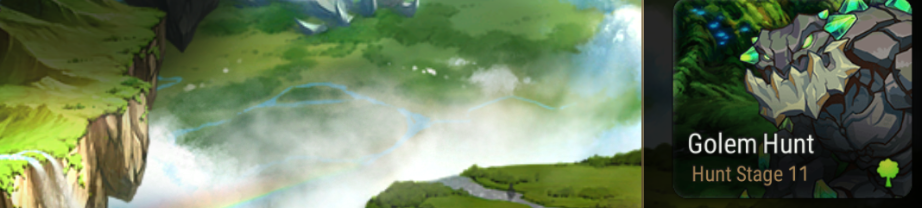
Golem Hunt 11
The frequency of debuffs is higher than that in Golem 1-10, so either having a strong Immunity or Cleanse Hero is very important. There will be consistent Defense Breaks and Stuns paired with AoE damage, a strong Healer is also recommended. Aside from this, bringing adept single target damage heroes is highly encouraged so the boss can be focused down quickly for fast runs.
Zerom Colossus's Moveset
- *NEW*Will of Protection: Increases Attack after attacking - It can be stacked
- *NEW*Protection of Nature: Increases the damage suffered from Fire elemental Heroes by 30%, while increasing the damage dealt to non-Fire elemental Heroes by 30%. When attacking, if the target is an ice elemental Hero, stun them for 1 turn.
This is analogous to the Wyvern's Fire Protection, enforcing elemental advantages and disadvantages. While this does make Fire Heroes optimal for Golem 11, Earth Heroes (and Light/Dark MLs) suffer no penalty.
- Shockwave: The basic attack that will attack all enemies, decreasing Defense for 2 turns. It will also cause an aftershock inflicting additional damage to your team.*NEW*Damage dealt will increase with less enemies.
- *NEW*Statue’s Rage: Attacks all enemies, Stuns one random enemy for 1 turn. Counterattacks if the cooldown of the skill is reset. Decreases the caster’s skill cooldown by 1 turn when attacked.
Additional enemies in the boss room:
Green Klineode: This enemy will have a 75% chance to Decrease Defense of your entire team.
Breeze Silva: This enemy is what can make Golem 11 so difficult when first starting. It will recover an ally’s health BEFORE increasing it’s Attack for 2 turns and Dispeling all debuffs. This is most notably countered by bringing a Hero with access to Cannot Be Healed since he only Dispels the debuffs after trying to heal. It’s also immune to provoke, silence, and speed decreasing effects.
How To Clear Golem 11
Golem 11 encourages ending the fight as soon as possible. Will of Protection will allow him to hit harder than previously, while the updated Statue’s Rage and Shockwave encourage killing him quickly to prevent ramp-up damage.
Defense Break, Immunity, and the Unhealable debuff are all excellent for countering the mechanics. AoEs are also worth bringing to clear the Klineode and Silva helpers.
Heroes
Tier lists have the potential to be fairly straightforward not taking into account that in a game like Epic Seven some heroes perform better based on team composition. Below is a brief description of some of the most commonly sought after Golem 11 Heroes.
If you are just starting your journey through Golem aim to create a team composition that will transition well into Golem 11 in the long run. Using Heroes that transition well into other Hunts is also highly advised when taking team composition into account.

A simple quick-take on some of the most used Golem Heroes.
-
Hide Content
-
DPS/Debuffing
-
Tanking
-
Healing/Utility
Ken (DPS/Tank/Debuffer)

Ken is a one man army. His fantastic HP scaling damage, consistent DEF Breaks, Burns, Speed Increase, and ATK Decrease basically allow him to rampage his way to victory. As long as you keep him Debuff free you can’t really go wrong with using this Fire Warrior.
Cermia (DPS/Debuffer)

Prepare for trouble and make it double; Cermia’s S3 will deal ridiculous amounts of damage, reset with S2, then do it again only with a Greater ATK buff tagging along. One of the strongest DPS Heroes you can bring to Golem, not only will she tear through golem’s defenses, but she boasts the Unhealable debuff to prevent the mobs from making the fight last longer than necessary.
Sol (DPS/Debuffer)

Sol is good at three things; keeping Golem Unbuffed, quiet, and abusing its high HP. The latter strength is what really differentiates him from other DPS options, since S3 and S2 scale off of enemy max HP. This, paired with a DEF break and ATK buff, will allow his already impressive damage to flourish and translate well into 3 man compositions later on.
Bellona (Dps/Debuffer)

Bellona hits hard, the consistent DEF breaks and HP scaling nuke on S1 utterly destroy most bosses, Golem is no exception. This aside, she also has access to a self Immunity buff mitigating Golems’s consistent Debuffs.
Having a sub- DEF breaker is always a good idea to pair with her, so that S1 will Crit as hard as possible.
Yufine (DPS/Debuffer/Dispel)

The one-shot queen continues to live up to her prowess even in Golem. Just set Yufine up with a DEF break and ATK Buff and she will carry your team through Golem with ease. Aside from her ridiculous damage she is also fairly self sufficient possessing both ATK Buff, Speed Buff, Dispel, and a DEF break.
Lidica (DPS/Debuffer)

Do you hate bosses getting turns? Do you like whips? Do you like long golden curls that sit as if they were hand crafted by the goddess Diche hers-- then use Lidica. Lidica’s kit can fill many roles, however it has the perfect tools to make any Golem composition consistent. Her ability to consistently apply CR reduction with S1 and S3, while also having access to Unhealable, Speed Decrease, and Decrease Hit Chance keep this hunts pesky mechanics in check.
Pairing her with Heroes who can consistently CR boost her will allow her to exert further control over Golem.
Tenebria (DPS/Debuffer)

Tenebria’s primary use in this Hunt is as a Defence Breaker with a slew of other manipulative skills. While her multiple Sleep effects will not affect Golem Directly they will provide adequate control over the other various enemies, while her Speed decrease will not be able to affect the other boss monsters you can still slow down Golem itself.
Specter Tenebria (DPS/Debuffer)

Specter Tenebria thrives off of debuffs and flourishes with kills; thankfully golem provides adequate avenues to check these boxes off the list. Aside from this, Specter’s S3 is one of the highest single target damage skills in the game even without debuffs, so defeating golem quickly will not be an issue for her.
If you use her bringing a consistent DEF break among the debuffs will be very beneficial.
Baiken (DPS/Debuffer)

The second one-shot queen, like Yufine, continues to live up to her title. Her innate damage output makes her a threat to many bosses; when paired with her ability to take multiple turns when you critically strike on S2 her burst damage potential skyrockets. Baiken also boasts a teamwide %25 CR boost when she critically strikes with S3 allowing her teams turns to rotate faster when needed.
Ravi (DPS)

Ravi heals herself, Ravi Attack, but most importantly Ravi’s enormous Health pool and massive damage will give Golem a big fat slap. One of Ravi’s main strengths is the self sufficiency her S1 provides her; consistently healing herself, and also getting CR pushed when hit. This allows for less complex team setups where you can just rely on her to deal as much damage as possible while never hitting critically low Health thresholds. Just turn off her S3 and she will rampage through this Hunt.
Kayron (DPS/ Debuffer)

Resident Fire Edgelord? Check. AoE? Check. Single target nuke? Check. Immortality? Check. Thief? Check. Kayron has it all, the only thing he’s missing is the support to back him up. Pair him with heroes who can keep offensive buffs on him and debuffs off for maximum efficiency in Golem.
He pairs especially well with Mascot Hazel due to her Fire elemental increase and Greater ATK Buff.
Arbiter Vildred (DPS/Debuffer)

Arbiter Vildred excels at being a constant deterrent to both Golem and the other enemies in the boss room. His consistent CR decrease and Blind allow him to perform as a potent utility DPS. His highly consistent damage output allow him to fit into a plethora of golem compositions.
Haste (DPS/Debuffer)

Haste is one of the few offensive Heroes who offers teamwide sustain via his s2. He won’t often bring the most insane damage to Golem but if you are looking for a secondary DPS or have few other options his performance is still very solid.
He is extremely proficient at applying bleeds so utilizing him with heroes such as Baiken or Surin is an effective strategy.
Cidd (DPS/Debuffer)

Cidd is also a surprisingly self sufficient DPS. Despite being earth his potent S3 can attack using Elemental Advantage while his S1 offers a defense break. His major flaw is needing access to Speed buff to unlock both his Elemental Advantage and Defense Break.
Though his kit also grants him access to a Speed Buff the a.i. automatically starts with S3 so obtaining the speed buff from S1 before using S3 can hinder his damage when playing on Auto.
Martial Artist Ken (DPS/ Debuffer)

Since you can't counter a counter, Martial Artist Ken’s second skill won't be getting as much screen time as you might imagine. This does not stop him from working as an excellent Defense Breaking DPS that also has easy access to the Attack Down debuff on his first skill.
Challenger Dominel (DPS/Buff)

Challenger Dominel is what I would consider a highly specialized pick for Golem. She has only one goal if you plan to use her here - 1 shot. In most cases you will want to build a team around her that utilizes fast soul generation paired with AoE and Defense Breaks. This will allow her to Soul Burn S1 with the most stored damage increase possible.
Melissa (DPS/Debuff)

Melissa performs as another highly single target focused burst damage DPS. While her third skill won’t be able to apply Curse to the boss her ability to deal high amounts of damage on multiple skills - as well as having access to a second turn mechanic - let her capitalize on opportunistic situations. She also has access to the anti Healing debuff on her first skill making her a fairly well rounded choice for this hunt.
For the greatest effectiveness pair her with Heroes who have access to Defence Breaks.
Kawana (DPS/Debuff/Buff)

Kawana plays into a bit of every role, the classic “Jack of all trades master of none.” Most optimally used in a Fire team, her skills all gain increased effects when this condition is met. She has access to a teamwide Attack buff while also sporting the ability to inflict bleeds. In most cases she will fill the role of a support DPS.
Lilias (Tank/Support)

This jack-of-all-trades is definitely a master of Golem when placed in the right teams. Her S3 will both cleanse the entire team of debuffs while simultaneously reducing enemy CR and increase her own. Her S1 will also trigger a dual attack of a random ally, this can be especially potent given that many strong Golem Heroes have S1’s that are detrimental to this Hunt.
Charles (Tank/Buff/Dispel)

Charles does about three things well. He Dispels, he buffs, and he deals colossal damage despite being a Knight. So basically he’s perfect for golem. Using him as a secondary utility damage source will generally decrease a teams runtime. While he won’t have type advantage over Golem like some of the other Knights this does not prohibit him from being a strong Golem Hero.
Shadow Rose (Debuffer/Dispel)

Shadow Rose takes the best debuffs for Golem and puts them all into her skills. She has CR decrease, Dispel, Unhealable, and a Defense Break. In addition, she has a %25 CR boost for her allies. If built fast and tanky with high Effectiveness her ability to control Golem is extremely strong. Her primary flaw is that S1 ONLY has a defense break when the enemy is above 50% Health and ONLY has an Unhealable Debuff when they are below 50% health.
Falconer Kluri (Debuffer/Tank/Dispel)

Similar to Shadow Rose, she possesses a single target Dispel and Defense Break. While Shadow rose excels in battlewide CR control Falconer Kluri excels in passive healing and CR increase. This typically means her Dispel and Defense Break will have a higher uptime, however the rest of her team will not. This is not a negative thing since higher defense break uptime alludes to dealing more damage more often.
Tamarinne (Healer/Buffer/Dispel)

Tamarinne’s utility is exemplary of the type of Support Hero you needed for Golem Hunt. Most importantly she possess a teamwide cleanse for the consistent debuffs and the ability to Dispel enemy buffs. She also has access to the strongest AoE CR push in the game, a teamwide ATK buff, and the ability to trigger a dual attack from the highest ATK Hero on your team.
Achates (Healing/Cleanse)

Achates is the perfect defensive Hero for any Golem team. Her skill rotations happen so quickly that Golem will hardly ever have any debuff uptime on your team. She’s a solid pick for anybody looking to stabilize their Golem team.
Iseria (Debuffer/Support)

If you need a consistent utility Defense Breaker Iseria will definitely fill this niche. She has access to a Defense Break on both S1 and S3, while also possessing the Cannot Buff debuff. Her skill cooldown reset on s2 is also very strong, but not as impressive if you plan to Auto Golem since the AI is not very keen to resetting the skills of targets who need it.
Vivian (Buffer/Support)

Vivian is best used as a support Hero in Golem. She has access to both Immunity (one of the most useful defensive golem buffs) and ATK Buff filling the roles of both a Defensive and Offensive support Hero. While her AoE damage is nice, it typically won’t be the primary reason you use her in this Hunt unless you need to kill the boss adds first, however as you get better gear this won’t be necessary.
Schuri (Debuffer/Buffer)

Schuri possesses a large amount offencive of teamwide CR increase whenever he delivers a critical hit. This not only allows him to perform as a sub-DPS but can allow for faster turn rotations for the entire team. He also has a Target debuff to further increase the damage output of the entire team.
Baal & Sezan (Debuffer)

If Dizzy is the queen of defensive debuffs then Baal & Sezan are the monarchs of offensive debuffs. In other content they main wain on the side of not optimal, however in Golem they have access to every important debuff you could want on s3. Their main downfall, and why they are not as highly recommended, is that unlike many of the other debuffing Heroes their debuffs only have a %85 chance to land. This can lead to inconsistency during auto runs.
Destina (Healing/Support)

Like Achates, she can function as a primary cleanser if your team is struggling with the debuffs of Golem. However, her skill uptime is slower than Achates so she wont cleanse quite as much.
Angelica (Healing/Support)

While some might think being an Ice Hero in Golem is a weakness Angelica defies this logic with ease. Her consistent Immunity uptime outshines her weakness to the earth element. Unlike Vivian, Angelica is a Defensive Immunity support that offers Healing on both S2 and S3. Don’t shy away from using her in the leader slot, when decently geared she can easily sustain the damage output of this Hunt.
Mascot Hazel (Healing/Buffer)

Mascot Hazel works especially well when using other Fire Heroes. Aside from Hazel’s healing, her skill tree will passively grant other Fire Heroes Effectiveness and ATK. However, her real strength lies in the Greater ATK buff she can provide another Fire Ally-- boasting an 85 percent total ATK buff (with Fruition Rune) will greatly decrease runtime.
Angelic Montmorancy (Healing/Support)

While not as strong in this particular Hunt as her predecessor, Angelica, Angelic Montmorancy can still act as a viable cleanse and immunity support Hero if you have no other better options. She is typically also built with extremely high Effect Resistance so despite her weakness to Earth her ability to resist status effects outshines this demerit.
Recommended Artifacts

Damage Artifacts:
-
Elbris Ritual: Golem has many AoE skills giving you multiple chance of counter
-
Portrait Of the Saviors: A strong option for Heroes you want to 1 shot Golem
-
Daydream Joker: This is basically the staple Artifact when facing enemies with high Health pools. Having one on each DPS will benifit in multiple facets of the game such as Abyss, Hall of Trials, Labyrinth, and Adventure content.
-
Kal’adra: This mage-only artifact works especially well on debuff heavy teams that utilize a mage as one of the primary or sub-DPS Heroes.
Debuff Artifacts:
-
Song of Stars: The target debuff this provides will increase teamwide damage.
Utility Artifacts:
-
Wonderous Potion Vial: Potion Vial is the most essential artifact in this hunt. Cleansing the incessant Stuns and Defense Breaks can help tremendously. It’s not as important if your team consists of Heroes with high Immunity uptime.
-
Aurius: This Artifact will be especially helpful for those who struggle to sustain through the damage of the boss on low Health Heroes. Bringing a Healer while using this artifact will help to mitigate the increased damage the Knight using it will take.
-
Idol’s Cheer: Since Golem attacks all of your Heroes so frequently having your main DPS passively accrue CR is a strong effect to utilize.
-
Prophetic Candlestick : This artifact is just overall excellence in giving your Heroes skills high uptime. It’s especially useful on heroes with Cleanse or Immunity skill sets.
-
Lela Violin : It effectively acts as a backup strip just in case the boss manages not to get his buffs removed by one of your skills.
-
Sigurd Scythe: An artifact that makes bruiser warriors have strong sustain -- works especially well in 3 man teams.
-
Strak Gauntlet: This artifact will help your warriors resist the consistent Golem debuffs
Why Golem?
Golem Sets
- Health Set (2/2) - Health increases by 15%
- Defense Set (2/2) - Defense increases by 15%
- Attack Set (4/4) - Attack increases by 35%
Golem is often regarded as the easiest Hunt to farm due to its forgiving mechanics. Even so, it’s still frequently treated as an afterthought. Both the Health and Defense sets are normally used as supplemental gear that can be replaced by using other sets containing strong Health or Defense % main stats on right side gear.
Despite this, the Attack set is often used on DPS Heroes that you want to deal insane damage or that have skill sets that utilize high attack very effectively. This is particularly seen in compositions that have an extremely slow but hard hitting DPS paired with CR pushing Heroes. The primary set this competes with is Banshee 11’s Crit Damage Set. However, both will essentially fulfill the same purpose in most cases assuming you have the appropriate substats. Banshee also has a ¼ chance of dropping or rolling this set, while Golem only has a ⅓ chance of getting an Attack set when you craft or receive drops from hunts, so it’s fairly more energy efficient in the long run.
Another strong suit of Golem is that many of the strong Golem Heroes overlap with strong Banshee and Azimanak Heroes creating an easier transition into those two hunts.
Further Golem Help

Credit: Grass Angel