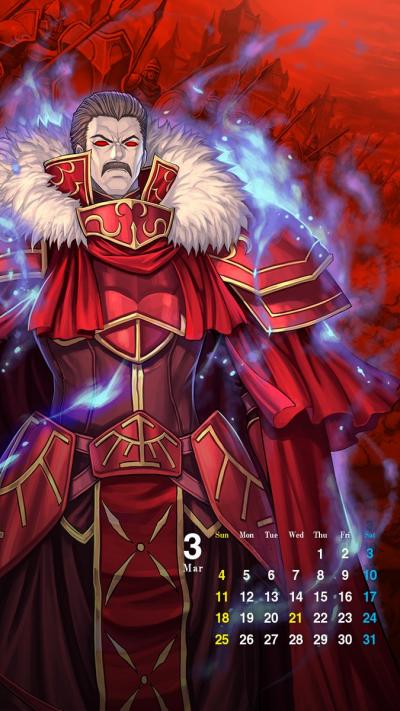
- Default
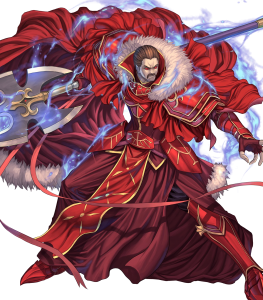
- Attack
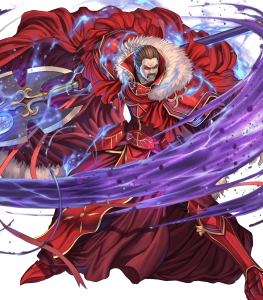
- Special
- Injured
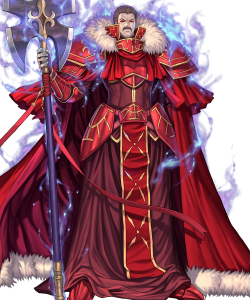
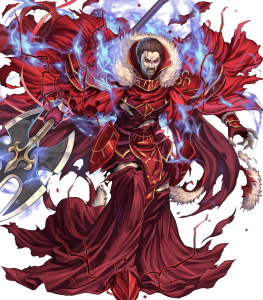
| Fallen Hardin - Dark Emperor |
|---|
|
Hero Stats
Stat Variations
| HP | ATK | SPD | DEF | RES | |
|---|---|---|---|---|---|
| Low | 22 | 7 | 5 | 9 | 7 |
| Middle | 23 | 8 | 6 | 10 | 8 |
| High | 24 | 9 | 7 | 11 | 9 |
| HP | ATK | SPD | DEF | RES | |
|---|---|---|---|---|---|
| Low | 41 | 31 | 24 | 33 | 29 |
| Middle | 45 | 34 | 28 | 36 | 32 |
| High | 48 | 37 | 31 | 39 | 35 |
IV Sets
| Key stats worth increasing through nature if possible. | |
| Complementary stats that matter, but not to the point of picking them over key stats for nature increase. | |
| Relatively worthless stat that can safely be decreased through nature. |
| HP | ATK | SPD | DEF | RES |
|---|---|---|---|---|
Skill Sets
https://www.youtube.com/watch?v=J9qRFoh702M (Enemy Phase Tank)
 |
Gradivus (+Eff) | A | Mirror Stance 3 Alternate: Atk/Res Unity |
|---|---|---|---|
 |
Positional Assist | B | Slick Fighter 3 Alternate: Special Fighter 3 |
 |
Iceberg Alternate: Moonbow |
C | Pulse Smoke 3 Alternate: Joint Drive Atk |
| IVs | +ATK / -SPD | S | Mirror Stance 2 Alternate: Quick Riposte 3 |
Weapon: Gradivus (+Eff)
Assist: Positional Assist
Special: Luna / Moonbow / Iceberg / Glimmer / Ruptured Sky / Ignis / Glacies / Bonfire
A Passive: Mirror Stance 3 / Atk/Res Unity / Atk/Def Unity
B Passive: Slick Fighter / Special Fighter / Crafty Fighter / Vengeful Fighter
C Passive: Pulse Smoke / Joint Drive Atk / Atk Smoke / Def Smoke
Sacred Seal: Mirror Stance / Quick Riposte / Bracing Stance / Mystic Boost
- Gradivus is going to be Hardin’s greatest asset to his performance due to the free A Passive he has thanks to innate Distant Counter, the innate healing on hit, and additional stats it grants. These effects give Hardin a plethora of flexibility when it comes to his playstyle and skill options as he can excel in most roles if given the proper investment.
- The Special is relatively flexible as Gradivus’ built-in healing grants Hardin the option to run damaging Specials. Likewise, because he is an armor unit, he can run an assortment of Fighter skills, which will ultimately determine which Special he uses. Even so, Specials such as Luna, Moonbow, and Iceberg are solid choices for Specials as they synergize well with his stats and Fighter skills alike.
- For tanking, Hardin would prefer to raise his Atk and Res over his Def in this instance as most of the common threats in Aether Raids are magical. Even so, he can stack it relatively easy as he has a free A Passive to work with. This means he would be a really good user of Atk/Res Unity as he can avoid Panic statuses and Lulls, if panicked, which are some of the most common threats in Aether Raids. Of course, you can also run Mirror Stance 3 as that will help with Hardin’s longevity since it slows the acceleration of the foe’s Special and raises Atk and Res.
- As far as enemy-phasing goes, Hardin can run plenty of Fighter skills to compliment his damage output. For instance, one can run Slick Fighter and stack up visible buffs on Hardin as there is no risk involved. However, you cannot run Unity with Slick Fighter, so you would have to use a different A Passive. Likewise, you can run Special Fighter and always retaliate with a 2 CD Special, whether that’d be Moonbow, Glimmer, or Ruptured Sky. Each has its own sets of benefits and drawbacks, so the option really boils down to preference.
- As Hardin will be acting as a carry unit, he can either run a Smoke skill or further bolster his damage output with Joint Drive Atk. Smoke skills are fairly standard but are effective. Pulse Smoke can be used to reset instant Specials on foes, which can be good when taking on multiple units in a single turn. Likewise, he can run Atk Smoke or Def Smoke to either bolster his tanking capabilities or his damage output respectively. There really aren’t any bad options available to him, so it will boil down to preference once more.
- Depending on the Fighter skill used, he can either run Mirror Stance to help with his tanking capabilities or Quick Riposte to synergize with Special Fighter. Bracing Stance is also an option if you want him to be a well-rounded tank that can take both Physical and Magical damage alike. Mystic Boost is also an available option if you want him to heal more per combat, but the 7 HP per hit should be more than plenty.
https://www.youtube.com/watch?v=lttQ47yZ-5A (Save Unit)
 |
Gradivus (+Eff) | A | Atk/Res Unity Alternate: Atk/Res Bond (3 or 4) |
|---|---|---|---|
 |
Positional Assist | B | Vengeful Fighter 3 Alternate: Crafty Fighter 3 |
 |
Ignis Alternate: Bonfire |
C | D/R Near Save 3 Alternate: A/R Far Save 3 |
| IVs | +ATK / -SPD | S | Atk/Def Bond 3 Alternate: Atk/Res Bond 3 |
Weapon: Gradivus (+Eff)
Assist: Positional Assist
Special: Ignis / Bonfire / Iceberg / Glacies / Moonbow
A Passive: Atk/Def Unity / Atk/Res Unity / Atk/Def Bond / Atk/Res Bond
B Passive: Vengeful Fighter / Crafty Fighter / Slick Fighter / Special Fighter
C Passive: D/R Near Save / A/R Far Save / A/D Near Save
Sacred Seal: Atk/Def Bond / Def/Res Bond / Atk/Res Bond / Quick Riposte / Close Def / Distant Def
- The additional stats that Gradivus grants to Hardin and the built-in healing per hit can make Hardin into a relatively solid Save user. The built-in healing means Hardin can afford to run damaging Specials. Likewise, the additional +4 to each of his stats means he can tank even more with Save strategies.
- The Special will ultimately be determined based on the Fighter skill used. If Hardin is running Vengeful Fighter, it would probably be in his best interest to run Ignis since he’ll more than likely be doubled without any Spd investment. Likewise, you can run Bonfire with Fighter skills that don’t accelerate cooldown, such as with Crafty Fighter. Special Fighter is also an option for Hardin, but he won’t have any Impact immunity or guaranteed follow-up attacks. There are plenty of options at his disposal, so it’s worth experimenting with each of them to see what you prefer.
- Since Saves put the user adjacent to the attacked ally, Hardin can make full use of Unity and Bond skills. Atk/Def Unity and Atk/Res Unity are solid options for him as they will reverse any sort of debuffs he might have to those stats, which can make him into a better Save tank. Likewise, you can run Bond skills which function in a similar fashion, only instead of reversing the debuffs, Hardin would simply cancel them out and get a static amount depending on the variant used.
- As Hardin will be acting as a Save unit, you would want to run Fighter skills that can either help him tank more or accelerate his damage output. Vengeful Fighter, old but gold, is a fairly decent option for him as he’ll not only gets a guaranteed follow-up attack but also accelerates his Special in the process. This means he can afford to run a 4 CD Special when using Save. Likewise, you can run Crafty Fighter, so that the foe cannot accelerate their own Special. Other good options include Slick Fighter and Special Fighter, but the latter would want Quick Riposte as the seal of choice, so depending on how invested your Hardin is, it may not be worth running as you want to double in most cases.
- Because of how his stats are distributed, you can go with either Far Save or Near Save. You can’t go wrong with either as Hardin not only has a Distant Counter weapon, which allows him to take on any unit, but also the additional +4 to all of his stats can make him into a relatively good tank. With Gradivus, he starts with a total of 40 Def and 36 Res, which is more than enough to start out with.
- Similar to the A Passives, you want to take full advantage of the adjacency if running a Save skill. This means stacking up Bond skills and the like are solid options for him. Depending on the type of Save you give him too, you can always run Distant Def or Close Def as his seal, or if you’re running Special Fighter as his B Passive, you can run Quick Riposte to secure doubles.
https://www.youtube.com/watch?v=nhQL9OrCWxE (Speed Stack)
 |
Gradivus (+Eff) | A | Kestrel Stance 3 Alternate: Atk/Spd Solo (3 or 4) |
|---|---|---|---|
 |
Positional Assist | B | Special Fighter 3 Alternate: Slick Fighter 3 |
 |
Ignis Alternate: Moonbow |
C | Joint Drive Spd Alternate: Joint Drive Atk |
| IVs | +SPD / -HP | S | Quick Riposte 3 Alternate: Atk/Spd Solo 3 |
Weapon: Gradivus (+Eff)
Assist: Positional Assist
Special: Ignis / Moonbow / Glimmer / Ruptured Sky
A Passive: Kestrel Stance 3 / Atk/Spd Solo
B Passive: Special Fighter / Slick Fighter
C Passive: Joint Drive Spd / Joint Drive Atk
Sacred Seal: Quick Riposte / Atk/Spd Solo / Kestrel Stance / Mystic Boost
- Hardin’s Spd stat may look really low in comparison to what we usually see nowadays. However, starting out with a base Spd of 28, and 31 with a boon, on top of the +4 Spd Hardin gets from his PRF makes it more than flexible for Hardin to Spd stack. As such, it could be in the best interest of others to Spd stack, especially when it comes to tanking since he’ll be taking fewer hits.
- The Special is rather flexible depending on what type of Fighter skill you’re running on him. For Special Fighter, a 4 CD Special such as Ignis would do wonders for him as he can always retaliate back with Ignis on the second hit. Likewise, if you’re running Slick Fighter, you can run any 2 CD Special as that will also guarantee the Special proc every combat.
- Because Gradivus allows Hardin to choose any A Passive he wishes, you can use the available slot to further bolster his Atk and Spd. Kestrel Stance is a solid option as it grants an additional +6 to Atk and Spd, which helps take the initial 35 Spd, assuming a Spd boon is present and pushes it up to 41. Moreover, you won’t have to work around the armor movement as much as it will always trigger in the enemy phase. You can also run Atk/Spd Solo for the additional +6-7 Atk and Spd. Just be wary of your positioning.
- Hardin has two very solid B Passive options when it comes to Spd stacking: Special Fighter and Slick Fighter. Special Fighter would synergize well with Hardin’s Spd as he can reliably double on his own and trigger 4 CD Specials in the process. However, if the foe has an Impact skill of any kind, Hardin will be unable to double unless he runs Quick Riposte as his seal. That being said, Slick Fighter has a built-in guaranteed follow-up attack, which can help make Hardin immune to Impacts. Slick is also a very solid option as it will allow the user to give visible buffs to Hardin without the risk of Panic and avoid debuffs. This means it’ll be difficult for Hardin to fail Spd checks.
- Hardin can also run Joint Drive Spd to further bolster his Spd stat. However, if you feel that he’s already receiving enough Spd from skills and support, you can always run Joint Drive Atk instead to help with his damage output.
- Depending on which Fighter skill you chose, you can either run Quick Riposte or seals that further bolster his Atk and Spd stat. The reason we would want Quick Riposte as his seal is only if you are running Special Fighter as it doesn’t have a built-in guaranteed follow-up attack, meaning he is prone to Impact skills. Quick Riposte would alleviate the issue and because Gradivus gives healing per hit, it can be relatively easy to stay in both the Special Fighter and Quick Riposte range. Otherwise, you can run skills such as Kestrel Stance and Atk/Spd Solo for more stat bonuses. Mystic Boost is also an option if you want him to heal even more each combat, but it’s not really needed.
Strengths
Distant Counter Weapon
Having a built-in Distant Counter weapon effectively frees up the A Passive, meaning Hardin can run more competitive skills. These skills can either be used to further bolster his tanking abilities or go into roles that would normally be harder to use without the free A Passive.
Jack of All Trades, Master of None
Because Hardin’s statline is relatively balanced on top of the fact that Gradivus grants an additional +4 to each of his stats, as long as the condition is met, Hardin can realistically go into any role, whether that’s stacking Spd and taking on skills that benefit from it, or even making him into a massive tank thanks to his base 36 Def and 32 Res. It’s really nice as anyone using him has plenty of options at their disposal.
Weaknesses
Armor Movement
Fun fact: Most armors can only move one space without skills. This is no exception to Hardin. However, generally speaking, there are plenty of options to improve his movement, whether that’s with positional assists such as Smite and Shove, or with Armor March and Armor Stride. However, the latter can potentially eat up his C Passive that could be used for other means.
Competition
Despite the solid refine, Hardin still faces competition from the likes of Brave Hector, who still outperforms Hardin in a plethora of ways. However, the built-in healing on each hit and the spectrum stats Hardin gets can at least make him stand out more, but only by so much, especially when they share the same rarity.
Weapon Skills
| Weapons | SP | Rng. | Mt. |
|---|---|---|---|
|
Lance Users Only
|
100 | 1 | 8 |
|
Lance Users Only
|
200 | 1 | 11 |
| Enables counterattack regardless of distance if this unit is attacked. Learns by default at 5 ★
Non-Inheritable skill.
|
400 | 1 | 16 |
| Available Rearmed Weapons |
|---|
| Arcane Qiang (+Def) |
| Arcane Qiang (+Res) |
| Arcane Qiang (+Atk) |
| Arcane Qiang (+Spd) |
| Arcane Qiang |
Special Skills
| Special Skills | SP | Turns |
|---|---|---|
 Retribution RetributionBoosts damage dealt to foe by 30% of damage dealt to unit. Learns by default at 5 ★
Non-inheritable by Staff-wielding units.
|
100 | 3 |
 Vengeance VengeanceBoosts damage dealt to foe by 50% of damage dealt to unit. Unlocks at 5 ★
Non-inheritable by Staff-wielding units.
|
200 | 3 |
Passive Skills
| Passive Skills | SP | Slot |
|---|---|---|
| If unit's HP ≤ 80% at the start of combat, grants Def/Res+3 during combat.
Inheritable by all units.
|
60 | A |
| If unit's HP ≤ 80% at the start of combat, grants Def/Res+5 during combat.
Inheritable by all units.
|
120 | A |
| If unit's HP ≤ 80% at the start of combat, grants Def/Res+7 during combat.
Inheritable by all units.
Unlocks at 5 ★ |
240 | A |
| If unit's HP = 100% and unit initiates combat, grants Special cooldown charge +1 per unit's attack, and unit makes a guaranteed follow-up attack. (Does not stack.)
Only inheritable by armor units.
|
60 | B |
| If unit's HP ≥ 50% and unit initiates combat, grants Special cooldown charge +1 per unit's attack, and unit makes a guaranteed follow-up attack. (Does not stack.)
Only inheritable by armor units.
|
120 | B |
| If unit initiates combat, grants Special cooldown charge +1 per unit's attack, and unit makes a guaranteed follow-up attack. (Does not stack.)
Only inheritable by armor units.
Unlocks at 5 ★ |
240 | B |
Other Info
| Origin |
Fire Emblem: Mystery of the Emblem
|
|---|


