Quests
Introduction
- Final Update: 12/09: Walkthrough now fully complete and verified.
- The spoilers in this walkthrough are limited to what enemies you will face in a particular node.
- Every major boss encounter is initially hidden.
- Press the New Monster Information or Boss Information headers to see specific spoilers, advice and/or tips.
- Generally, Masters who managed to clear Camelot should not have any issues with Babylonia.
- Unlike Camelot the bosses are generally less difficult and less gimmicky. There are 3 Boss Guides for this Singularity.
- Have fun and enjoy the story!
Node Difficulty Scale
| Filler | Easy | Moderate | Hard | Very Hard |
Walkthrough
| Node | Enemy Classes | Enemies & Difficulty | Notes |
Ch. 1 - 1 |
A new Monster approaches: These beasties are usually not very threatening and often just filler mobs. Click the New Enemy Information below for specifics. |
||
New Monster Information |
|||
Ch. 1 - 2 |
|
A new Monster approaches: These are really just reskinned Soul Eaters. Flames, so hot right now. |
|
New Monster Information |
|||
Ch. 1 - 3 |
One large wave with multiple reinforcements. Nothing a few Assassins can't handle. |
||
Ch. 1 - 4 |
A new Monster approaches: Essentially a reskinned dragon. Charge NP gauges during the first wave and dispose of it. |
||
|
|
|||
Ch. 2 - 1 |
|
A new Monster approaches: A dragon-type Lancer opponent, dust off Siegfried! |
|
New Monster Information |
|||
Ch. 2 - 2 |
First Boss encounter. Click the Boss Information below for specifics. |
||
Boss Information |
|||
Ch. 2 - 3 |
A standard Wyverns into Basmu node. Bring a strong Assassin to sort them out. The HP counts are quite high for newer Masters rushing through the story. Have an NP ready for the final wave. |
||
Ch. 2 - 4 |
Bunch of different classes, bring a Berserker/Avenger if needed. Kill the Chimera in the final wave quickly to avoid any critical shenanigans. |
||
Ch. 2 - 5 |
Pure Story Chapter. Babylonia is the first singularity with plenty of non-combat sections. Enjoy the story! |
||
Ch. 3 - 1 |
|
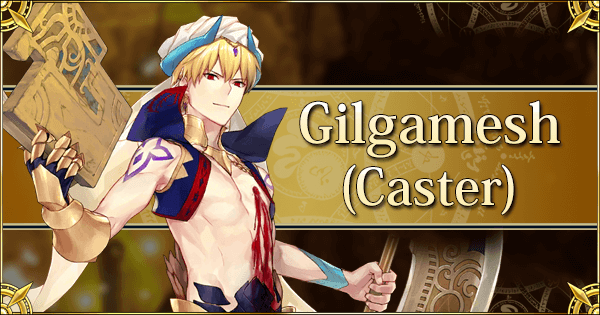
Bring some Riders to clear the Caster enemies. See Gilgamesh's Servant page for his abilities, but his abilities aren't threatening as an opponent. |
|
Ch. 3 - 2 |
|
A much more annoying single wave node, bring competent (AoE / anti-Divine) Lancers. There is no opportunity to charge NP bars and Ishtar can charge her's quickly. Still, she won't use her NP - only her Extra attack - on a full charge bar. Ishtar can charge her NP. |
|
Ch. 4 - 1 |
Pure Story Chapter. | ||
Ch. 4 - 2 |
First time that Demon Boars appear in the main story. They do hit fairly hard, can charge their NP, and can act twice. Generally, as with all Berserkers, just pile on the offense. |
||
Ch. 4 - 3 |
Bring some strong offense to avoid any charged attacks from the Archers. | ||
Ch. 4 - 4 |
One large wave of Reinforcements. A strong Saber ought to suffice. |
||
Ch. 4 - 5 |
Pure Story Chapter. | ||
Ch. 4 - 6 |
|
Remember those annoying massive ghosts from Camelot? Well, it's back and it negates buffs when it decides to. Bring some competent Casters and Berserkers, and try to dispose of it quickly. |
|
| Back to Chapter Selection | |||
| Node | Enemy Classes | Enemies & Difficulty | Notes |
Ch. 5 - 1 |
Benkei can be distracting, but as soon as Ushiwakamaru falls there is no offense left. Bring an Assassin or Berserker and pounce on Ushiwakamaru. |
||
Ch. 5 - 2 |
< |
A new Monster approaches: Nonetheless, a simple node with Sabers. |
|
New Monster Information |
|||
Ch. 5 - 3 |
A nasty node if caught unawares. The first 2 waves contain the always crit-happy Chimera, while Jaguar Warrior gains a bonus charge per turn in wave 3. With an additional extra (small) damage reduction buff & the benefits of a Forest stage, and this fight can turn ugly. Bring a strong Saber and try to finish off Jaguar Warrior quickly, but do not overstay your welcome with the Chimeras. |
||
Ch. 5 - 4 |
Round 2! Jaguar Warrior has the same buff as last time, but there are no preceding waves. She also possesses far more HP. Bring an excellent (ST) Saber to finish her off quickly. Note: her NP grants Sure Hit, so do not rely on Evasion to tank her NP. |
||
Ch. 6 - 1 |
|
Spriggans, everyone's favorite critical mob. These Spriggans are not Sabers, but Rider and Assassins. Bring a good Berserker, or Medea for a nice budget option to remove their buffs. |
|
Ch. 6 - 2 |
Boss encounter. Click the Boss Information below for specifics. |
||
|
|
|||
Ch. 7 - 1 |
|
Nothing special, bring the appropriate counter-classes or a Berserker. | |
Ch. 7 -2 |
N/A. | ||
Ch. 7 -3 |
|
Another round of combat with Ishtar. This time she brings a permanent defense buff, but still will not cast her NP. Bring some (anti-divine) Lancers and she'll be a goner in no time. |
|
Ch. 7 - 4 |
|
Another massive ghost, but simply charge NP gauges on the Skeletons to get rid of it immediately. | |
Ch. 8 - 1 |
Pure Story Chapter. | ||
Ch. 8 - 2 |
N/A. | Ch. 8 - 3 |
Pure Story Chapter. |
Ch. 9 - 1 |
|
A new Monster approaches: Charge NPs on the first two waves to clear this node without too much difficulties. To circumvent class problems, field a Berserker/Avenger. |
|
New Monster Information |
|||
Ch. 9 - 2 |
Boss Encounter. See Boss Information for details. |
||
Boss Information |
|||
Ch. 9 - 3 |
Boss Encounter. See Boss Information for details. |
||
Boss Information |
|||
Ch.10 - 1 |
|
Once more a chapter starts with a variety of gold Monsters. Field competent class advantage or simply exploit Berserkers. |
|
Ch.10 - 2 |
|
The Onigashima Oni return. They're quite vulnerable to anti-demonic and anti-male Servants, or simply smash them to pieces with Berserker/class advantage. |
|
Ch.10 - 3 |
Boss encounter. Click the Boss Information below for specifics. |
||
Boss Information |
|||
Ch.10 - 4 |
A rather annoying node, with plenty of high damage Berserkers. Do not linger too long, and try to have an NP ready for the final wave. Giant Demon Boars are some of the worst monsters out there. |
||
| Back to Chapter Selection | |||
| Node | Enemy Classes | Enemies & Difficulty | Notes |
Ch. 11 - 1 |
Pure Story Chapter. | ||
Ch. 11 - 2 |
Boss encounter. Click the Boss Information below for specifics. |
||
Boss Information |
|||
Ch. 11 - 3 |
A veritable onslaught of different class Werejaguars. Still, nothing a Berserker can't smash. The Rider ones are the strongest, so bringing an Assassin is fine too. |
||
Ch. 11 - 4 |
Pure Story Chapter. | ||
Ch. 12 - 1 |
No special gimmicks, but a fair chunk of Lancer HP to chew through. Bring an AoE Saber. |
||
Ch. 12 - 2 |
Should be an easy node. | ||
Ch. 12 - 3 |
Another Wyvern node, but with a Sphinx at the end. Bring a Berserker or a Rider. |
||
Ch. 12 - 4 |
WARNING: CHOICE OF DIALOGUE AFFECTS DIFFICULTY! Boss encounter. Click the Boss Information below for specifics. |
||
Boss Information |
|||
Ch. 12 - 5 |
Pure Story Chapter. | ||
Ch. 13 - 1 |
|
These Spriggans all have an anti-divine damage buff. They're all Sabers though, so bring Archers and go to town. |
|
Ch. 13 - 2 |
N/A. | ||
Ch. 13 - 3 |
Fairly diverse enemy composition, consider a Berserker/Avenger. | ||
| During this Chapter, selecting a preference for either goddess will affect the enemy composition. | |||
Ch. 14 - 1 |
(1) (2) |
(1) (2) |
Generally, selecting any option that prefers Ishtar (usually option 1), makes the node harder. Mobs have more HP, higher levels and thus do more damage. |
Ch. 14 - 2 |
(1) (2) |
(1) (2) |
Generally, selecting any option that prefers Ishtar (usually option 1), makes the node harder. Mobs have more HP, higher levels and thus do more damage. |
Ch. 14 - 3 |
No Choice involved. The mixed classes make it preferable to field a Berserker to dispose of the dragon quickly. |
||
Ch. 14 - 4 |
(1) (2) |
(1) (2) |
Generally, selecting any option that prefers Ishtar (usually option 1), makes the node harder. Mobs have more HP, higher levels and thus do more damage. Plenty of Assassins in either choice, and they should be primarily countered. |
Ch. 14 - 5 |
(1) (2) |
(1) (2) | This node is pretty evil depending on which choice is made. Generally, the Ruler node is countered a little more easily with a powerful Berserker or Avenger. These large boars can charge their NP, so be careful. |
Ch. 14 - 6 |
This choice affects the difficulty of the upcoming fight massively! Boss Encounter. See Boss Information for details. |
||
Boss Information |
Ch. 14 - 7 |
Pure Story Chapter. | |
Ch. 15 - 1 |
|
Bring some Riders to clear the Caster enemies. See Gilgamesh's Servant page for his abilities, but his abilities aren't threatening as an opponent. Be prepared for an influx of ALL Experience. |
|
Ch. 15 - 2 |
N/A. | ||
Ch. 15 - 3 |
Straightforward, but a lot of Reinforcements. | ||
Ch. 15 - 4 |
Full Rider node. Bring Assassins and demolish them. |
||
Ch. 15 - 5 |
Boss encounter. Click the Boss Information below for specifics. |
||
Boss Information |
|||
Ch. 15 - 6 |
Boss encounter. Click the Boss Information below for specifics. |
||
Boss Information |
|||
| Back to Chapter Selection | |||
| Node | Enemy Classes | Enemies & Difficulty | Notes |
Ch. 16 |
A new Monster approaches: The mob has to be defeated 3 times, so space NPs accordingly. |
||
New Monster Information |
|||
Ch. 17 - 1 |
These nodes are single class, and despite the Lahmu's high damage, easily countered. Bring a powerful (AoE) Saber to clear them. |
||
Ch. 17 - 2 |
A tragic node. Not all difficulty is in game mechanics. |
||
Ch. 17 - 3 |
Still single class, still easily countered. Bring a powerful (AoE) Saber to clean up the reinforcements quickly. |
||
Ch. 17 - 4 |
A new Monster approaches: Bring an Archer or Berserker to clean up the Saber boss. |
||
New Monster Information |
|||
Ch. 18 - 1 |
Boss Encounter. See Boss Information for details. |
||
Boss Information |
|||
Ch. 18 - 2 |
Boss Encounter. See Boss Information for details. |
||
Boss Information |
|||
Ch. 18 - 3 |
Pure Story Chapter. | ||
Ch. 18 - 4 |
A diverse, but not very dangerous list of mobs. Bring Berserkers, or a strong Saber for the final wave. |
||
Ch. 18 - 5 |
Boss Encounter. See Boss Information for details. |
||
Ch. 18 - 6 |
Pure Story Chapter. | ||
Boss Information |
|||
Ch. 19 - 1 |
Pure Story Chapter. | ||
Ch. 19 - 2 |
Pure Story Chapter. | ||
Ch. 20 - 1 |
Pure Story Chapter. | ||
Ch. 20 - 2 |
This node marks the beginning of the Chaos Tide effect. Every turn, the party receives 300 damage. Apart from that, it's a straightforward node. |
||
Ch. 20 - 3 |
The Chaos Tide effect intensifies. Every turn, the party receives 600 damage. The Chaos Tide is rather annoying if the fight drags on.. |
||
Ch. 20 - 4 |
A Quake effect that immediately scrambles the team composition randomly among all 6 Servants is now active. The 600 damage Chaos Tide is also still in effect. Fill up on Archers as this node has a single powerful Bel Lahmu. If short on Archers, use the Chaldea Combat Uniform's Order Change ability to force the Archer to the frontline. The Bel Lahmu mobs are really beefy, so long exposure to Chaos Tide is likely. |
||
Ch. 20 - 5 |
Boss Encounter. See Boss Information for details. |
||
Boss Information |
|||
Ch. 20 - 6 |
Both Quake and Chaos Tide (1200 damage) are in effect. Fill up on Archers as this node has a single powerful Bel Lahmu. If short on Archers, use the Chaldea Combat Uniform's Order Change ability to force the Archer to the frontline. |
||
Ch. 20 - 7 |
Only Chaos Tide (900 damage) is in effect. Fill up on Archers as this node has two powerful Bel Lahmu. |
||
Ch. 21 - 1 |
N/A. | ||
Ch. 21 - 2 |
Pure Story Chapter. | ||
Ch. 21 - 3 |
A 3000 damage Chaos Tide is now in effect. However, the Blessing of Kur & Mage of Flowers buff Servants with a 50% damage buff, 50% damage reduction, 50% NP gain, 10,000 extra MAX HP and 4000 healing at the end of every turn. Unleash some Archers on this Bel Lahmu. |
||
Ch. 21 - 4 |
Borrow the neat story support! Enemies are extra vulnerable to instant-death in this quest. Both the 3000 damage Chaos Tide and the Blessing of Kur & Mage of Flowers buffs are in effect. Note that this quest isn't difficult, so much that it is long. A new Monster approaches: |
||
New Monster Information |
|||
Ch. 21 - 5 |
Boss Encounter. See Boss Information for details. Chaos Tide, Mage of Flowers, and Blessing of Kur are still in effect. |
||
Boss Information |
|||
Ch. 21 - 6 |
Boss Encounter. See Boss Information for details. Chaos Tide, Mage of Flowers, and Blessing of Kur are still in effect. |
||
|
|
|||
Ch. 22 |
Pure Story Chapter. | ||
| Back to Chapter Selection | |||
| This is just a Spoiler Protection tab to create uncertainty for unspoiled players. There's nothing here, sadly. Go to one of the other tabs for the walkthrough. |

