Possible Drops:
--
Mission and Clear Conditions:
Mission:
Capture Command Post (Sends you back to Route A)
OR
Rescue Hostage (Continue Route B)
Clear Guide:
Team Recommendations:
-
2 Combat Echelons Level 90 5x Linked
-
1 Dummy Echelon
-
1 HOC: BGM-71
Clear Steps
Despite the presence of a Doppelsoldner, and a Mortar, this map is relatively straight forwards, either a straight rush to the Command Post, or a bit of a longer run to rescue MP-40. Pay a bit of attention to your Ammo and Rations, as fights can pile up. Besides that, mind the special abilities of enemies, and success will follow.
Writers Note: While it may seem tempting to be cheeky to run around the below the mortar with an Echelon and use an HOC to Bombard the Strelets to win the 6th fight, this is not recommended. Not only is this less than resource-efficient, it will abuse your tanks mightily. Also, while it might work on this map, it is a bad habit to get into, so do not use HOCs as a DPS tool.
Capture Command Post
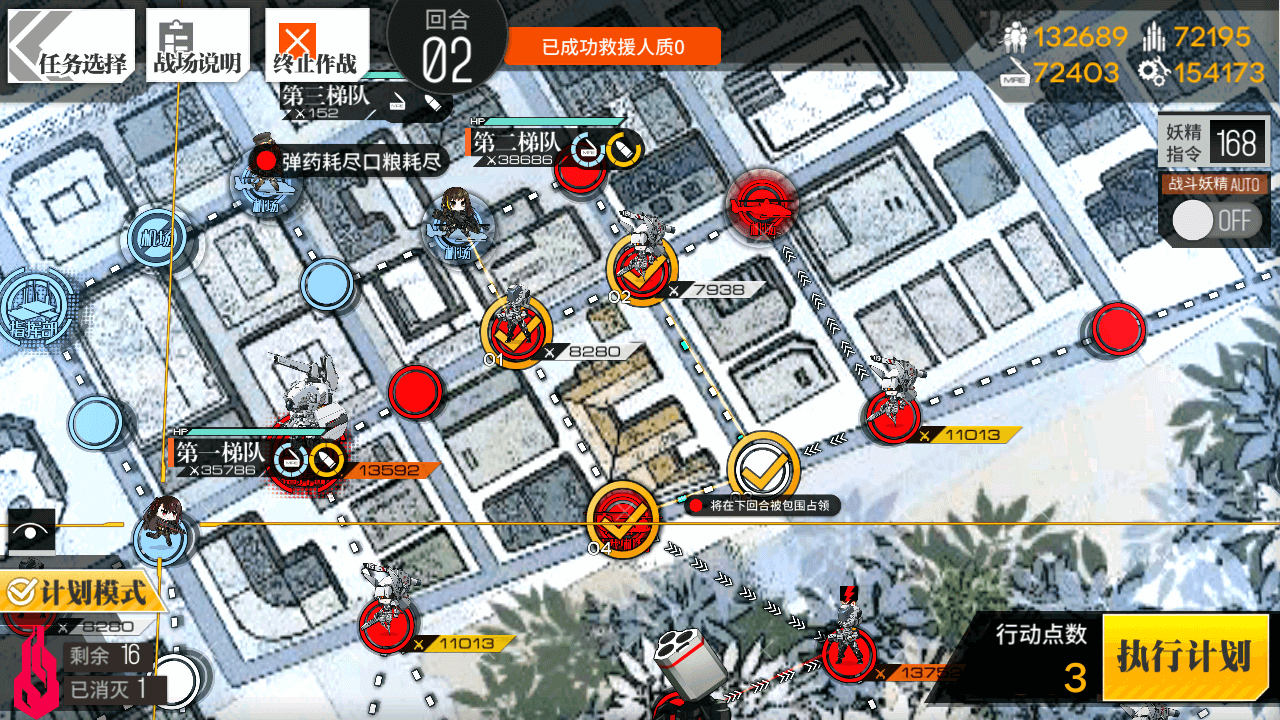
Turn 1
1.1
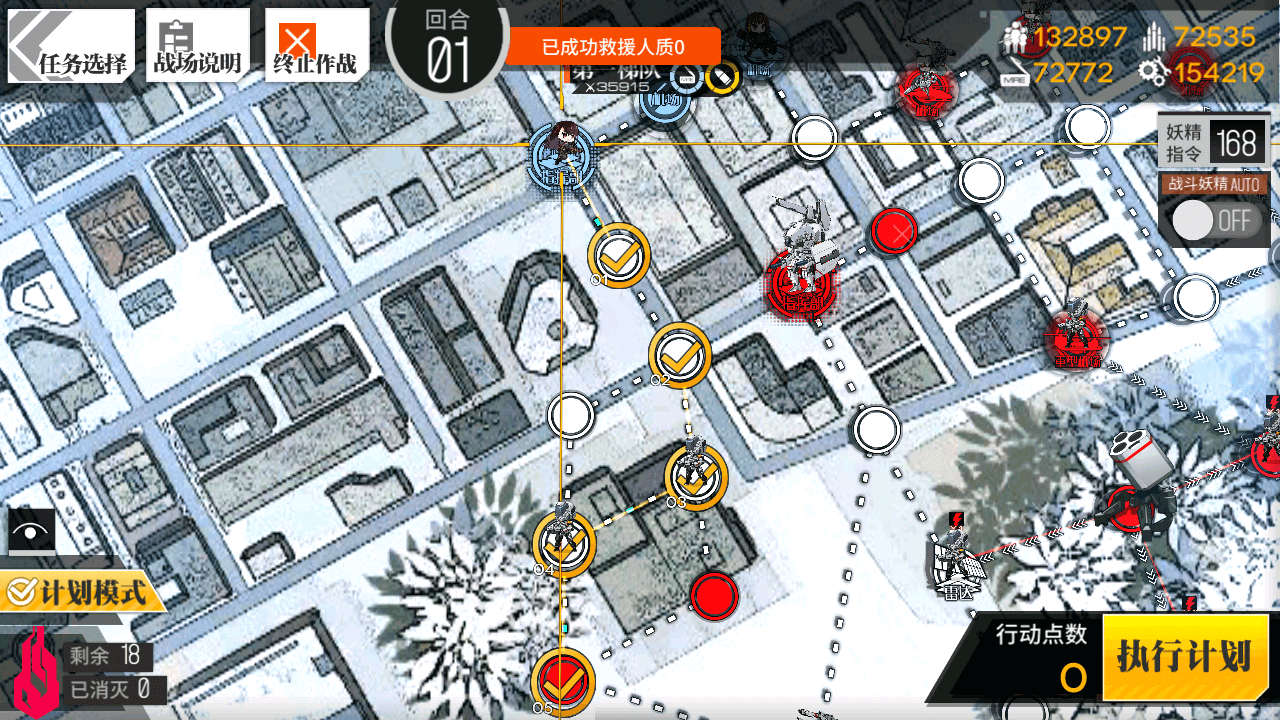
Deploy a Combat Echelon on both the Heliport and Command Post. An RF/HG Echelon is recommended for fighting the Doppel, but an AR/SMG one can work. Move the Command Post Echelon down three nodes, then left one, then down a final node.
Turn 2
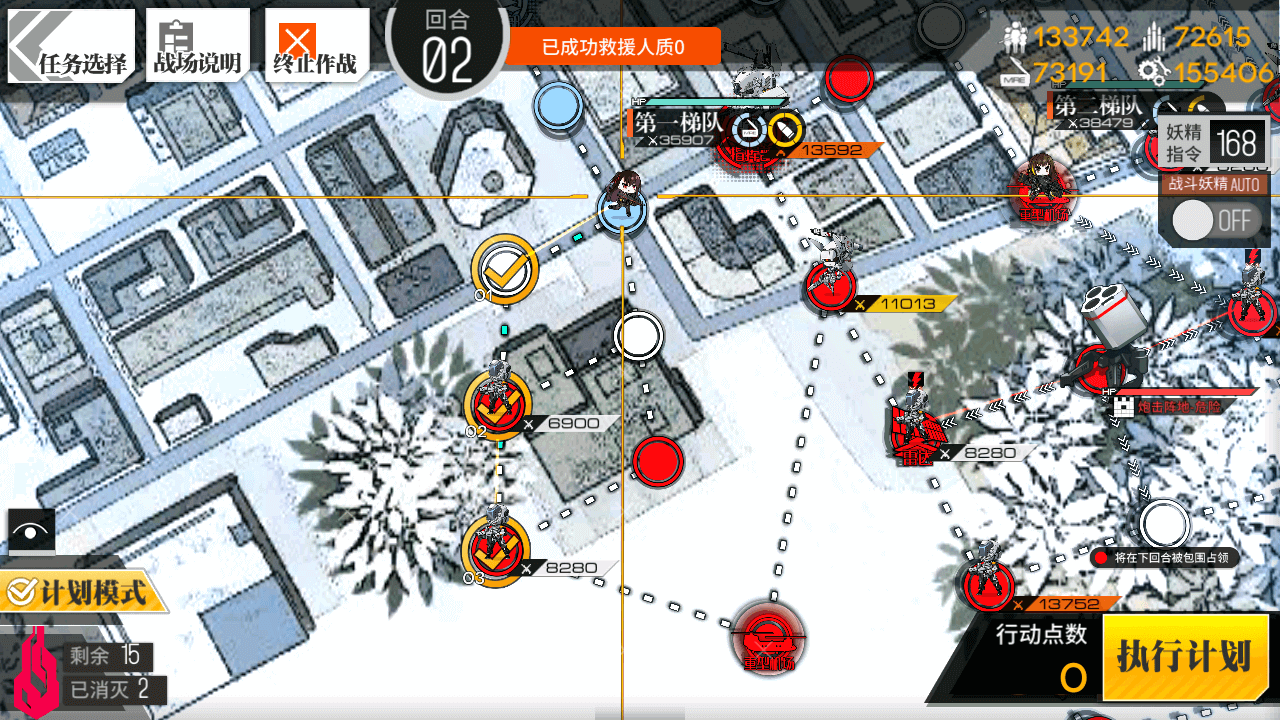
2.1
Move the RF/HG Combat Echelon right one node, then up one node. The Doppel will not move off the Command Post, so do not be concerned about engaging it now.
Turn 3
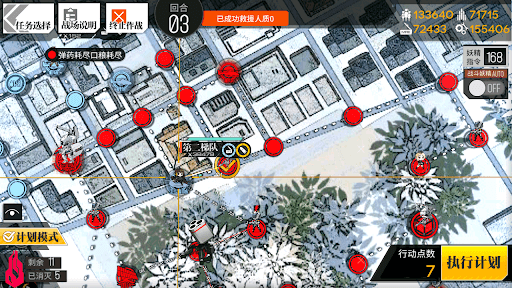
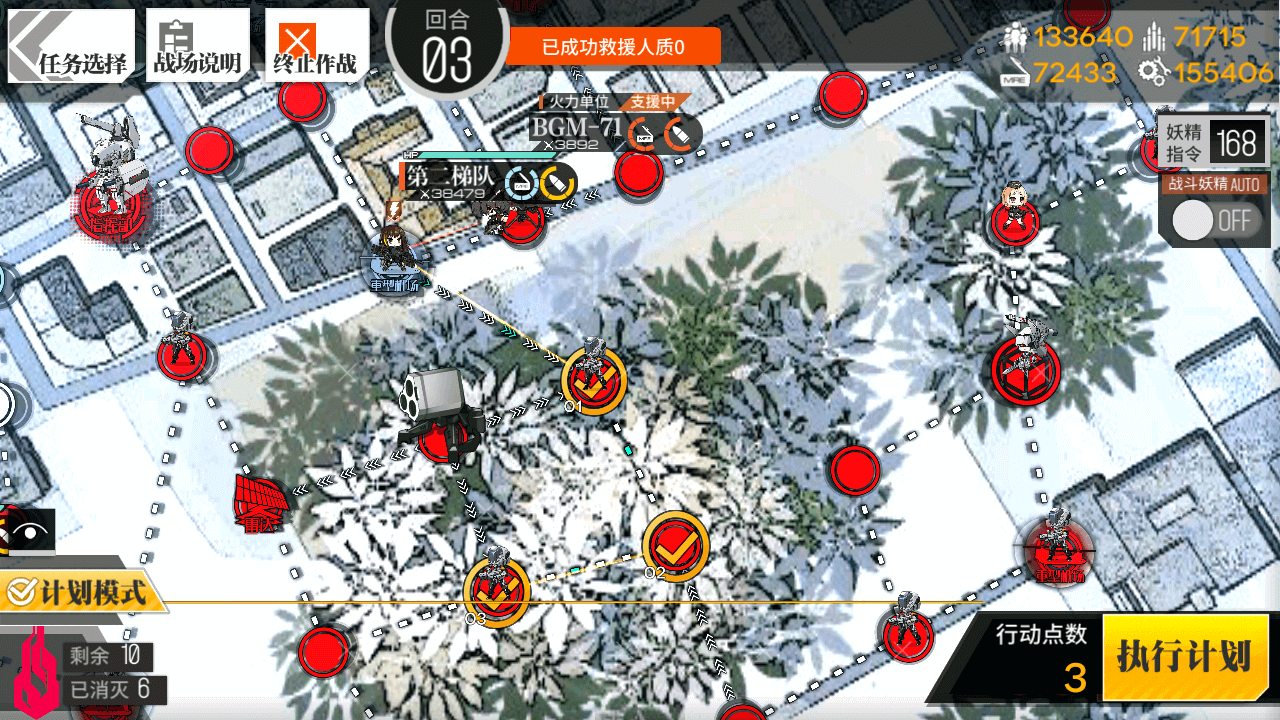
3.1

Deploy BGM-71 on the Heavy Heliport, then move onto the Command Post to engage the Doppel. Once it falls, victory is yours.
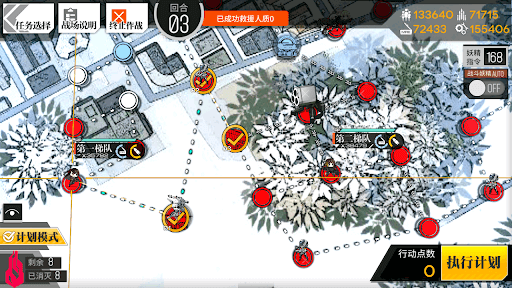
Hostage Rescue:
Turn 1
1.1
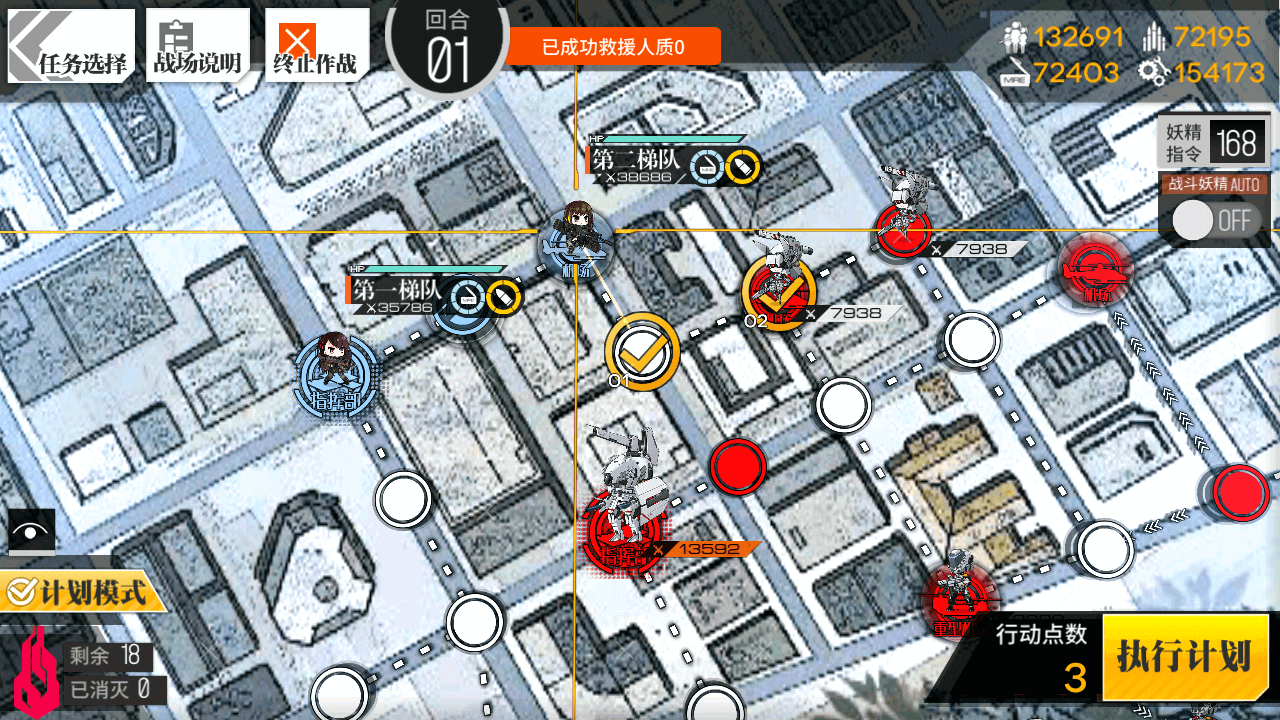
Deploy a Combat Echelon on both the Command Post and Heliport. Move the Combat Echelon on the Heliport down and right one, to engage the Rodelero.
1.2
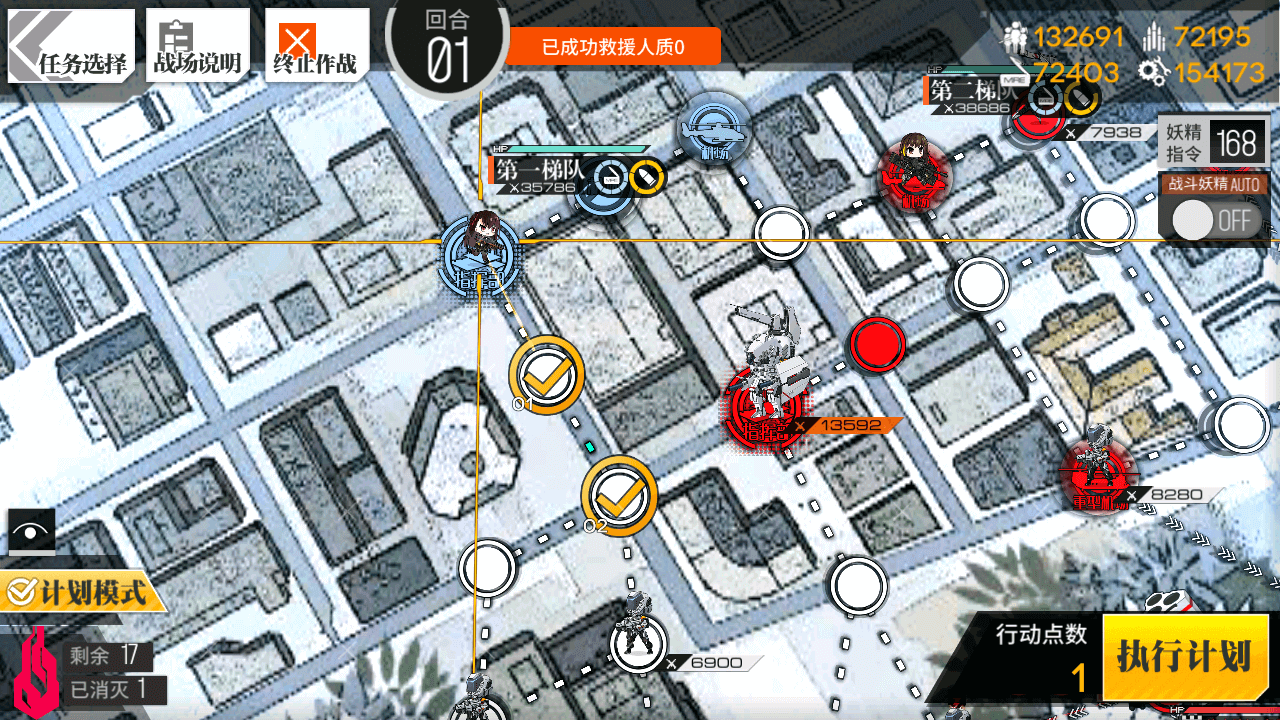
Move the other Combat Echelon down two nodes.
1.3
Deploy a Dummy Echelon on the Heliport, and end your turn.
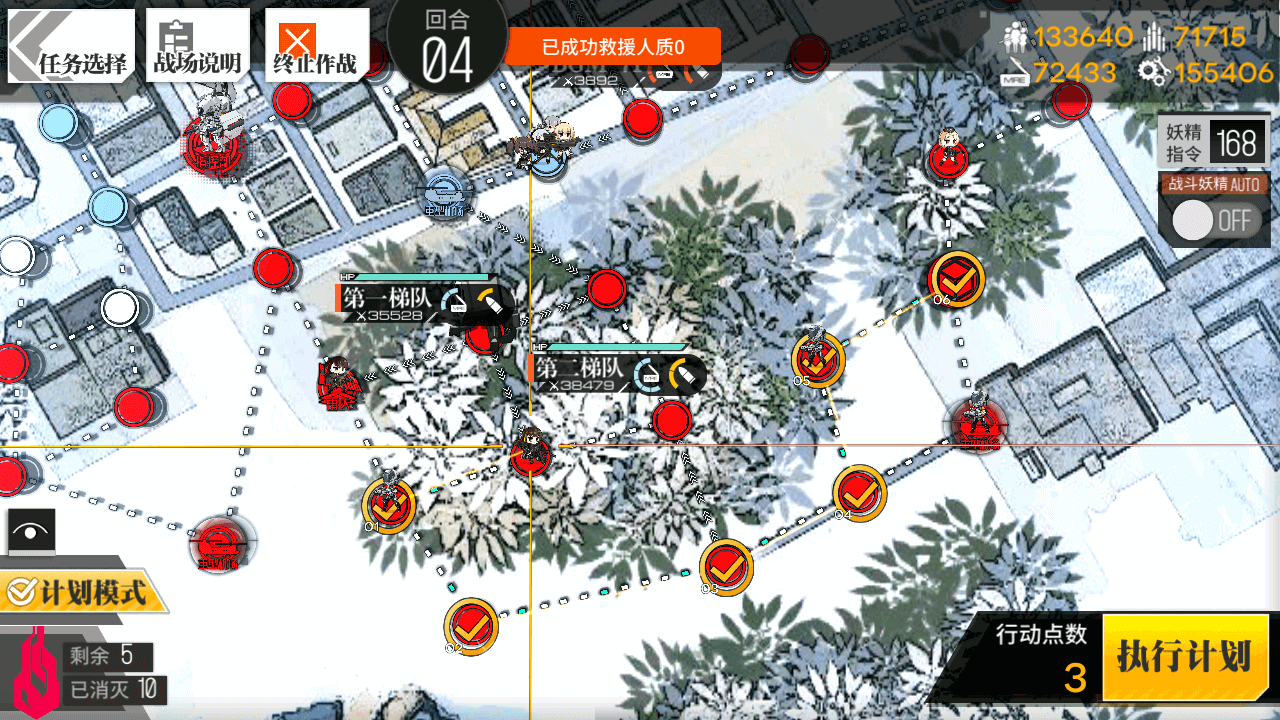
Turn 2
2.1
Move the rightmost Combat Echelon down, right, down and then left, to end the move on the Heavy Heliport.
2.2
Move the other Combat Echelon to the left one node, then down two.
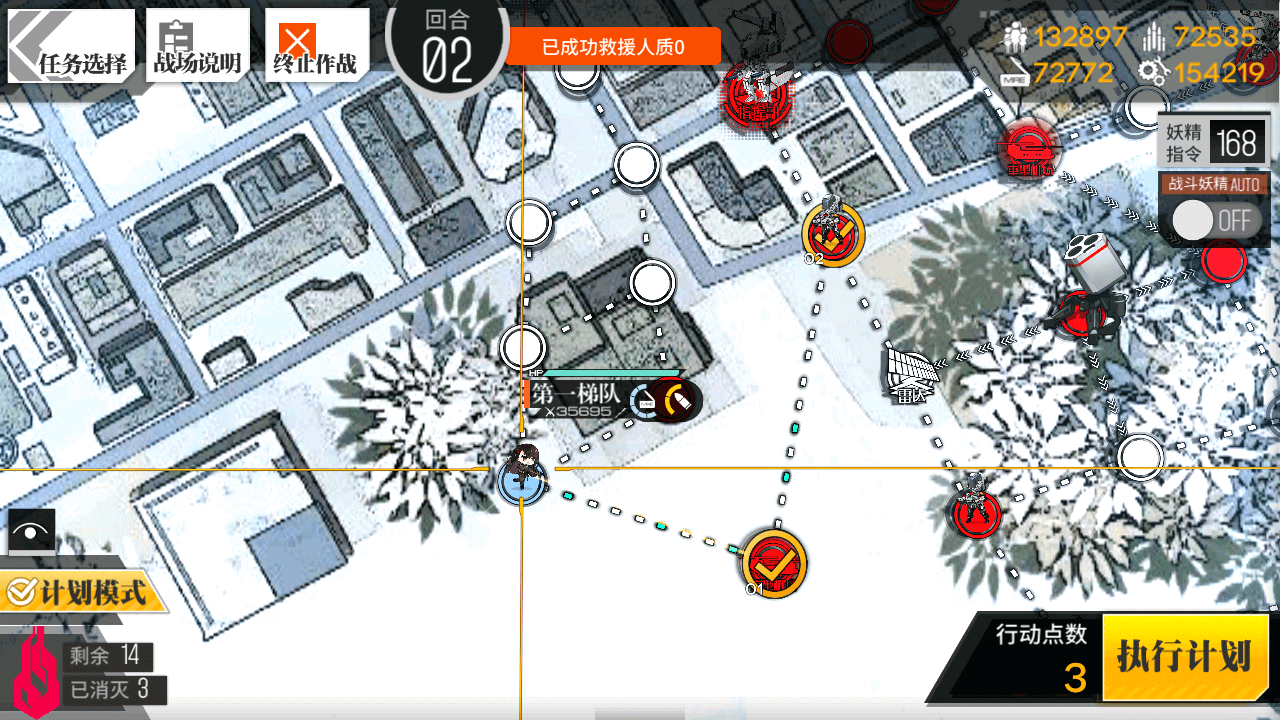
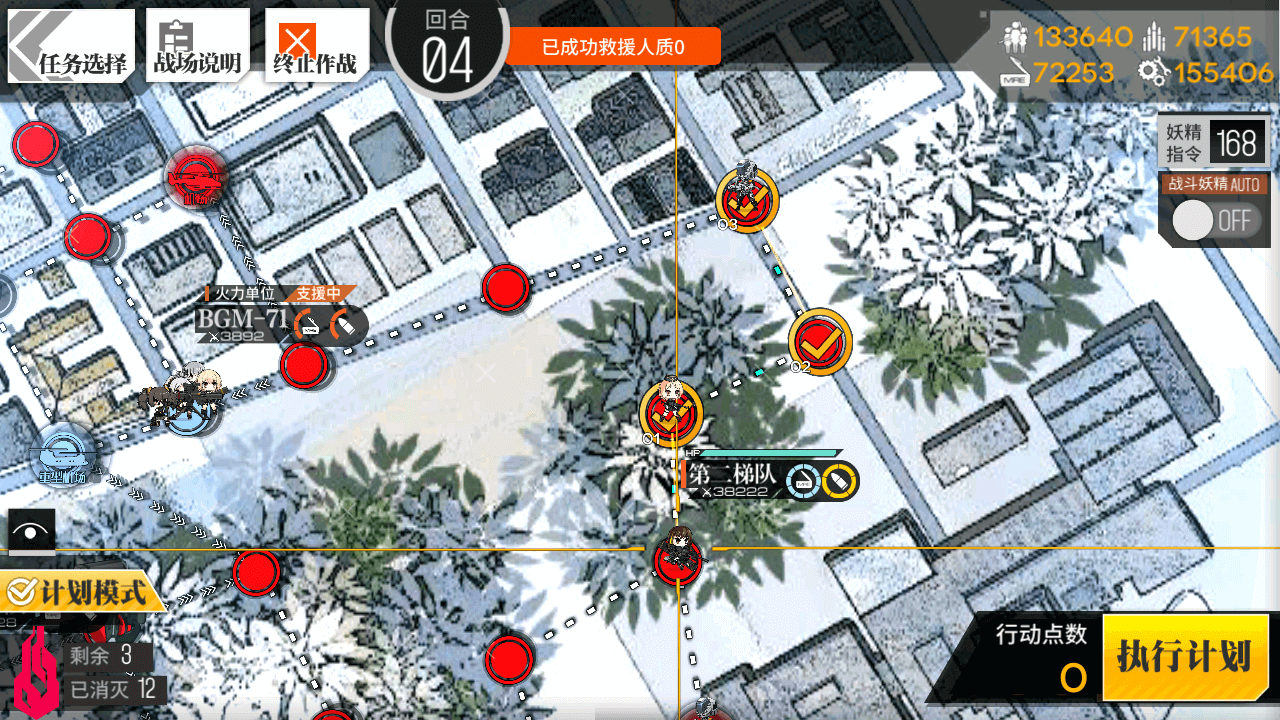
Turn 3
3.1
Move the Combat Echelon off the Heavy Heliport to the right, killing the enemy there.
3.2

Deploy an HOC (BGM recommended, but not required) and bombard the Mortar to destroy it.
3.3
Swap BGM with the Combat Echelon, and move them down two nodes, then to the left one node, ending below the now defunct Mortar.
3.4
The other Combat Echelon should move right, up, and then back down, ending on the Radar node.
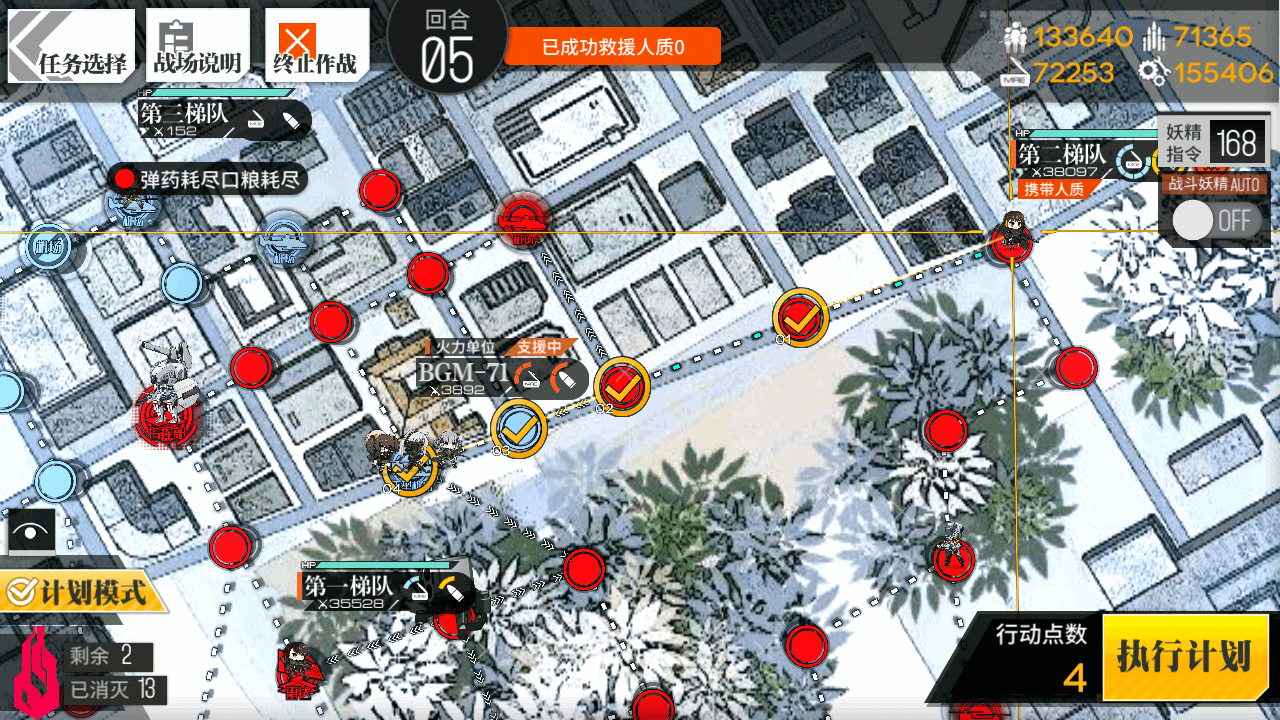
Turn 4
4.1
Send the Combat Echelon below the Mortar to the left, down, three nodes to the right, and then take the least populated route to the one Time Supply node. You should have enough supplies to make it regardless, but be mindful nonetheless.
4.2
Resupply, rescue the hostage and continue around to the right and then up once again.
Turn 5
5.1
Move BGM onto the Heavy Heliport once again, then move your Combat Echelon straight across four nodes, swapping with BGM and manually rescuing the hostage.