Possible Drops:
--
Mission and Clear Conditions:
Mission: Kill all enemies
Clear Guide:
Team Recommendations:
-
2 Lvl 70 4x Linked Combat Echelons
-
1 Dummy Echelon
Clear Steps
Chapter 2 starts off fairly simple with a search and destroy mission as an introduction to the new faction, the Paradeus. All enemies on this map are Strelets, akin to the Ripper or Vespid units from SF, or the Cyclops from the KCCO. 416 joins you, although she cannot live up to her ‘all you need’ boasts, as you’ll be doing most of the work. Strelets are a fairly weak enemy but can pose a threat through sheer numbers, so some AoE damage will not go amiss. Otherwise, this map is a simple shoot it till it dies sort of mission.
Turn 1
1.1

Deploy a Combat Echelon on the western Heliport, and the on the Command Post. Deploy a Dummy Echelon on the Southern Heliport. Move the Western Combat Echelon right one node.
1.2
Move the Combat Echelon on the Command Post left one node, down one node, right, down, and then right once again, ending the move directly above your Dummy Echelon.
1.3
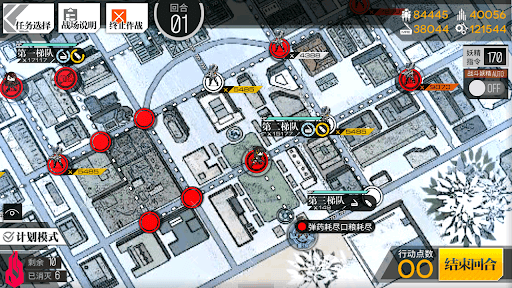
Swap the Combat and Dummy Echelons to resupply. Swap the Combat Echelon back so they are in the northern position, then end your turn.
Turn 2
2.1

Move the western Combat Echelon left, resupply, then down two nodes.
2.2

Resupply again, then move the other Combat Echelon right two nodes, up twice, then back left one node. End your turn.
Turn 3
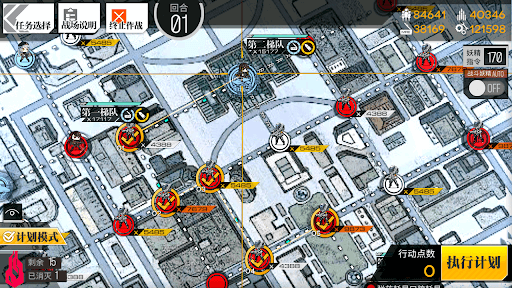
3.1
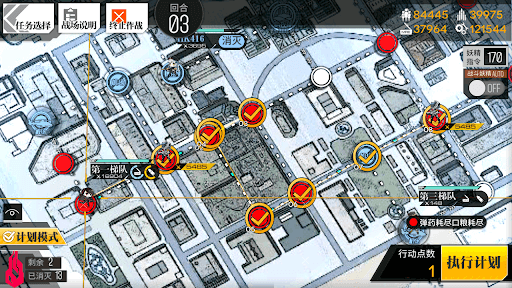
The exact position of the enemy units will vary, but you will be able to kill them using your western Combat Echelon. The example shows the longest possible path, which should cover all possible tiles the enemy can be positioned on. You will likely be able to use a shorter path, or a combination of your Combat Echelons to finish the map in fewer moves than the example path.