Mission and Clear Conditions:
Mission:
Gold: Defeat 2 Enemies and Capture the Enemy Command Post in 4 turns
Silver: Defeat the Patroller marked by a Silver Star
Clear Guide:
Team Recommendations:
- 1 RFHG
- Taunt Recommended
- Shield SMG recommended (if no Taunt Fairy available)
- 1 HOC
- AGS recommended
- High Pierce is preferred over High Lethality
Clear Steps
Well, it wouldn't be a GFL story chapter without at least one RNG filled disaster of a map now, would it? There's actually another one in the Emergency maps but we'll get there later.
Now, we need to address this mess.
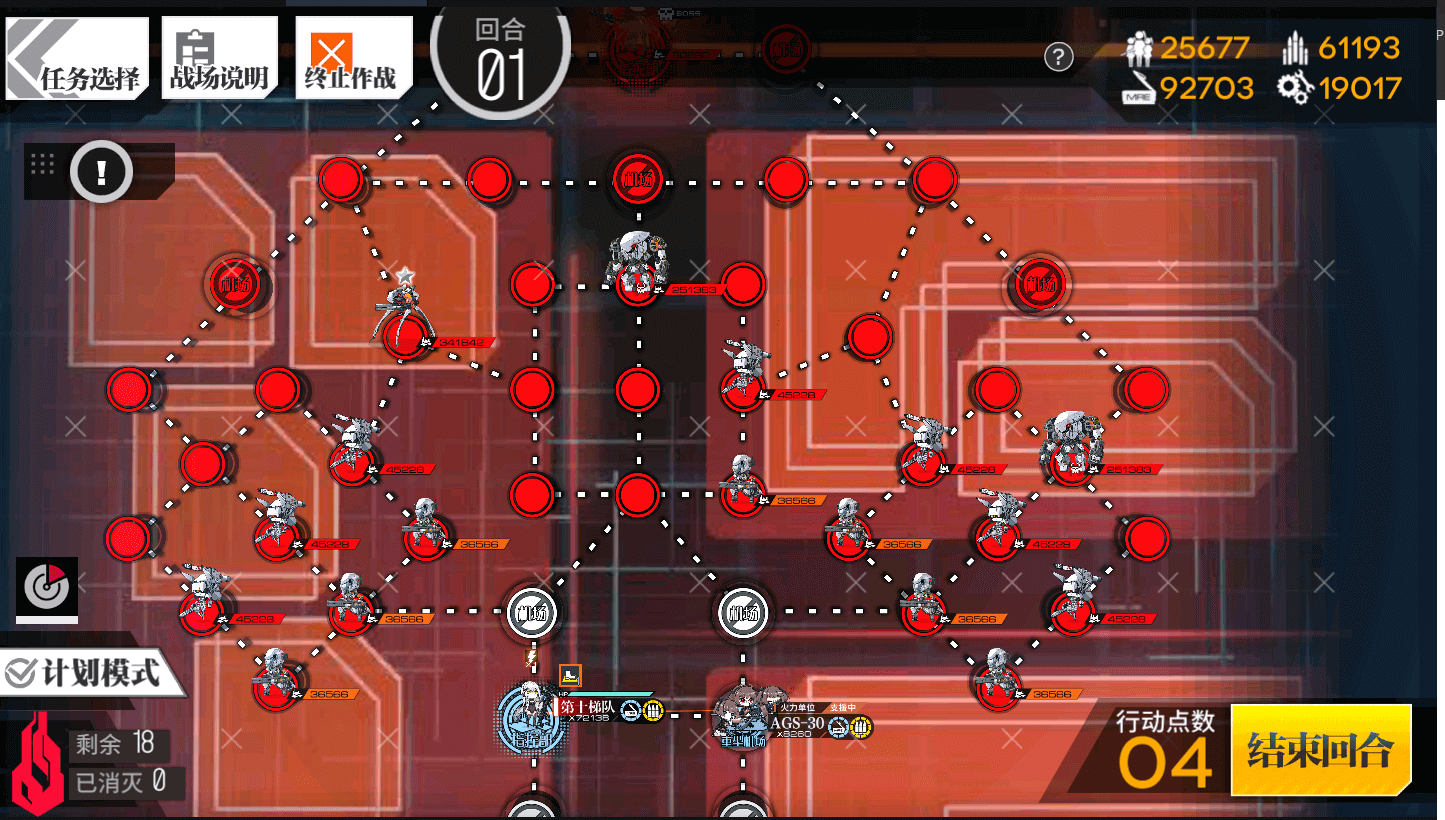
First: what is a bad Enemy layout?
When you are deploying Echelons, you will only see a few Rodels, Gunners and the Boss. As soon as you start the mission, more Enemies will spawn in. We are primarily concerned with the Gladiators, who come with Doppels as backup and should not be engaged if you value your sanity.
Second, if you want to get Gold/Silver at the same time, you want the Patroller to be on a side that doesn't have Gladiators set to get in your way.
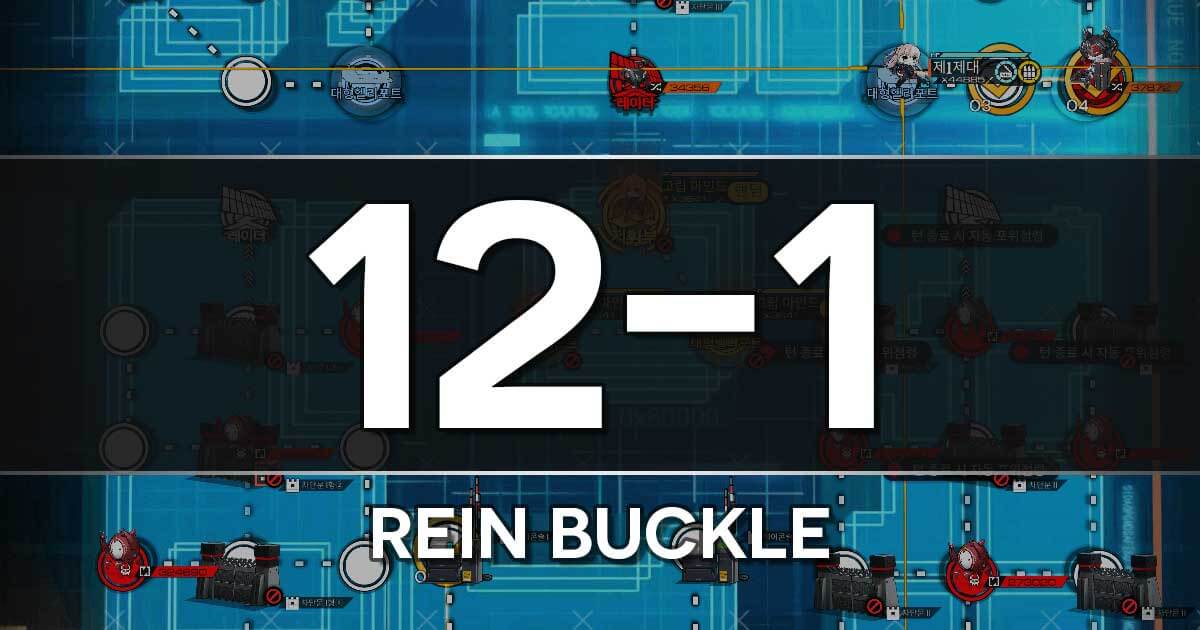
Shown below is a pattern that is safe to clear the map with.
The left side will have several battles, but without any Gladiators you should be able to clear it without any trouble. This pattern is unlikely to get the Gold/Silver together however, as the Patroller will likely move into the middle rectangle and not down where our Echelons can bonk it.
The good news:
As long as your Enemy layout is favorable, this map isn't hard.
You don't need the exact same layout as the guide, just a layout that lets you get a Combat Echelon and a HOC to the designated place safely.
You also can meme on the map completely with Parachute Fairies.
The bad news? Getting a favorable layout can be annoying, and nobody enjoys resetting maps for starting layouts.
Also, this map needs 2 Friend Echelons that aren't SG/MGs, so have fun with that if your friends are like Soul's CN ones who just want to spam big CE memes.
Enemies here can be tackled in a few different ways, but a Taunt Fairy is highly recommended to reduce incoming Damage and to make the Boss look silly. It is also useful for fighting the Patroller for the Silver medal.
AR/SMG or RF/HG can be used as needed.

Turn 1
1.1
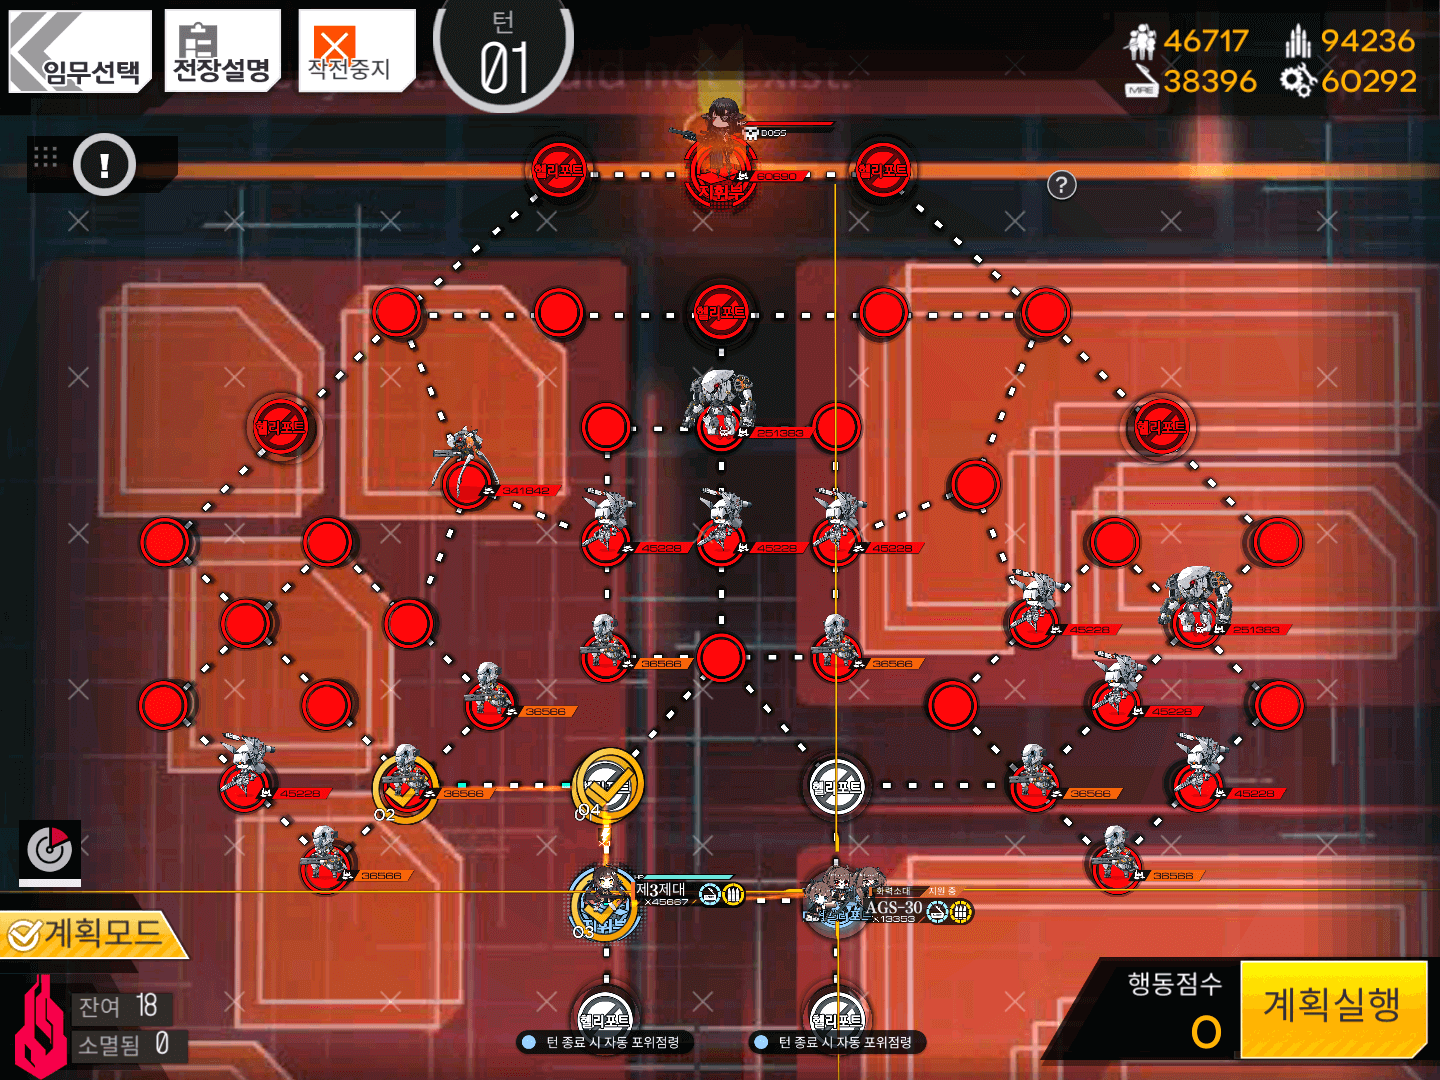
Deploy your Combat Echelon and AGS.
Move your Combat Echelon up one node, then left one node.
Move your HOC left one node, then up one node.
1.2
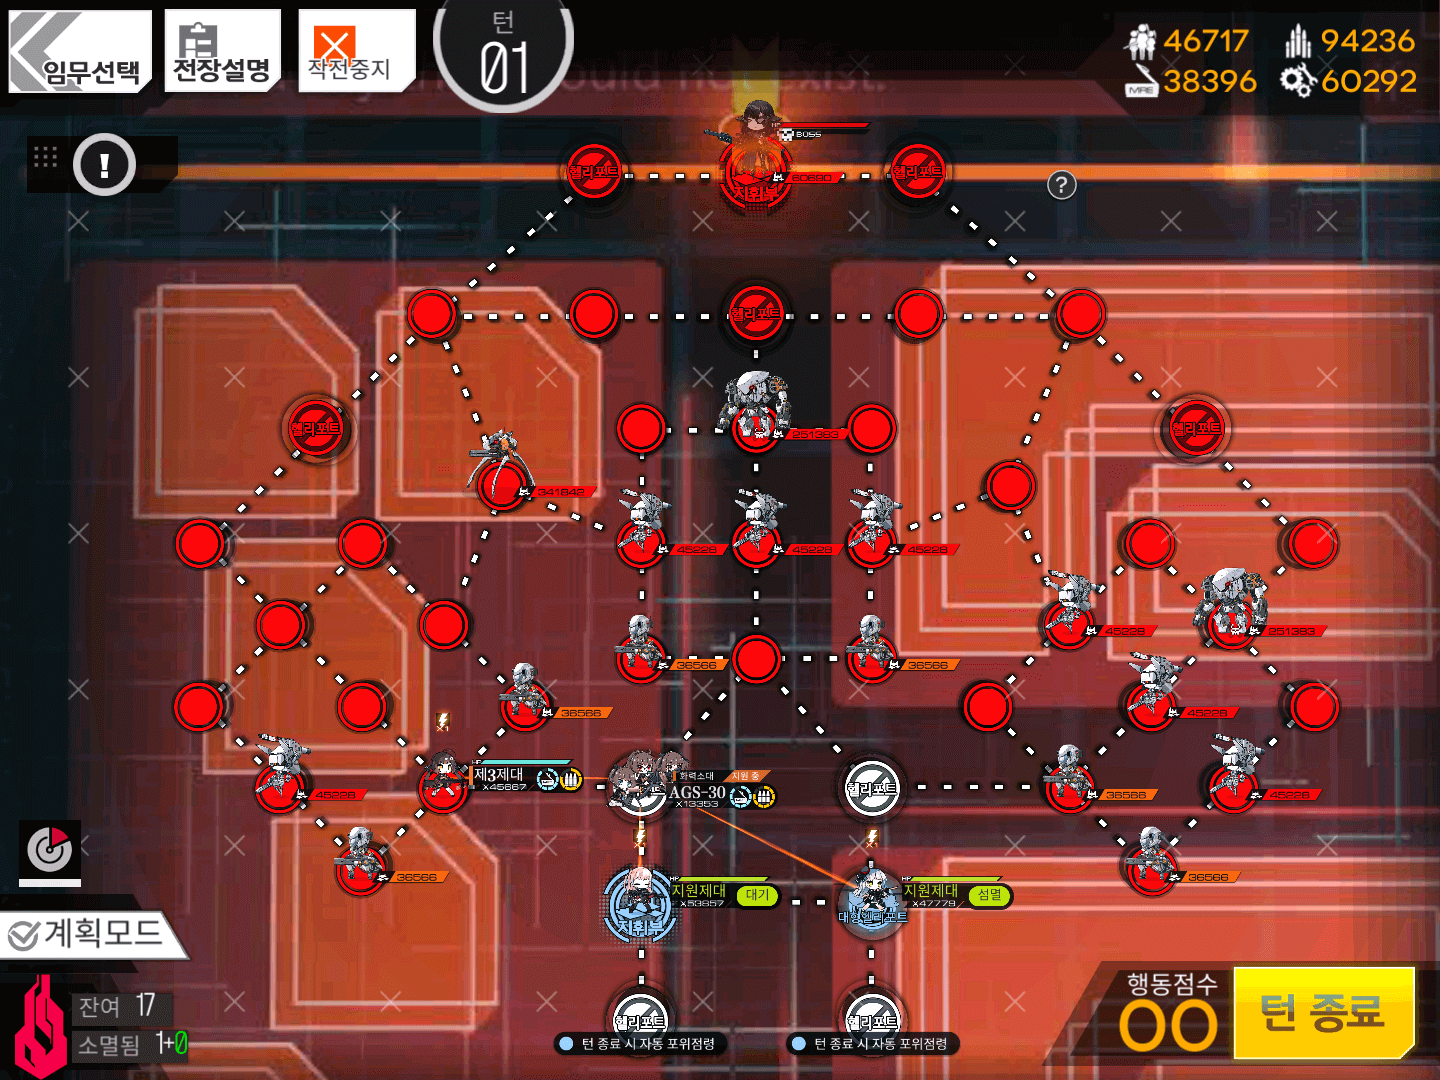
Deploy 2 ARSMG Friend Echelons.
Leave the left on Standby and set the right one to Eliminate.
End your turn.
Turn 2
2.1

Resupply your Combat Echelon and HOC by switching around with the Friend Support.
Set the left Friend support to Eliminate and the right one to Standby.
2.2
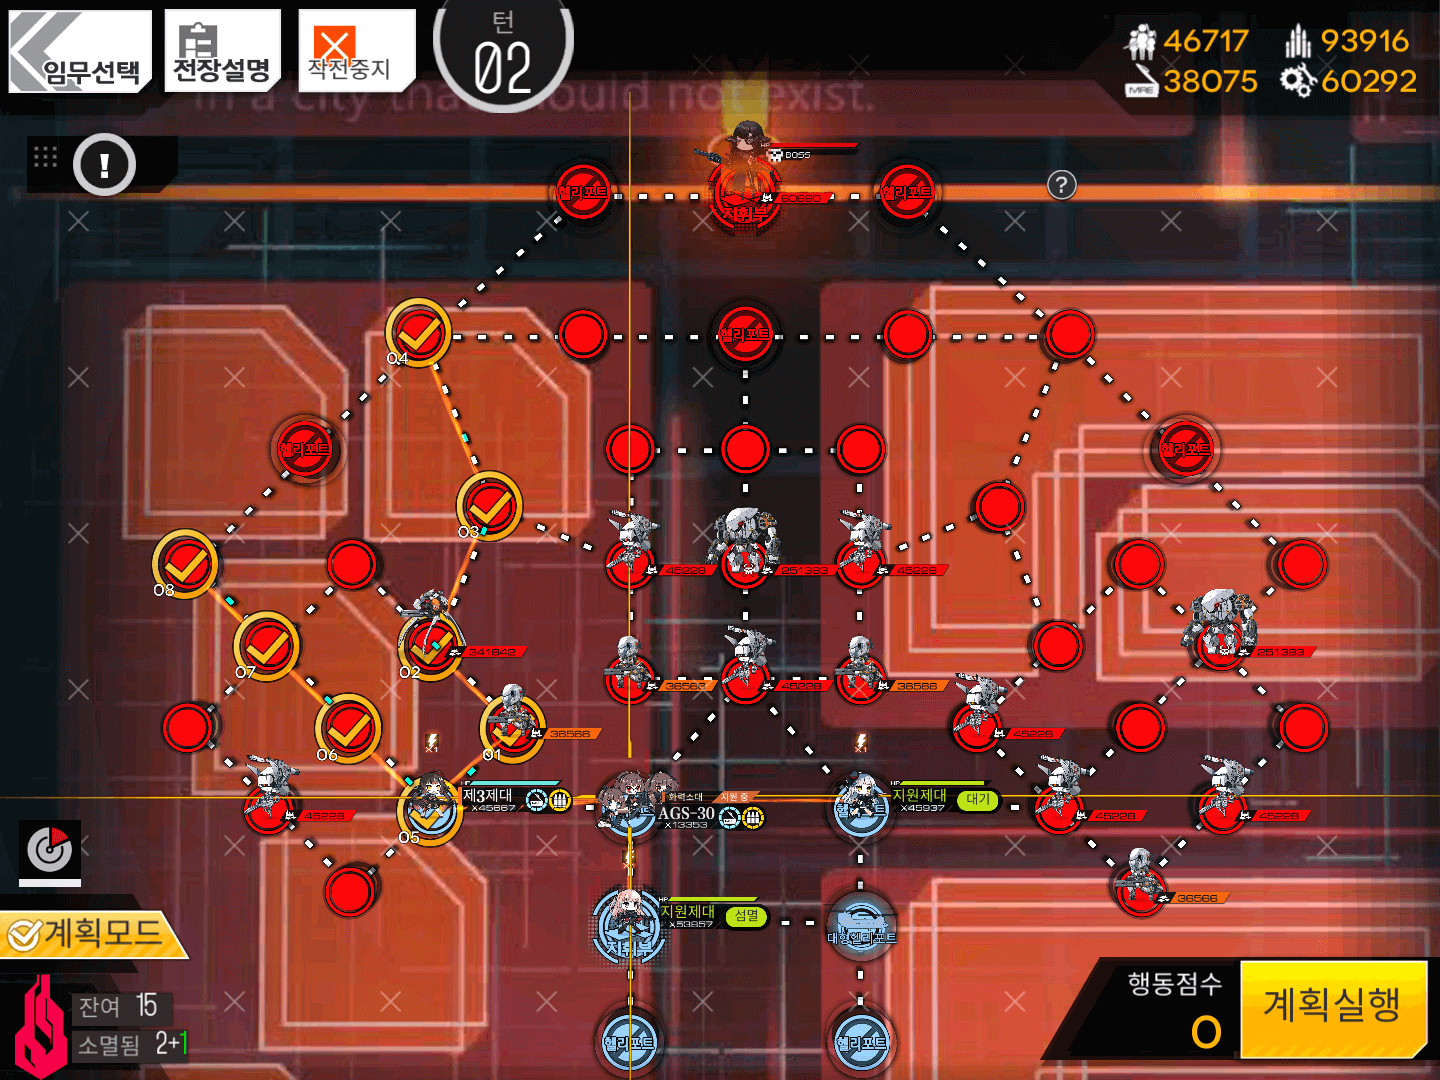
Move your Combat Echelon up-right one node and up-left one node to bonk the Patroller for the Silver Medal. Afterwards, move it up two nodes.
Move your HOC left one node and then up-left three nodes.
Turn 3
3.1
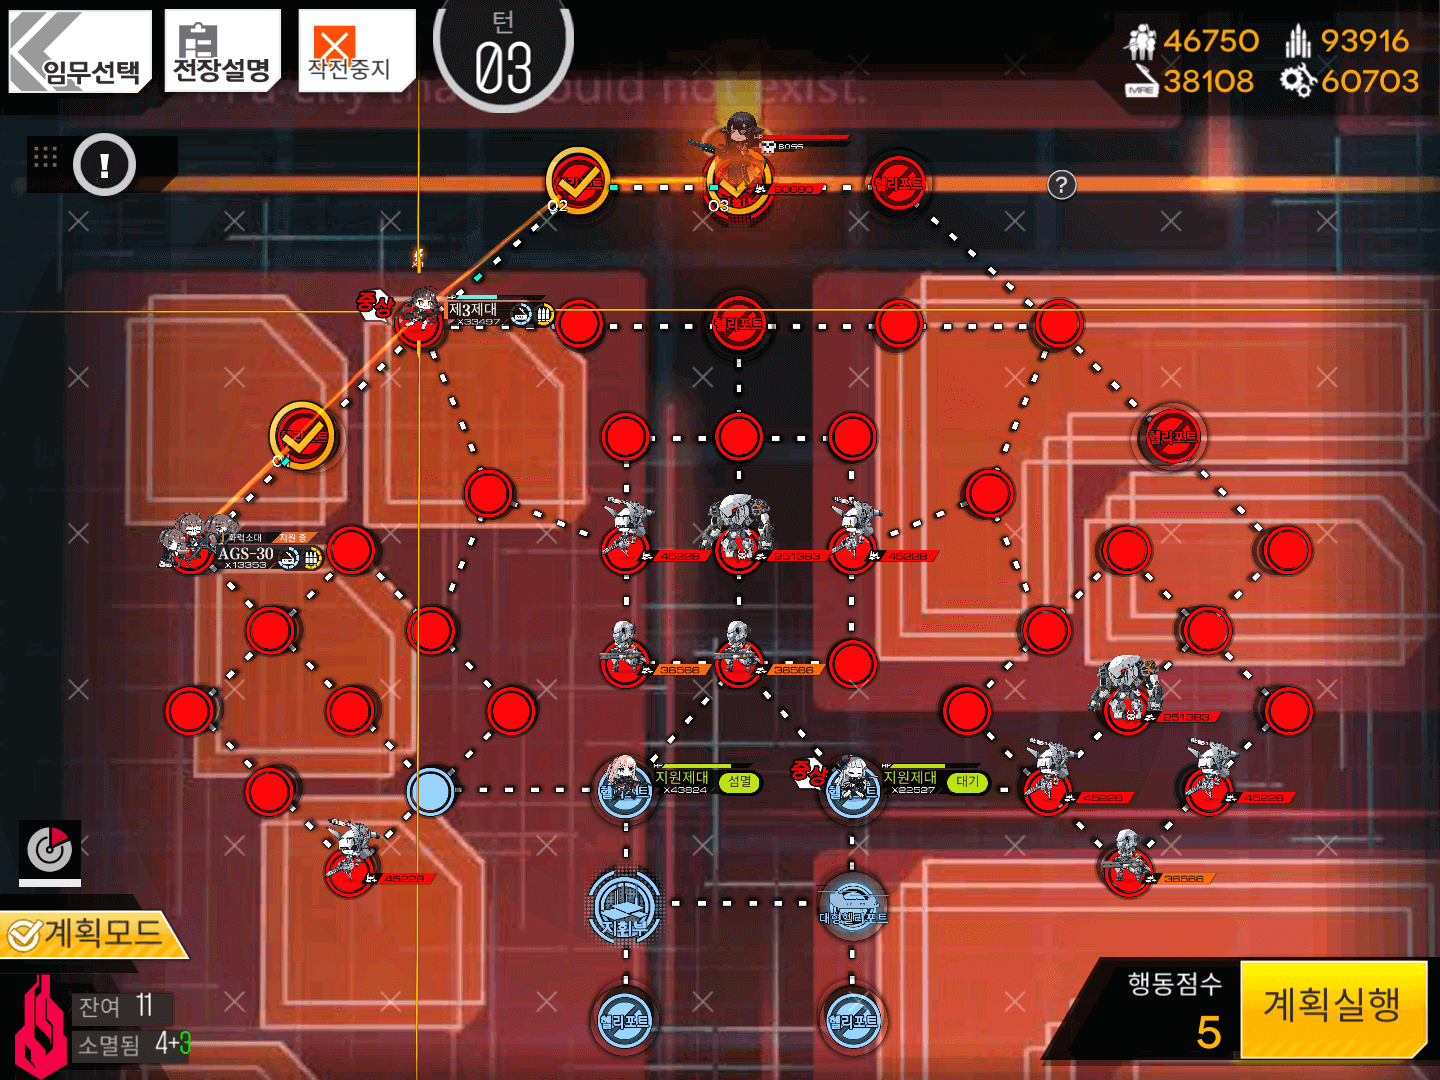
Move your HOC up-right one node to support the upcoming battle.
Now move your Combat Echelon up-right one node, then right one node to fight the Nyto.
Set any Friend Echelon on Eliminate to Standby.
End your turn to finish the map.
Video Guides:
Next Chapter:
-
Chapter 12 Normal
-
Chapter 12 Emergency