
The Great Lightwyrm
Released on July 25th, 2019 at 11:00 PM PST, High Jupiter’s Trial released to the excitement and anticipation of Dragalia Lost’s endgame players. Players eager to unleash their collection of Shadow Adventurers soon discovered that this is no walk in the park -- spacing and timing became paramount, as High Jupiter is not hesitant to punish entire parties for the mistakes of one team member. The investment needed to play this trial has also increased, as High Jupiter’s Wyrmprint, King of the Skies, is once again a helpful asset, coming off from the insignificance of the previous High Dragon Wyrmprint in High Mercury. Unavoidable damage throughout the fight has returned as well.
The world’s first High Jupiter clear team consisted of Ieyasu, Botan, Heinwald, and Althemia. Some familiar faces from the world’s first High Mercury clear resurfaced for this; Mia posted a video of the clear on July 26th.
Stat Requirements
Minimum HP WITHOUT Void Weapons
| Shadow | HDT WP | Cleo S2 (DEF +20%) | DEF +0% | DEF +9% | DEF +12% | DEF +15% |
|---|---|---|---|---|---|---|
| Melee | Yes | No | 1984 | 1820 | 1771 | 1725 |
| Melee | No | No | 2784 | 2554 | 2486 | 2421 |
| Ranged | Yes | No | 2480 | 2275 | 2214 | 2156 |
| Ranged | No | No | 3480 | 3193 | 3107 | 3026 |
| Melee | Yes | Yes | 1653 | 1538 | 1503 | 1470 |
| Melee | No | Yes | 2320 | 2158 | 2109 | 2062 |
| Ranged | Yes | Yes | 2066 | 1922 | 1879 | 1837 |
| Ranged | No | Yes | 2900 | 2698 | 2636 | 2578 |
Minimum HP WITH Void Weapons (+7% DEF)
| Shadow | HDT WP | Cleo S2 (DEF +20%) | DEF +0% | DEF +9% | DEF +12% | DEF +15% |
|---|---|---|---|---|---|---|
| Melee | Yes | No | 1854 | 1710 | 1667 | 1626 |
| Melee | No | No | 2602 | 2400 | 2340 | 2282 |
| Ranged | Yes | No | 2317 | 2138 | 2084 | 2033 |
| Ranged | No | No | 3252 | 3000 | 2924 | 2852 |
| Melee | Yes | Yes | 1562 | 1459 | 1427 | 1397 |
| Melee | No | Yes | 2192 | 2047 | 2003 | 1961 |
| Ranged | Yes | Yes | 1953 | 1823 | 1784 | 1746 |
| Ranged | No | Yes | 2740 | 2559 | 2504 | 2451 |
Not taken into consideration: Light Res Wyrmprints other than King of the Skies.
Preflight Checklist
-
50 Mana Circles
-
Crafted 5★ Elemental weapon
-
100% Skill Prep (Cleo) OR Void weapon + max Axe/Lance Co-Ability
-
One defensive Wyrmprint (see below)
-
A max Unbound Strength Dragon
-
Adequate facilities
-
Shadow Altar Lv. 30+ (x2)
-
Library Obscura maxed
-
Dojo Lv. 31+ (x2) (Newer players: 16+)
-
Poison Slime Statue maxed
-
Adventurers to Consider
Ideal: Only run (1) Bleed user
Team Composition: Prefer (2) melee + (2) ranged


Recommendations by Weapon Class
Blades
Ieyasu: Shadow’s strongest Bleed user and premier Shadow DPS. His Blade Co-Ability greatly benefits team damage.
Natalie: Though much riskier than Ieyasu, she provides similar damage and makes room for a different Bleed user. That being said, she will almost never gain a STR buff from her Skill 2 unless intentionally taking hits or withholding healing support. The timing of S2 is particularly important, as the divergent shield is helpful against unavoidable hits, but can also lead to a swift death if mistimed. Highly discouraged if still learning the HJP fight.
Staves
Cleo: Similarly to Lowen, Cleo can easily reach 100% Skill Prep and start the fight with a teamwide 20% Defense buff, greatly lowering the entry HP level. Do note that Electron Burst/Outburst serve as a secondary HP check as well, so Cleo players should be mindful of having their S2 buff ready at appropriate times.
Heinwald: Deals roughly double Cleo’s damage while still maintaining heals at an adequate level. His S2 Strength buff is helpful for powering up his own S1; in practice, opportunities to buff nearby allies may sometimes be far and few in between.
Lance
Botan: Strong offensive support, but competes for Bleed stacks. Further lowers HP requirements with her Lance Co-Ability.
Wands
Gala Cleo: A versatile offensive support, capable of buffing allies and inflicting Defense Down with her active Skills and Magical Modification. A variation of running High Jupiter exist that involves stacking four Gala Cleos to finish the battle in less than one minute.
Veronica: Packs powerful burst damage combined with a Skill Damage Co-Ability for allies, but is often overshadowed by Gala Cleo.
Axes
Curran: A solid melee DPS choice that does not step on the boundaries of Bleed users. 15% DEF from maxed Mana Circles is very helpful for teams without Cleo or Botan, especially if ranged Adventurers on the team requires it.
Sazanka: She performs similarly to Curran, but has diminished effectiveness when other Bleed users are present.
Sword
Yaten: If early Breaks are desired, Yaten is the premier choice for this role. He also offers Energy support for allies and has consistent Skill uptime.
Shinobi & Sons

Shinobi: The ideal pick for a majority of the Shadow Adventurers used for this battle, Shinobi offers a whopping 90% increase to Skill Damage alongside a modest 20% Strength buff.
Marishiten: General purpose powerhouse, although overshadowed by Shinobi in many cases. Nevertheless, a 60% Strength increase is still very powerful and is preferred by some Adventurers, such as Yaten.
Nyarlathotep: Immediately provides Last Bulwark which may lower the learning curve somewhat. Nevertheless, dropping below 30% essentially turns the Adventurer into a wet noodle and is far less consistent than traditional picks.
Nidhogg: Reserved for ranged adventurers who have trouble surviving the HP check without certain Wyrmprints. Nidhogg is also a solid choice for healers.
Juggernaut: The budget option. Runs will be slower, but still possible with a 45% Strength buff.
Wyrmprint Selection

At least one defensive Wyrmprint of some kind is highly recommended for this fight.
King of the Skies: Grants the highest level of protection. Assumes the adventurer is already Paralysis immune.
Happy New Year!: A hyper-defensive pick that shores up the incomplete Paralysis Res of certain 3★ adventurers.
Luca’s Prank: Providing additional Light Resistance without sacrificing too much offense, this is a common sight on ranged Adventurers that require the additional durability.
I Need a Weapon


Melee
Sword
Abyssbringer is clearly superior to Dáinsleif, even if the latter is fully unbound. This is due in part to Dáinsleif’s lack of a damaging Skill 3 and the absence of Strength Doublebuff on current Shadow Sword users.
Blade
Ieyasu: Nightsky Ripper is generally superior because of its enhancement of Skill 1 by High Jupiter’s Bane, although a MUB Blackwing performs similarly to a 0UB Void weapon.
Natalie: Having a third iframe from Blackwing greatly increases her odds of survival as she will usually be close to death. Furthermore, Natalie in practice will often be above 30% HP and therefore appreciates the neutral damage offered by Blackwing’s higher raw STR.
Dagger
If both options are MUB, the extra damage from Honor Edge’s Skill 3 is preferred. However, Death Seeker is clearly superior when it has more unbinds.
Axe
Genocide Cleaver stands far above its Core counterpart, with MUB Primordial Titan performing just below a 0UB Genocide Cleaver.
Lance
Botan: Assuming Botan is run alongside Ieyasu, Mistilteinn is the ideal choice. If by chance she is the only Bleed user on the team, Final Eclipse would be preferred.
Zace: Mistilteinn is the clear choice for its Skill 3 alone, adding to Zace’s already punishing arsenal.
Ranged
Bow
Necro Arcus and Black Dahlia Bow output roughly the same damage. Slight preference is given to the latter for its defensive utility.
Wand
Dirge of Desperation is especially effective and doesn’t even require unbinds to outperform Underworld Despair.
Staff
Caduceus allows Staff users to contribute to team DPS, whereas Aria of Lamentation is marginally superior in terms of healing (when above 50% HP).
Attack Rotation

Static Charge Mechanic
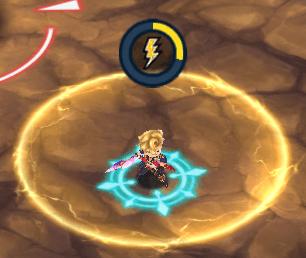
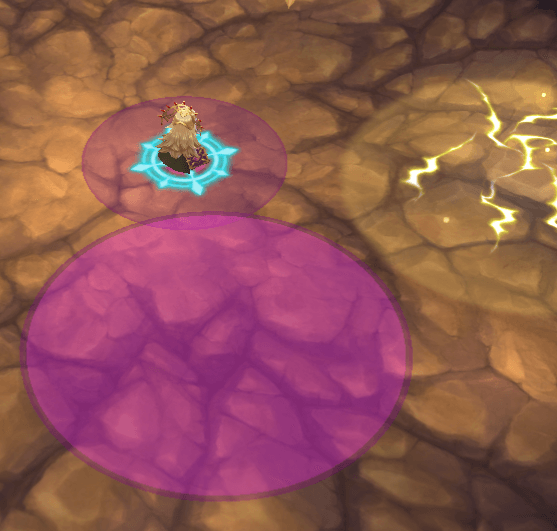
Getting hit by any of HJP’s lightning attacks will apply a debuff ring. This ring can stack up to (3) times, denoted by the mini lightning bolts over an adventurer’s head, growing in size with each stack. The timer above an adventurer slowly ticks down until flashing red, indicating (2) seconds before detonation. Any allies still within the ring will take damage and receive a Static stack(doesn’t damage the original stacked adventurer). Receiving another stack will refresh an adventurer's timer.
Though intimidating to new players, these stacks should be largely ignored until just before detonation or prior to unavoidable Static stack applications (Shocking Spark, Electron Burst/Outburst). During these situations, players must spread out so as to avoid overlapping and receiving double stacks.
Phase 1
-
Supreme Surge
Opening HP check, applies (1) Static stack.
-
Peck, Dash
Short-range Peck (announced with a “!”) followed by a Dash attack that blasts lightning in its trail shortly afterwards.
Melee adventurers should bait HJP into dashing SW for increased safety during Brilliant Blitz.
-
Round Bolts
A pair of bolts proceed starting from HJP’s front and rear, zapping clockwise for a half-revolution. This attack can be iframed. Melee adventurers should position themselves at HJP’s left or right, then either roll clockwise twice or begin iframes after the first pair of bolts appear.
-
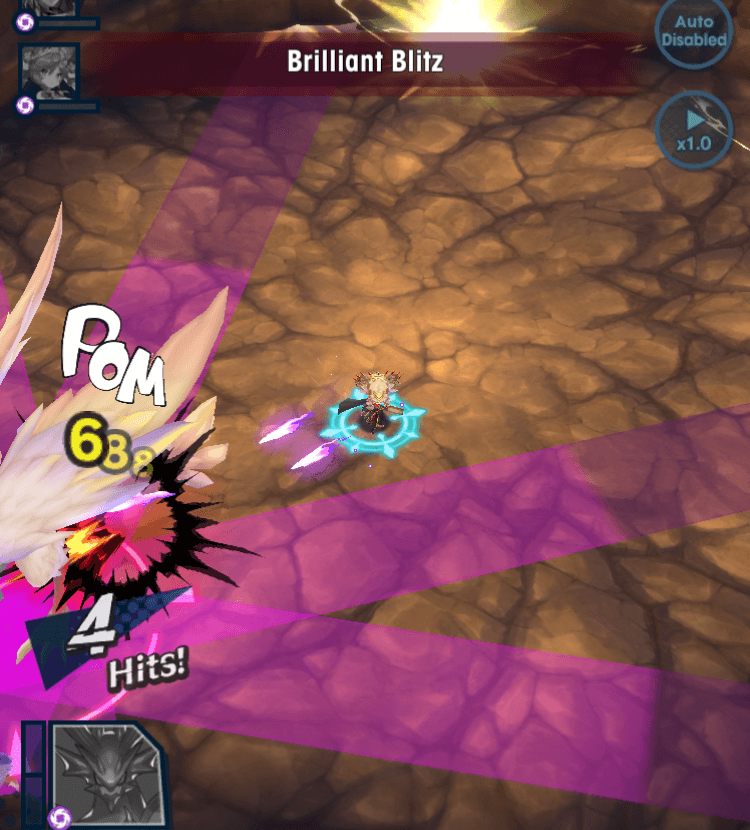
Brilliant Blitz
6-way thin, rectangular Purple markers. HJP’s front/rear/left/right provide the largest openings in which to stand.
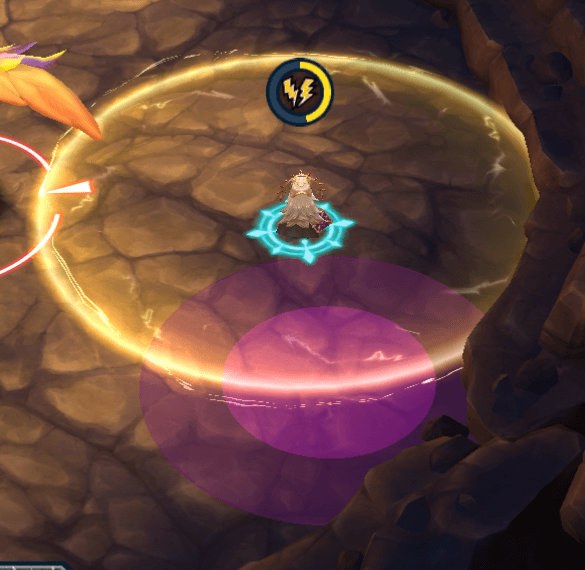
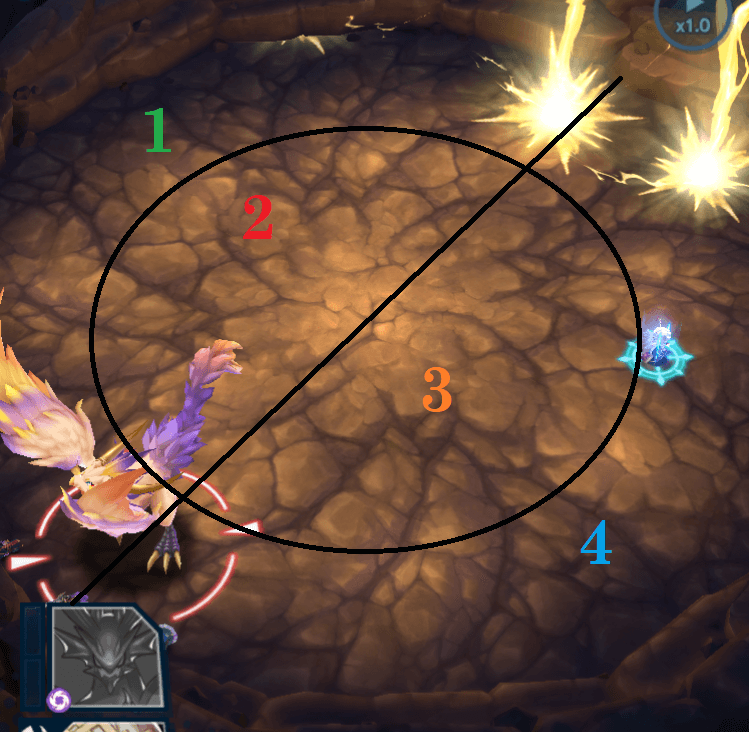
Rolling Fulgor
A lethal wall of lightning forms at the northeast, always with a random lane left empty. This wall will quickly advance from NE to SW as the next Brilliant Blitz is charging.
Caution: Lane hitboxes can be deceptive due to the slanted viewing angle. To minimize parallax errors, it's recommended to wait as close to the map's north side as possible.

-
Brillant Blitz
-
Peck, Dash, Round Bolts
-
Shocking Spark
An unavoidable pulse that serves as a secondary HP check, targeting each player similar to High Midgardsormr's Storm Chaser. Applies (1) Static stack to all party members.
-
Rolling Fulgor
-
Brilliant Blitz
-
Electron Burst
Undodgeable pulse that applies (1) Static Stack to all party members and damages based on individual Static stacks. Any stacks aside from Shocking Spark's will return with a vengeance, as ranged Adventurers need to be close to full HP in order to survive.
An alternative way to survive Electron Burst is to tank the hit during Dragon form. This is a fairly common way for players in public lobbies to deal with this attack, especially for ranged Adventurers. Players will need to ensure that their Static rings do not overlap to prevent a premature end.
Bolt Impact
Three consecutive circular Purple markers target each adventurer. Similar to High Brunhilda’s Meteors, these circles will remain locked at a target location and can be left behind by dodge rolling.
To avoid trapping one another, designate two players to dodge along the map’s outer ring while having the other two remain around the center of the map.
Phase 2
-
Amplify
HJP remains stationary and empowers himself. During this time, players can freely deal DPS without fear of reprisal.
Peck and Dash attacks now apply (1) Static stack. Round Bolts will now be punctuated by a cross shaped pulse emanating from from HJP’s front/rear/left/right. Additionally, HJP will now use augmented versions of Brilliant Blitz, Bolt Impact, Rolling Fulgor, and Electron Burst.
-
Peck, Dash, Round Bolts
-
Radiant Blitz
The Amplified, 8-way variant of Brilliant Blitz, leaving far less wiggle room.
Bolt Barrage
Amplified variant of Bolt Impact where each target circle remains as a shocking field for a short time. To conserve map space, try to overlap the fields as much as possible.
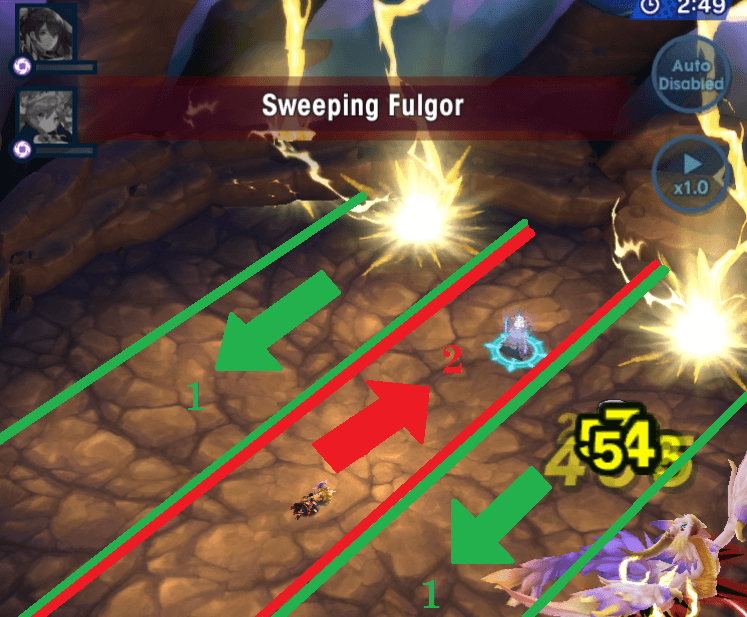
Sweeping Fulgor
As the name implies, this variant of Rolling Fulgor sweeps back and forth. The initial empty lane is always dead center, while the return trip has safe zones that are always one lane to the left and right of the center lane.
Players should wait at the northeast opening (red lane), edging toward the side they wish to enter, then roll once either NW or SE (green lanes) to dodge the return sweep.
-
Shocking Spark
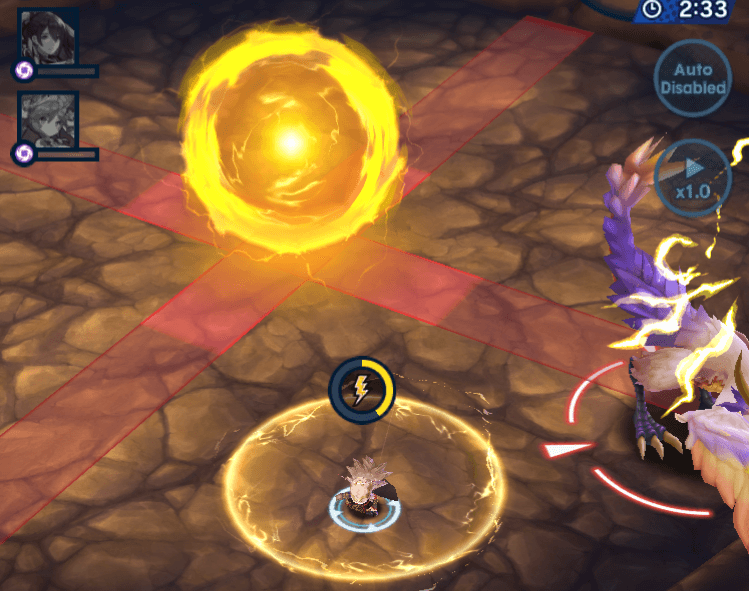
Electro Sphere
A ball spawns at map center and slowly charges a cross-shaped Red marker, splitting the map into quadrants. After firing, the Electro Sphere will begin charging a new cross rotated about 15 degrees clockwise.
Caution: Bolt Barrage will immediately follow this first Electro Sphere. Attempt to spread one player into each quadrant to avoid trapping, with melee adventurers taking the two closest quadrants.
-
Bolt Barrage
-
Electron Outburst
Amplified version of Electron Burst. Players with (2) Static stacks take significantly less damage from Electron Outburst and may opt to either increase their stack by rolling into the center Orb for minor damage, or tank Outburst by Shapeshifting. As with Electron Burst, the latter is a popular method for surviving the attack, especially since this variant is much stronger.
If High Jupiter does not reach his first Break state by this point, the party’s DPS is most likely insufficient for this fight.
-
(Amplify times out)
-
Peck, Dash, Round Bolts
-
Bolt Impact
-
Rolling Fulgor
-
Brilliant Blitz
Phase 3
-
Amplify
-
Peck, Dash, Round Bolts
-
Bolt Barrage
-
Radiant Blitz
-
Electro Sphere
At this point, High Jupiter should be nearing death. For players readying their Shapeshift for the next Electron Outburst, take care not to do so too early, as this phase contains an additional Sweeping Fulgor that drains precious Dragon Time.
-
Shocking Spark
-
Sweeping Fulgor
-
Bolt Barrage
-
Electron Outburst
Once again, players may opt to increase their Static stacks to (2) using Electro Sphere or Shapeshift and use their Dragon Skill for iframes.
-
(Amplify times out)
-
Peck, Dash, Round Bolts
-
Rolling Fulgor
-
Bolt Impact
-
Brilliant Blitz
Rewards


-
Conqueror of Light epithet
-
High Jupiter: 5★ Dragon purchased with Lightwyrm’s Greatspheres
-
Light Fafnir Statue: purchased and upgraded with Lightwyrm’s Greatspheres
-
Ripe / Succulent Dragonfruit, Talonstones, Lightwyrm’s Greatspheres, Lightwyrm’s Glowscales