Time to Get Completely Annihilated... Again!
If you are working on getting a 400-kill run on Lungmen: Outskirts, then you already know what Annihilation Mode is all about, so let’s jump into the strategy!
We will walk through a strategy for getting a 400-kill clear for the second Annihilation Stage: Lungmen Outskirts. This is not the only way to clear this map! Several different strategies can work, so we encourage you to search for other strategies if you are failing to succeed with this one.
First we will go over recommended team composition, followed by a step-by-step walkthrough including screenshots of Operator positions.
Team Composition
D1: 1 Defender. D1 must be able to block at least 3. Higher Def is preferable. The biggest threat for the Defender comes from hard hitting physical enemies, so high Defense and Defense Skills are preferable.
Being able to block 4 is a huge advantage to give the player some breathing room on the DPS checks. Considering the insane DEF multiplier on her Skill 2, Cuora is a great 4-Star choice for the job. She is recommended even for people with higher rarity defenders, due to her being much easier to raise to an acceptable level compared to the likes of Hoshiguma or Liskarm. It is likely possible to do it with other 4★ or below Defenders, but honestly, there is no reason to do that since you can get Cuora with Shop Vouchers. For D1: Cuora. Just get her, use her, and thank me later.
M1, M2, and M3: 3 Medics. 1 AoE and 2 Single Target Medics are preferable, though 3 Single Target Medics can work as well. M1 will be our AoE Medic, M2 will be our strongest ST Medic, and M3 will be our weaker ST Medic. For M1: Perfumer < Ptilopsis < Nightingale. For M2 and M3 (and M1 if we don’t have an AoE Medic): Hibiscus = Ansel < Gavial = Myrrh < Warfarin = Silence < Shining.
C1: 1 AoE caster: Lava < Gitano < Skyfire < Eyjafjalla (Skill 2) = Ifrit (her range might be an issue, but facing her down instead should work).
SP1 and SP2: One Special Class that can “Push” and one Special Class that can “Pull”. Both must have Skill Level at least 4 and have Skill 1 equipped. Skill Level matters more than Operator Level, as long as SP1 has enough health to survive a few hits. Our SP1 will be our Push Operator: Shaw or FEater. SP2 will be our Pull Operator: Rope or Cliffheart.
G1: 1 Guard, the stronger single target damage the better. Melantha is a sufficient and very accessible option.
F1: 1 Flex option. Should be a ranged single target damage dealer. A common choice would be a single target Caster, Sniper, or Supporter.
Recommended Levels
The levels required of your Operators to succeed will depend somewhat on which Operators you have, their rarities, strengths, etc. A good guideline would be to have your Healers and Defenders at least E1 Lvl 40 to be safe, with DPS units at least E1 Lvl 25. Vanguards, Medics, and your Push Specialist can be at slightly lower levels. (Your Pull Specialist, Rope or Cliffheart, mostly just needs the Skill level to be 4 or more.)
It is possible to do it with lower level Operators, but, obviously, the higher their levels and skill development, the easier success will be achieved. If you are failing and making no mistakes, then it might be best to enhance your Operators!
- Tip: While it is recommended to eventually clear Annihilation: Lungmen Outskirts with your own units to unlock Auto-Redeploy, it is worth using a strong friend support if it will help you get more kills and more one-time rewards as well as raise the weekly Orundum limit more than would be possible with your own units only.
- If borrowing a friend support, Exusiai, Meteorite, and Skyfire are great DPS pickups. If you already have plenty of DPS and are having survivability issues, taking a strong Medic, especially an E1 Shining with Skill 2, can help keep your Defender alive at critical times.
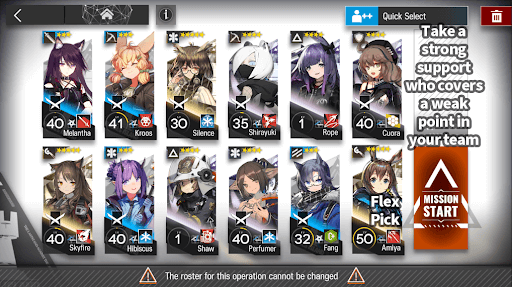
Here is an example of a team that can work (It is not a recommended team, just an example of a team comp that can work):
Common Troubles
Here are some of the problems players have with this map. Preview them now to avoid mistakes, and come back to them after failed attempts for insights on how to improve.
Enemy units are leaking past Cuora.
-
Better DPS is needed, typically from S2 or C1, but also possibly S1 or G1. Choose burst Skills if possible and use them at appropriate times.Develop your DPS units to at least E1Lvl40, and raise Skills to 4 or 5.
Cuora is dying.
-
Ensure that Cuora has her Skill 2 selected.
-
Time her defensive skill to coincide with the high incoming damage periods, especially when the Hateful Avengers are at around half health.
-
Develop Cuora to at least E1 Lvl40, and raise her Skills to Lvl 4 or above. Additional DEF percentage boosts can exponentially reduce damage taken, so high Skill level is very helpful for tanking through threatening enemies you cannot kill quickly.
-
Choose Medic Skills that provide increased Defense or burst healing, and time the use to coincide with high incoming damage periods. Also make sure your positioning is correct and that Cuora is within the range of both (or at times all 3) Medics.
SP1 is dying when they are placed above the exit.
-
SP1 needs to be placed before M1 in order to survive.
I don’t have enough DPS to kill the Wraith Leaders.
-
That is expected. Make sure SP1 is placed correctly to push them to oblivion.
SP1 or S2 is dying during the Caster rush.
-
If SP1 is dying, make sure you are eliminating that very first Caster. If SP1 is dying after that, or if SP2 is dying ever, then you need to develop your M1 to at least E1Lvl40, and raise Skills to Lvl 4 or 5.
Aerial Drones are getting through to the North.
-
Try facing S1 up (instead of left) to offer more aerial support.
Cliffheart is failing to pull enemies to their death!
- I’ve heard some players are having problems with Cliffheart pulling enemies into the wall instead of the pit. Not much can be done about this one if it is the problem. Rope is the alternative to Cliffheart, so use her instead.
DPS or Medics are dying before the Defender.
-
The Defender must be deployed last! Enemies prioritize attacking the latest-deployed unit in their range. Follow the deploy order exactly as described in the guide (don’t deploy too early or too late) and enemy aggro will properly target the Operators we want them to (here it is typically the Defender or Medic).
I don't have enough DP to follow the recommended Deploy order
- Have your Vanguard use Skill 1. Skill 1 will give more efficient and guaranteed DP over time. The bonuses from other Skills are not necessary for map clear.
Strategy
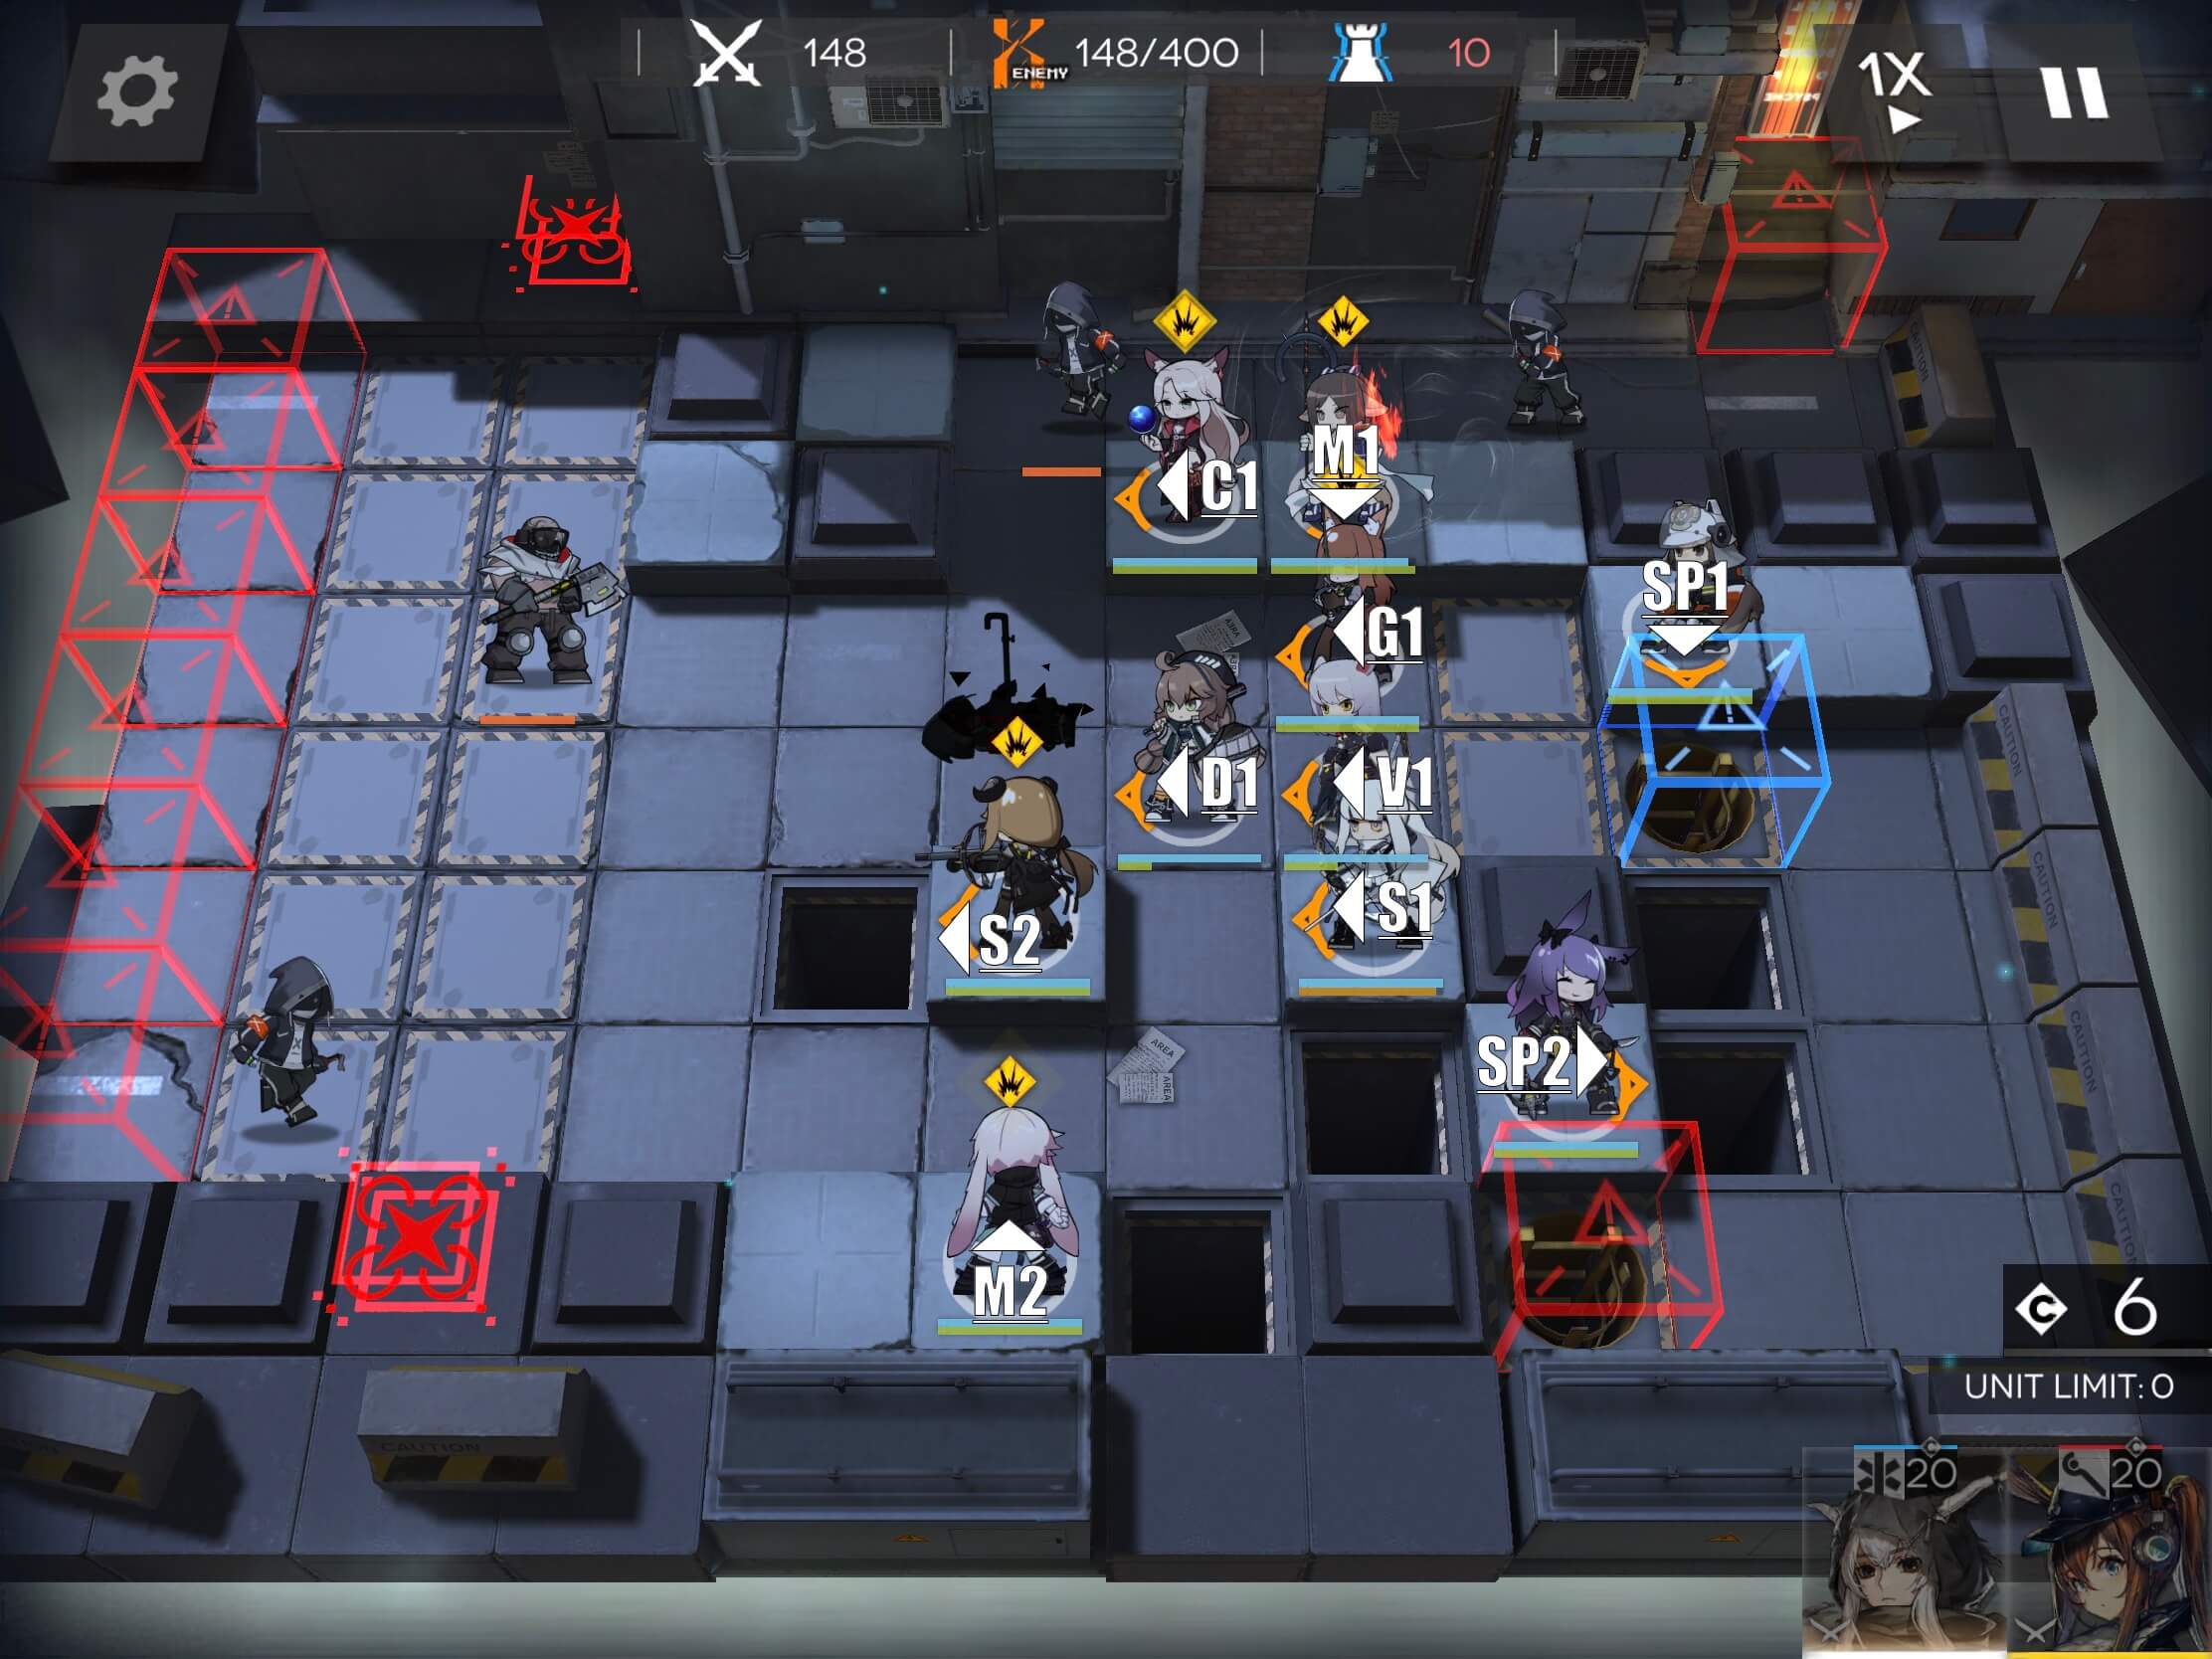
Set up your first formation as seen in the image below. Placement order should be done as follows, and can be placed as soon as there is sufficient DP. Note that placement order is important, as enemies will target the most recently placed Operator in their range. Placement can be seen in the image below.
V1 -> C1 -> S1 -> SP1 -> M1 -> G1 -> S2 -> M2 -> SP2 -> D1
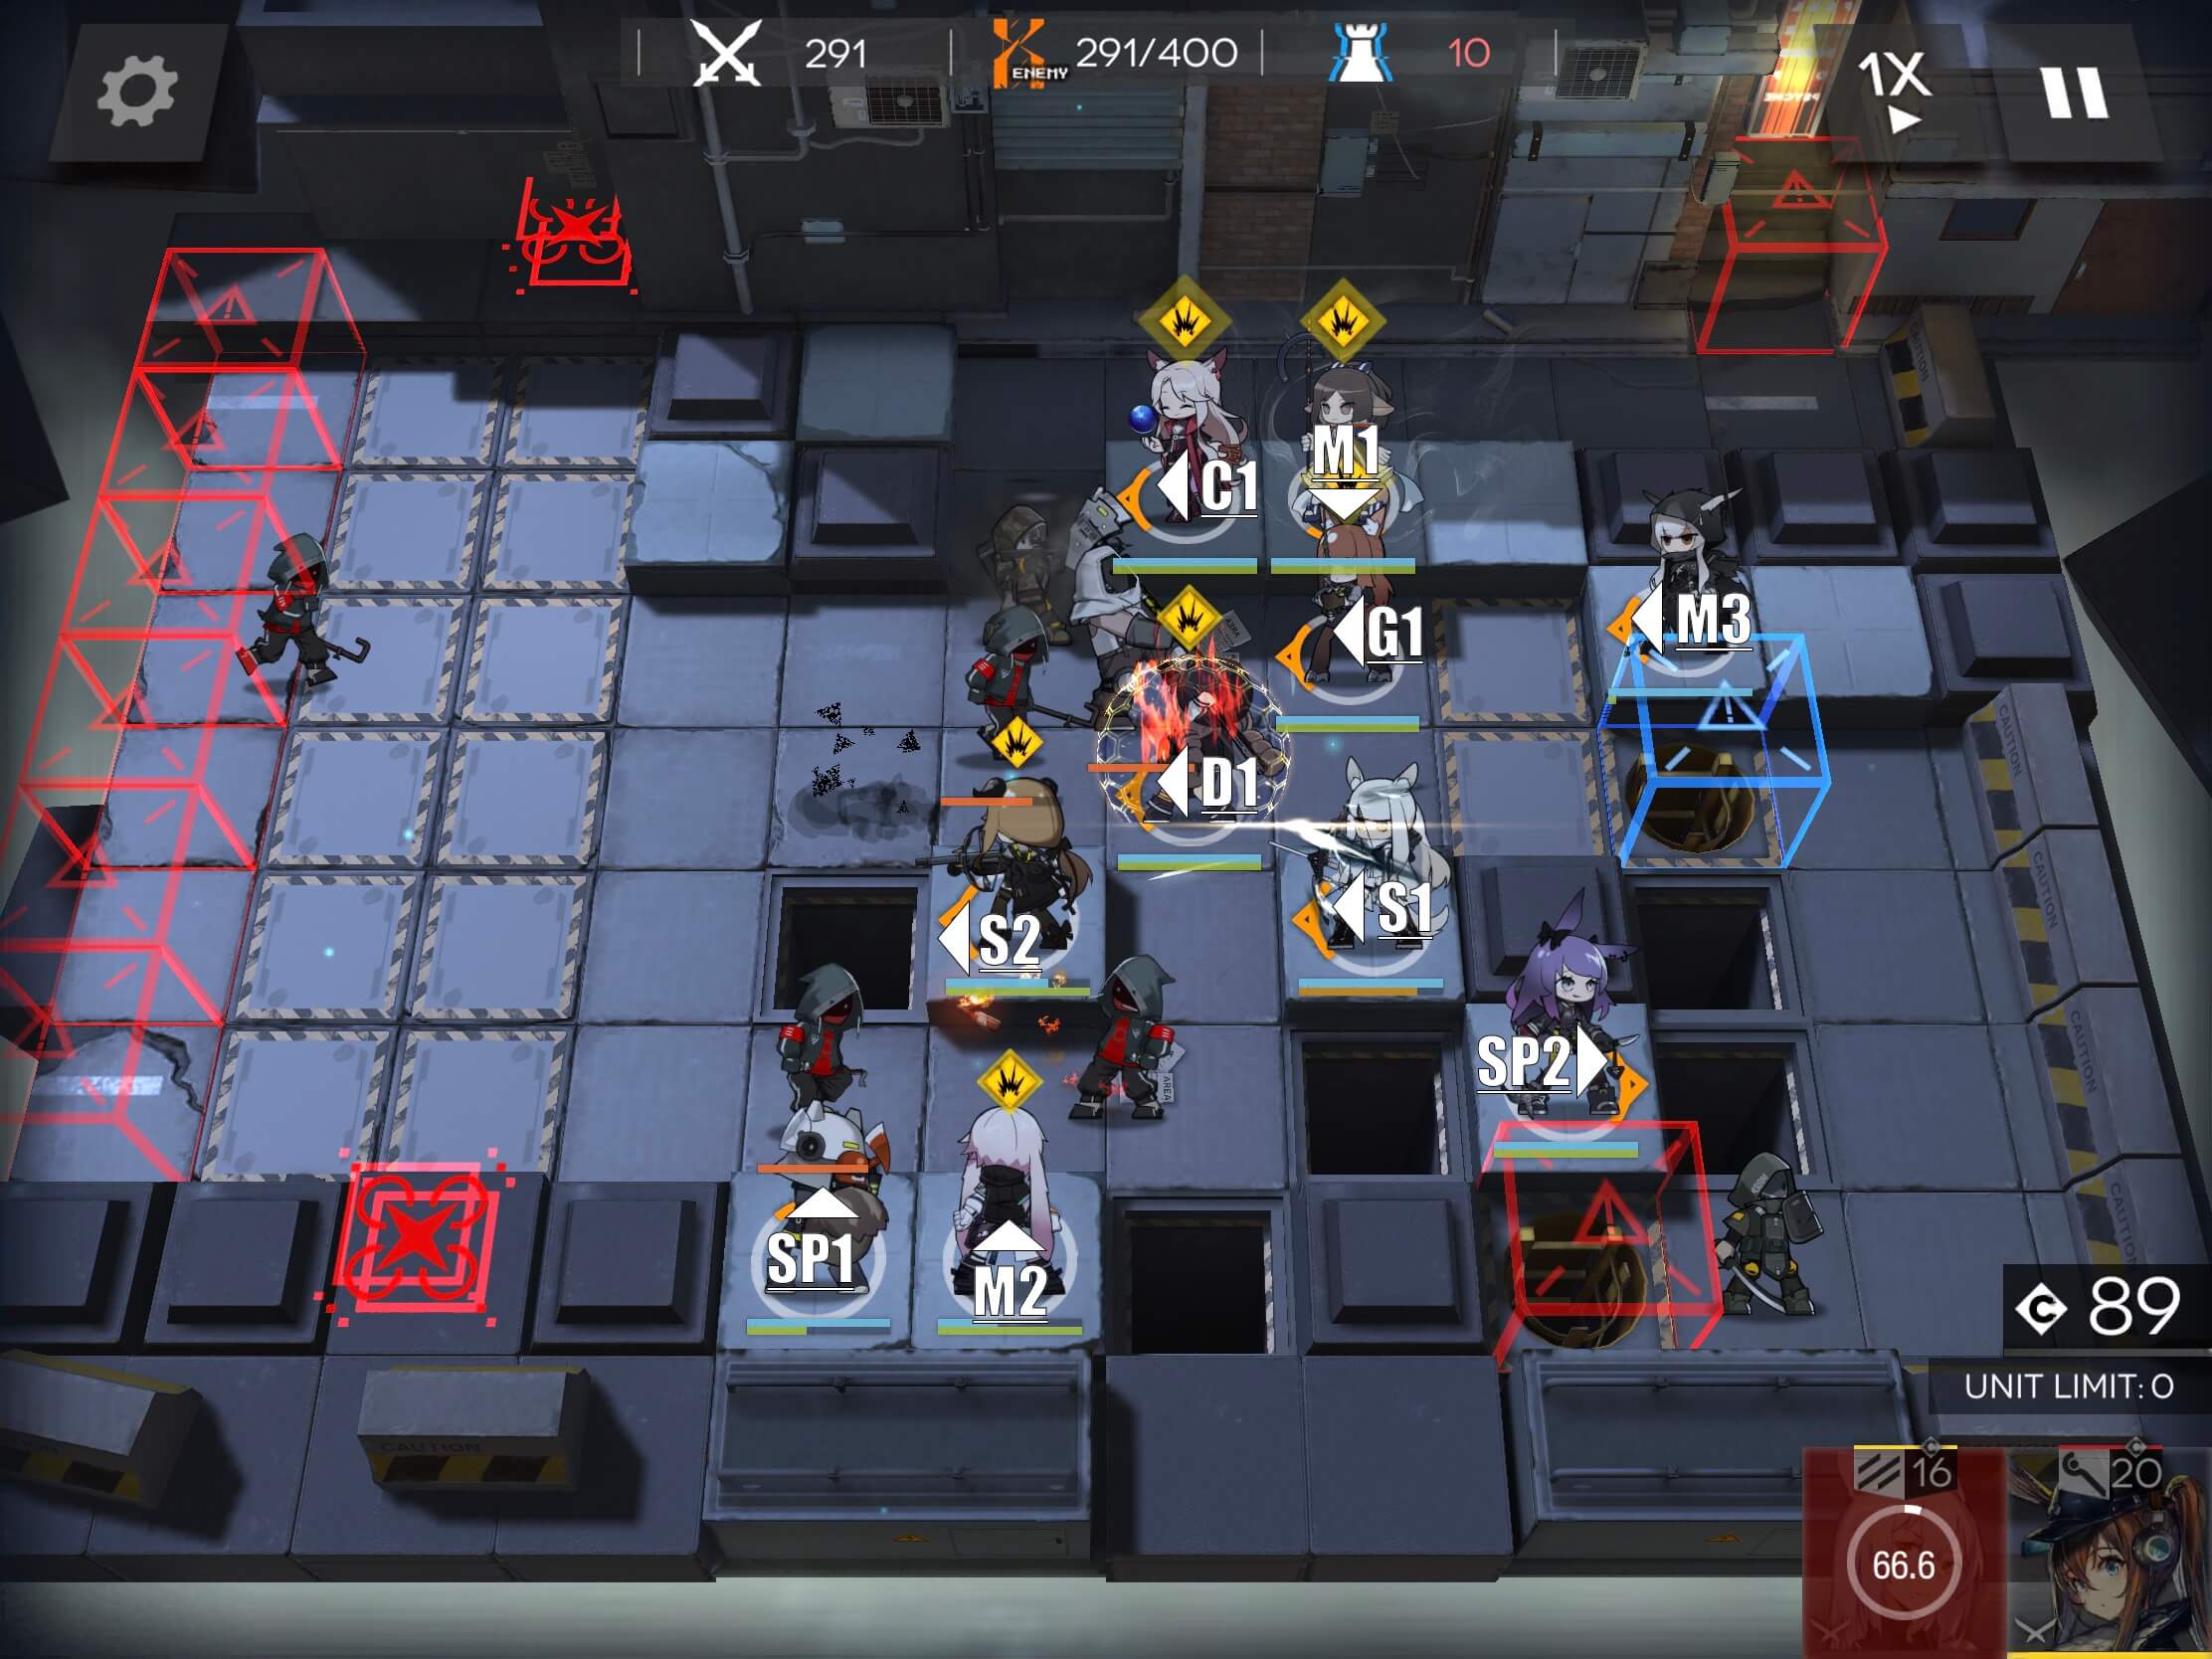
It is important to make sure you place your SP1 before your M1, and deploy your D1 last. By around kill 155 your entire team needs to be on the map. Your formation should look like this:
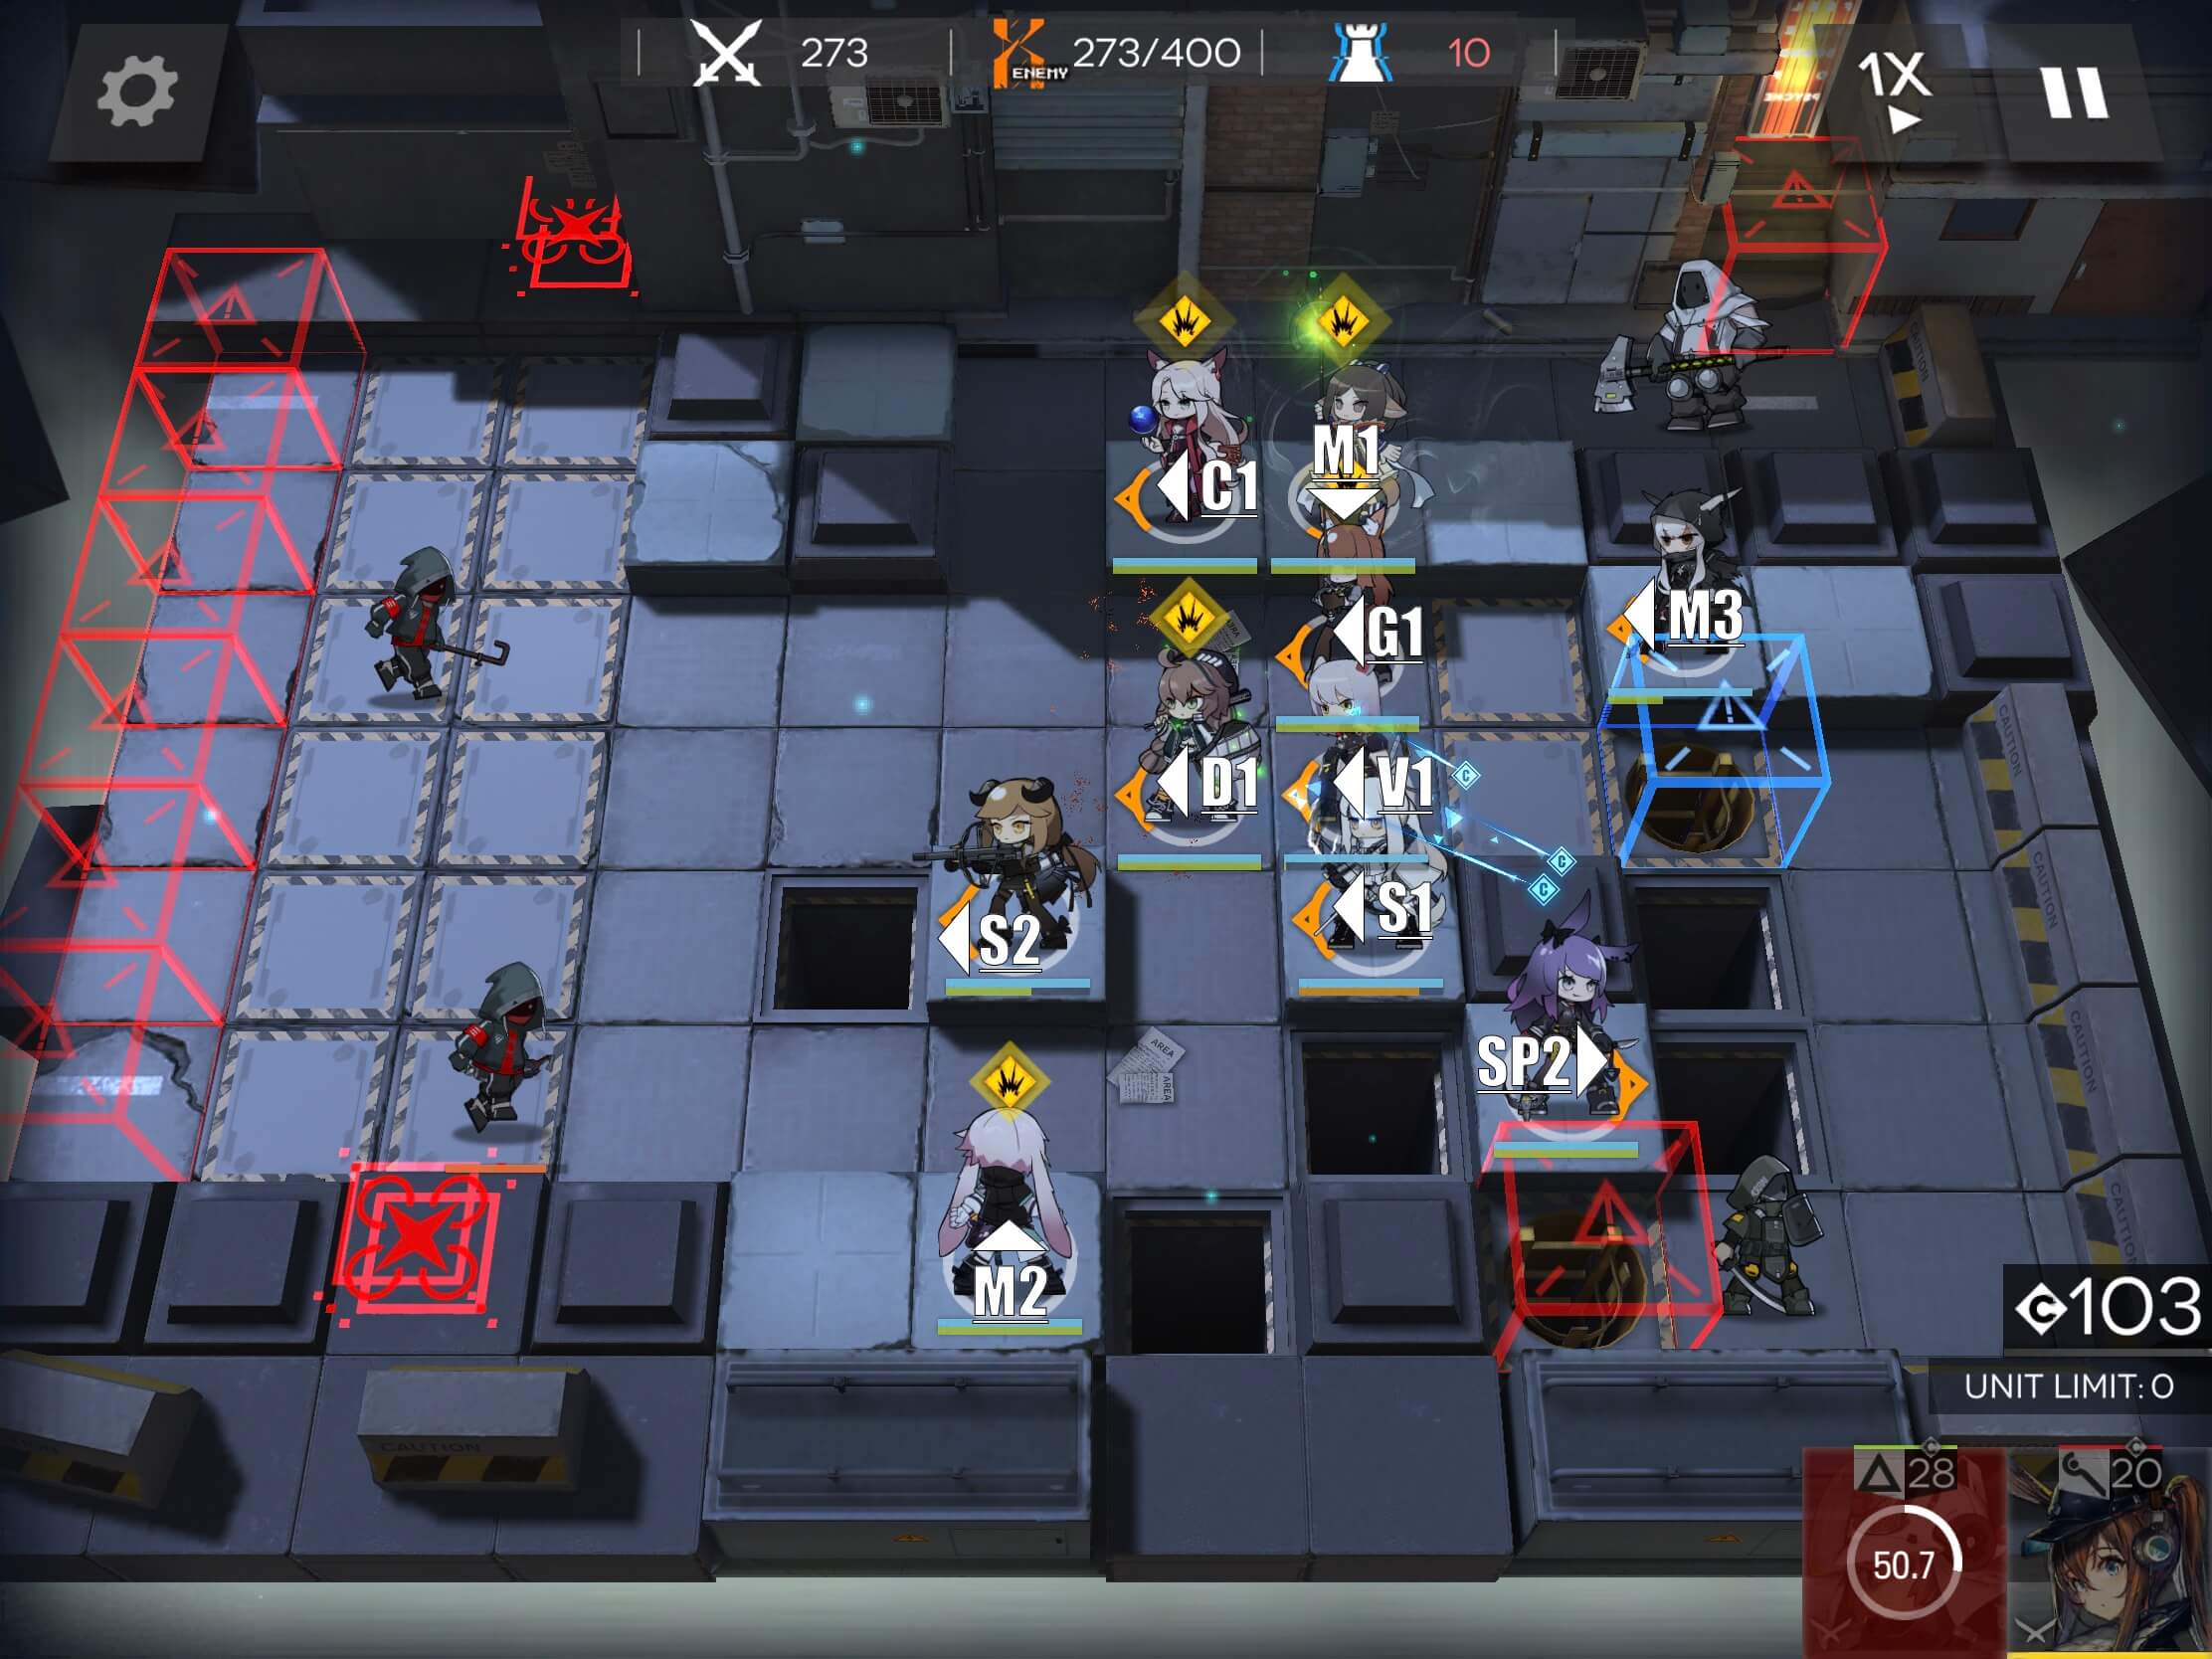
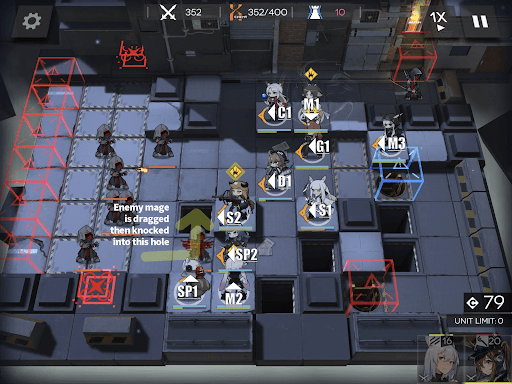
Now we’ll have a bit of a breather until our next action at 264 kills after SP1 pushes the second Wraith Leader into oblivion. Once that is done, retreat SP1 and replace them with M3. Our new formation should look like this:
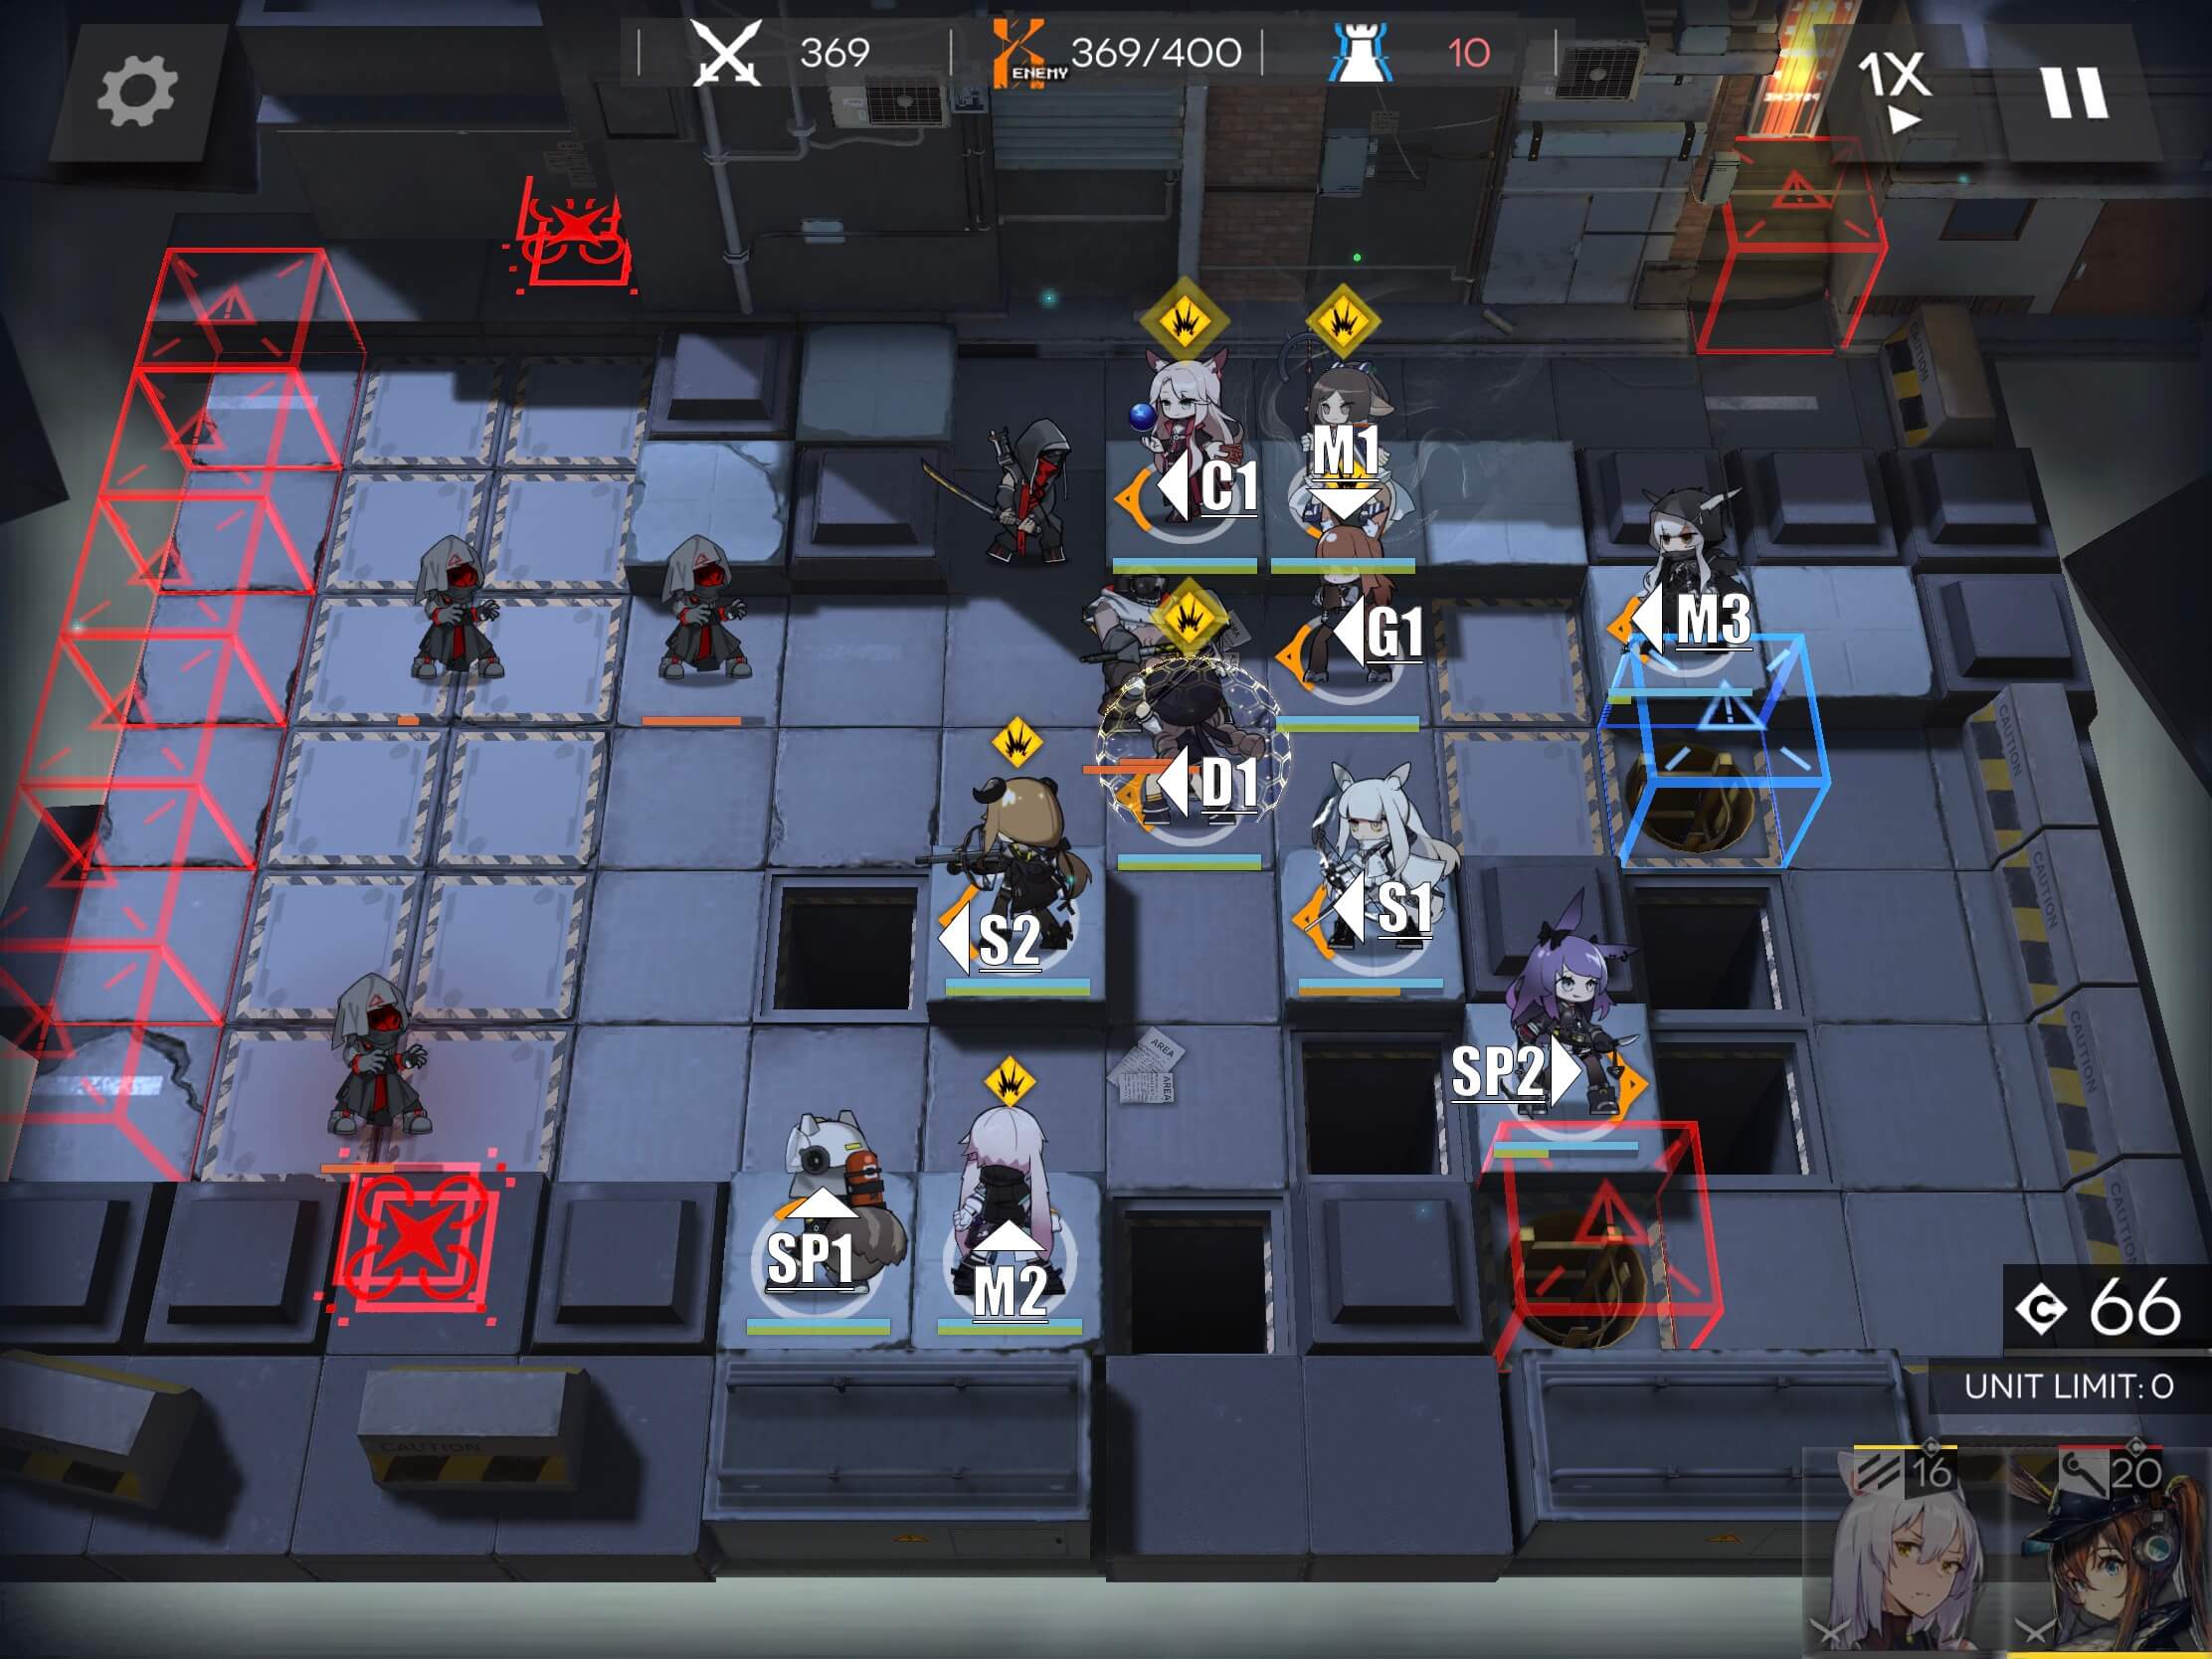
Once SP1 can be redeployed again, we will retreat our V1 and place our SP1 on the map like this:
At 325 kills a Hateful Avenger (red mask with a katana) will be heading toward your Cuora. These guys have a lot of HP and they start hitting like a truck when under 50% HP, so use a defensive skill to survive it. There will be a lot going on at this point, so it is a good time to use all your cooldowns to stay ahead.
At around 333 kills the last enemy (an Avenger: yellow mask katana guy) that needs to be pulled into the pit of doom will be dispatched by your SP2, and she can be retreated. The mayhem in the center will continue. If you are not able to keep up on DPS, you can place your V1 in front of or behind the D1 to help block (in front is preferred so S2 can contribute).
You will be getting another Hateful Avenger in that mess in the 340s, so remember to use another defensive skill at 50% HP if needed. Once he’s dead you’ll be at 350.
We will now be heading into the Caster rush phase. We are going to place our SP2 to pull the leading Caster in the bottom lane into range for our SP1 to push. If we don’t do this it is likely our SP1 will die. After placing our SP2, our map looks like this:
As soon as the Caster has been pulled and pushed to death, we need to retreat our SP2 for later use. Enjoy the Caster slaughter, and when she can be re-deployed again, place SP2 where she was earlier. Your map should now look like this:
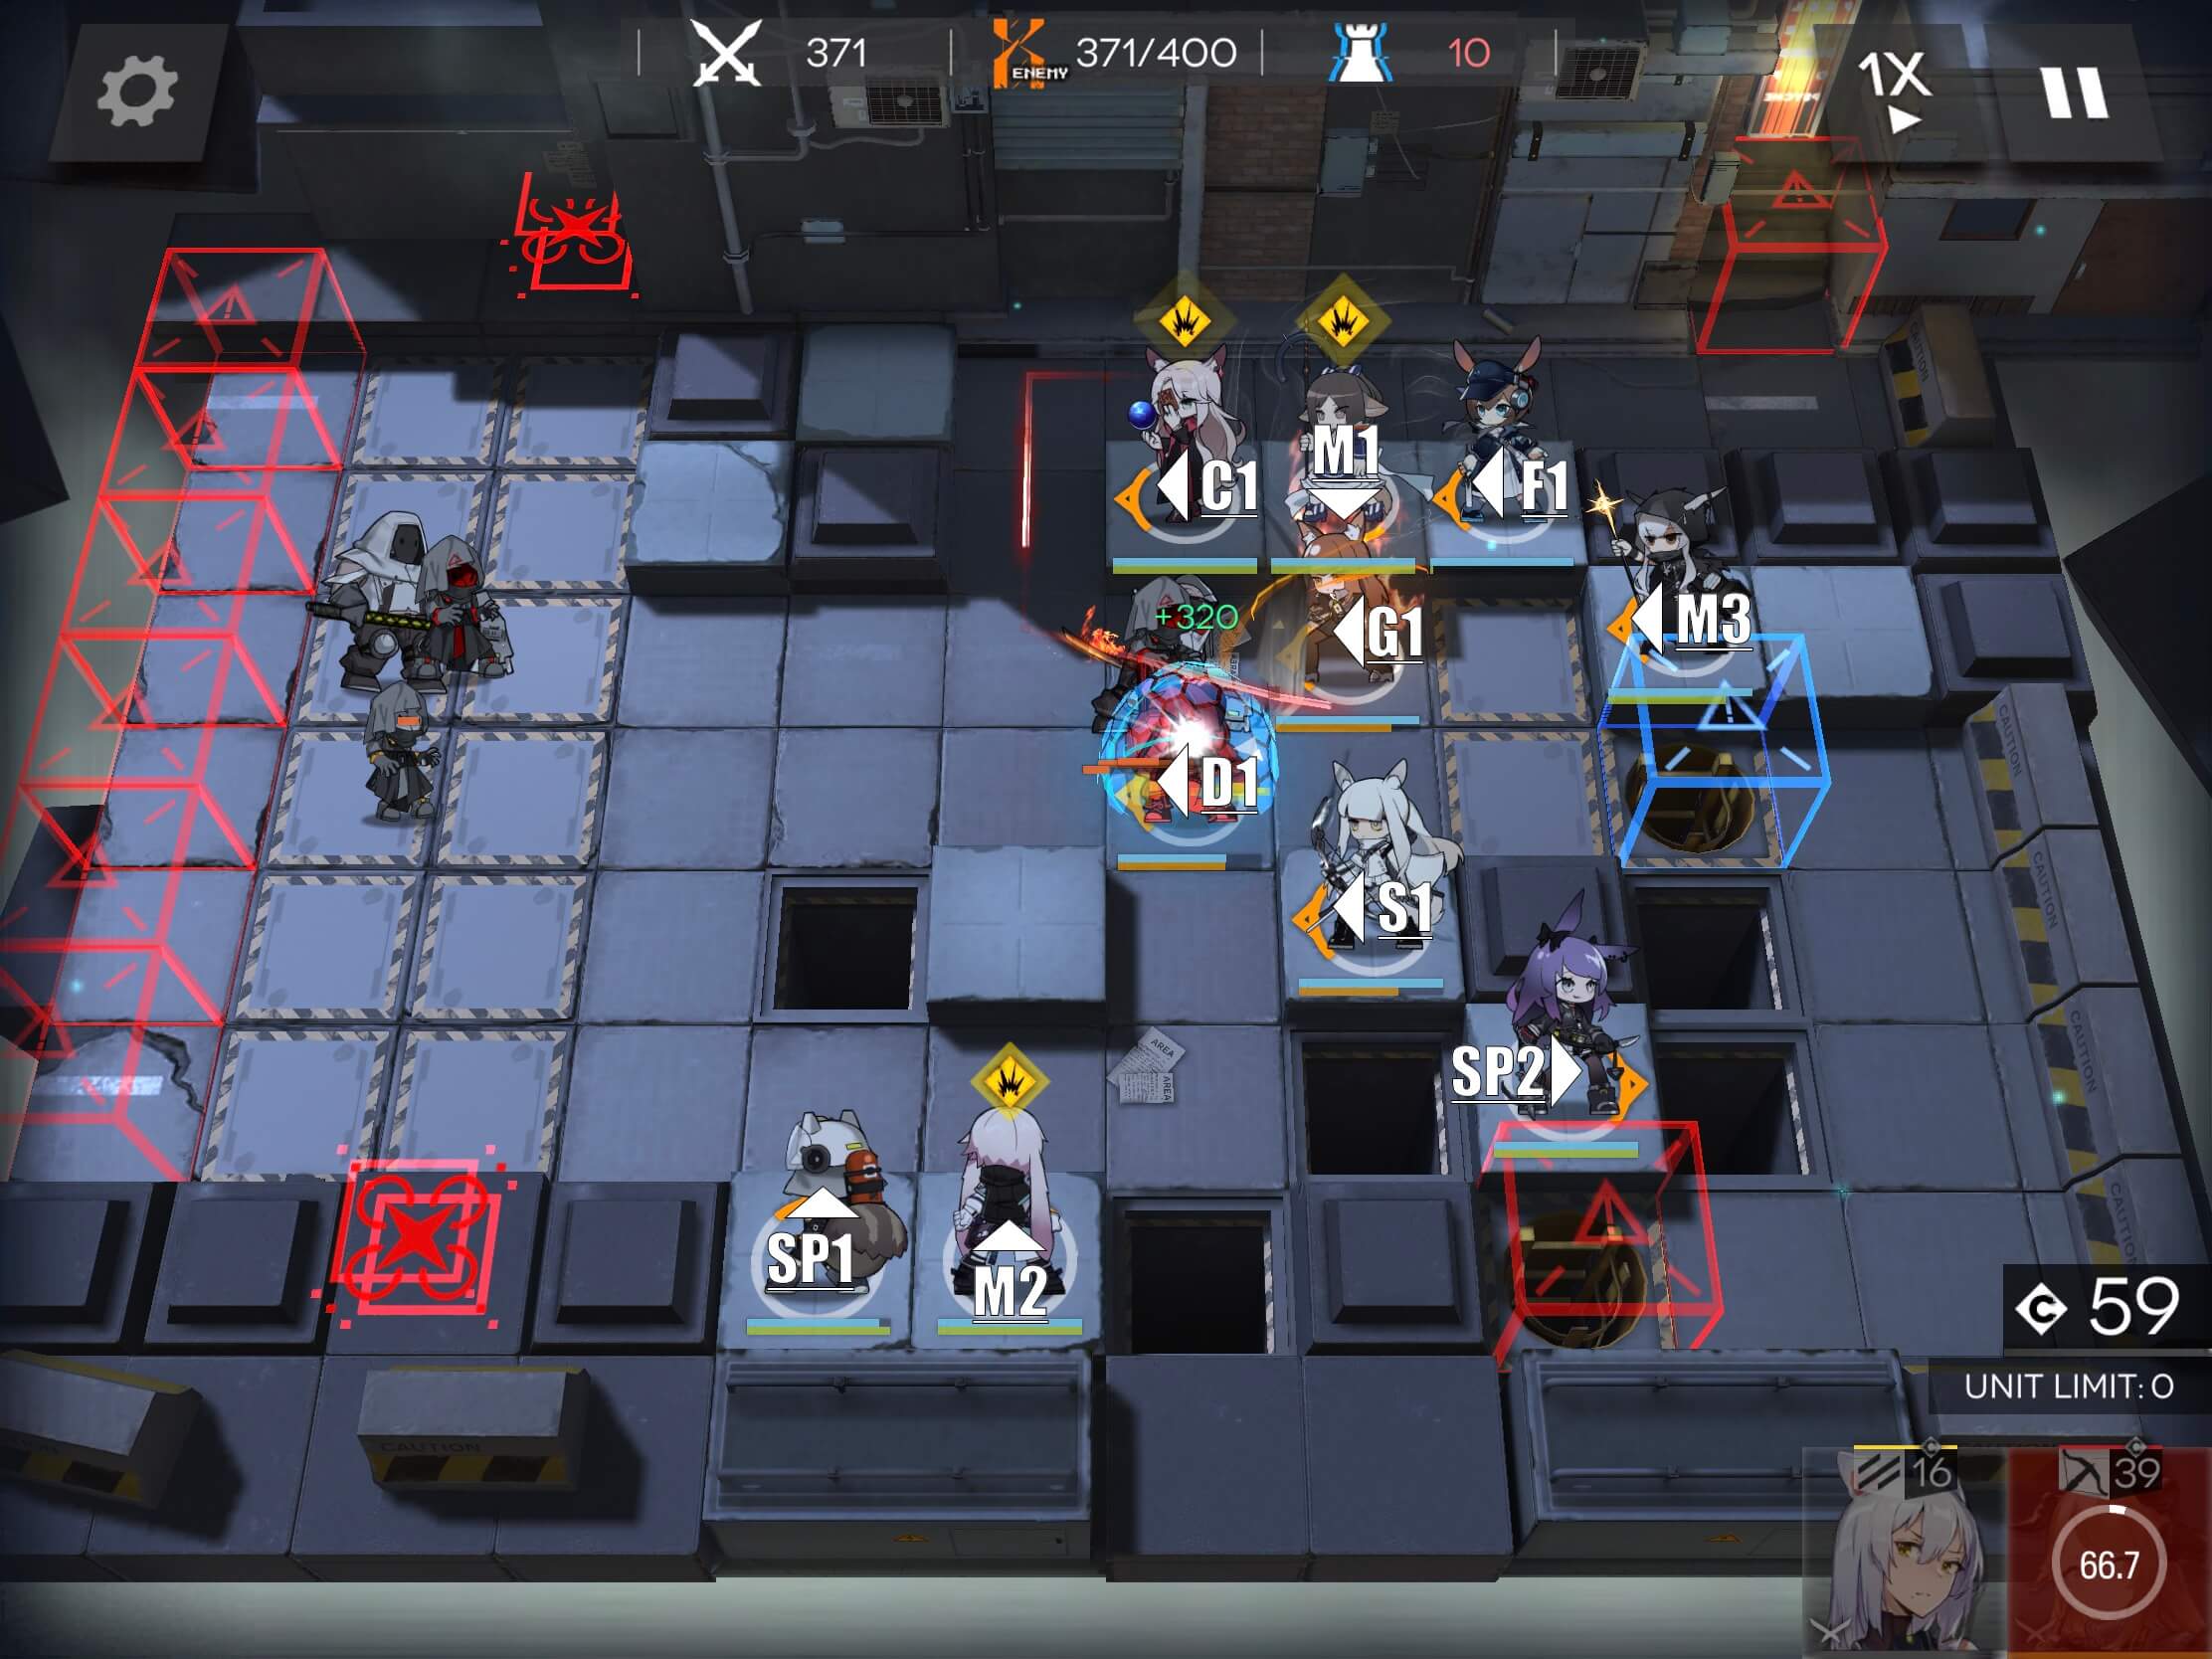
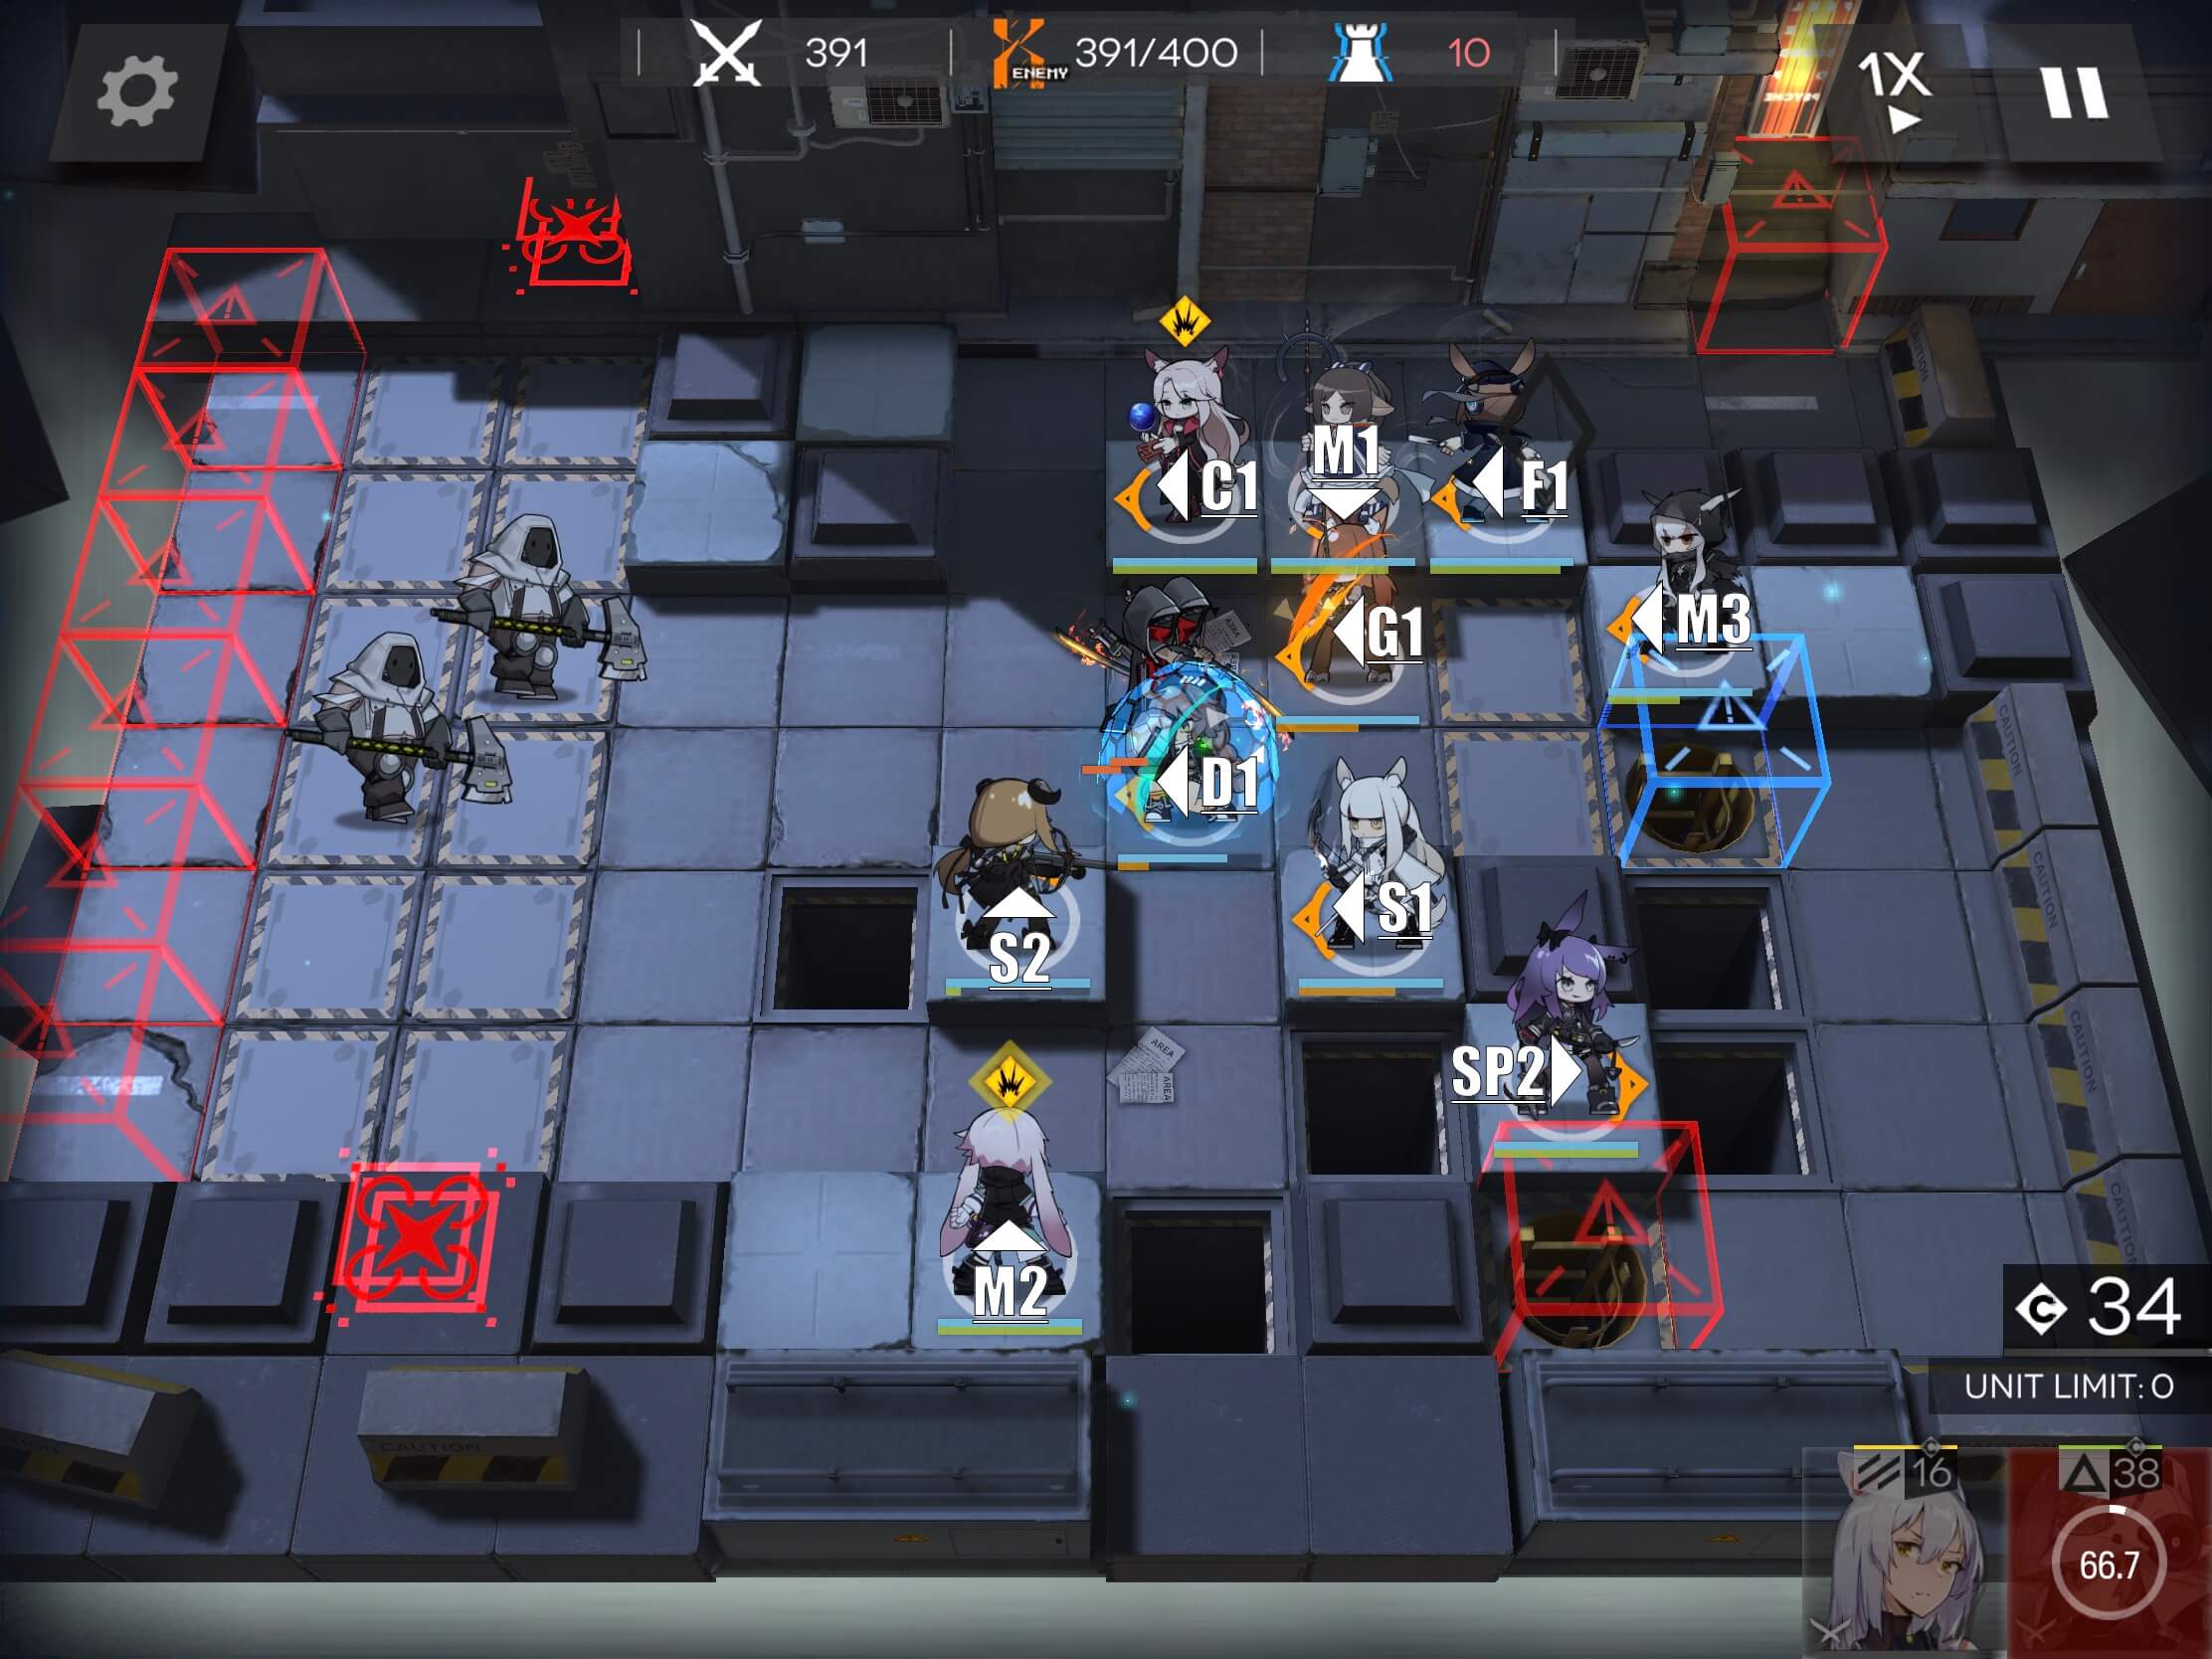
You will have another Hateful Avenger coming in from the top, so don’t forget to use whatever Skills are needed to get through his low health phase. Once the majority of Casters are gone from the map and there is only a single Caster in the bottom lane, we will retreat our S2 and place our F1 to help with a rush from the top.
Our map now looks like this:
Starting at around 380, a couple more Hateful Avengers will come down the middle-top lane, so be aware.
- Tip: When the two red-masked Hateful Avengers reach close to 50% health, activate Cuora’s +DEF skill and all your DPS skills. The damage they deal is no joke and they must be finished off before your defensive skill runs out, or the run may brick!
At around 388, the last of the Casters will be pushed into the Chasm of Eternity and 2 big Butchers will start down the middle lanes. Retreat SP1 and re-deploy S2 like so:
If you have survived this far, the rest should just be mopping up what is left! Congratulations on the higher Weekly Orundum cap from Annihilation!