Table of Contents
Character Stats
| Critical |
|
|---|---|
| Ki Restore Speed |
|
Character Info
| Battle Style | |
|---|---|
| Melee | |
| Arts Cards Held | |
| Tags | |

|
|
Overview
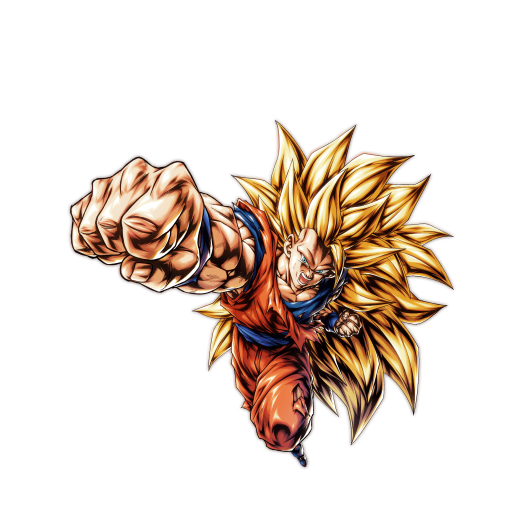
LL SP SSJ3 Goku (Dragon Fist) GRN is the 4th Year Anniversary Part 2 headliner Fighter and he has not disappointed. He’s one of the best offensive Fighters in the game with his fantastic Damage upon entry coupled with a subtle ramp-up Ability and his cover-nullification allows him to do that success early on.
Similar to LL SP MUI Goku RED, the Part 1 headliner Fighter, SSJ3 Goku has a unique gauge that works quite differently from the ones we’ve seen before. His gauge takes at least two combos to be filled and he gets some powerful effects that can change the tide of battle in an instant such as his vanish manipulation and his lock-in Special Move Arts.
Defensively, this Fighter has a 60% Damage reduction and heals on every Strike and Blast Arts but due to the sheer offensive power that most Fighters have today, he cannot take hits very well.
Strengths
Winning Trump Card
As mentioned in the Overview, LL SP SSJ3 Goku (Dragon Fist) GRN’s Unique Gauge provides him with powerful effects that can win you games with ease. Once his gauge has been filled, his Main Ability becomes one of the best Main Abilities in the entire game. He gets a 30% self-heal, + 1 to his Arts Card Draw Speed for 15 timer counts which will make him have LvL 2 Card Draw or a short period of time, 30% Damage Inflicted and he gets Vanish Manipulation due to his Unique Gauge. He removes the enemies Vanish while simultaneously replenishing his.
This Ability can be used defensively or offensively depending on the situation as defensively, you can regain your vanish if you can’t swap out or if you’re trying to manipulate a perfect vanish. Offensively, you can guarantee that his powerful Ultimate Arts will hit every time which can be a one-shot on any Fighter in the game as he also gets 3 timer counts of type-neutrality once it’s been activated.
Once his gauge has been filled he also becomes an effective sniper to due to his Special Move Arts locking the enemy in for 3 timer counts upon activation. This makes it easy to kill Fighters that are below a certain HP threshold.
The Dragon's Wrath
LL SP SSJ3 Goku (Dragon Fist) GRN is one of the best Damage dealers in the game as mentioned in the Overview. Upon entering the battlefield he gets 120% Damage Inflicted coupled with +1 to Arts Card Draw Speed. With the 30 Ki he gets on entry as well, this makes SSJ3 Goku a combo machine that cannot be stopped due to him getting cover-nullification for 10 timer counts up to two times when he enters the battlefield.
This game design shows that the developers wanted his gauge to easily be activated as it would be disastrous if his early game combos could be halted by Fighters with Cover Changes. Once his Main Ability has been activated, he gets even more Damage to go along with one of the most powerful Ultimate Arts cards in the game. As mentioned in his previous Strength, if used correctly this can decimate any Fighter in the game with ease.
His Damage coupled with his combo potential and insane post gauge effects makes this Fighter one of the scariest to go up against to date.
Weaknesses
Defensive Woes
LL SP SSJ3 Goku (Dragon Fist) GRN is not good defensively which is the case for most Fighters nowadays. Fighters such as LL SP MUI Goku RED and SP LL 17&18 RED can tear through him with ease. This is due to his not-so-great HP stat and defensive stats.
Gauge Can Take Awhile
Fighters that destroy Cards when cover changing such as SP LL Future Gohan YEL, and SP LL Perfect Cell PUR can put a halt to SSJ3 Goku’s combo which will result in his gauge taking longer than usual. Fighters that reduce Ki when cover changing can also slow down LL SP SSJ3 Goku (Dragon Fist) GRN a bit but overall you should get his gauge to full during the early-mid stages of a match
Team Synergy
Sagas From The Movies

LL SP SSJ3 Goku (Dragon Fist) GRN and SP Tapion YEL have revived Sagas From The Movies from the dead. These two Fighters coupled with either UL Gogeta BLU or SP LL SSJ Youth Gohan PUR can go up against any team in the game. You have insane Damage dealers in the form of SSJ3 and Ultra Gogeta, Tapion can act as Rising Rush Fodder and a supporter to push their Damage even further and Revival Gohan can take Rushes and come back to destroy enemies this his frightening post-transformation Damage. This team is easily a top-three team in the game and it’s mainly due to LL SP SSJ3 Goku (Dragon Fist) GRN.
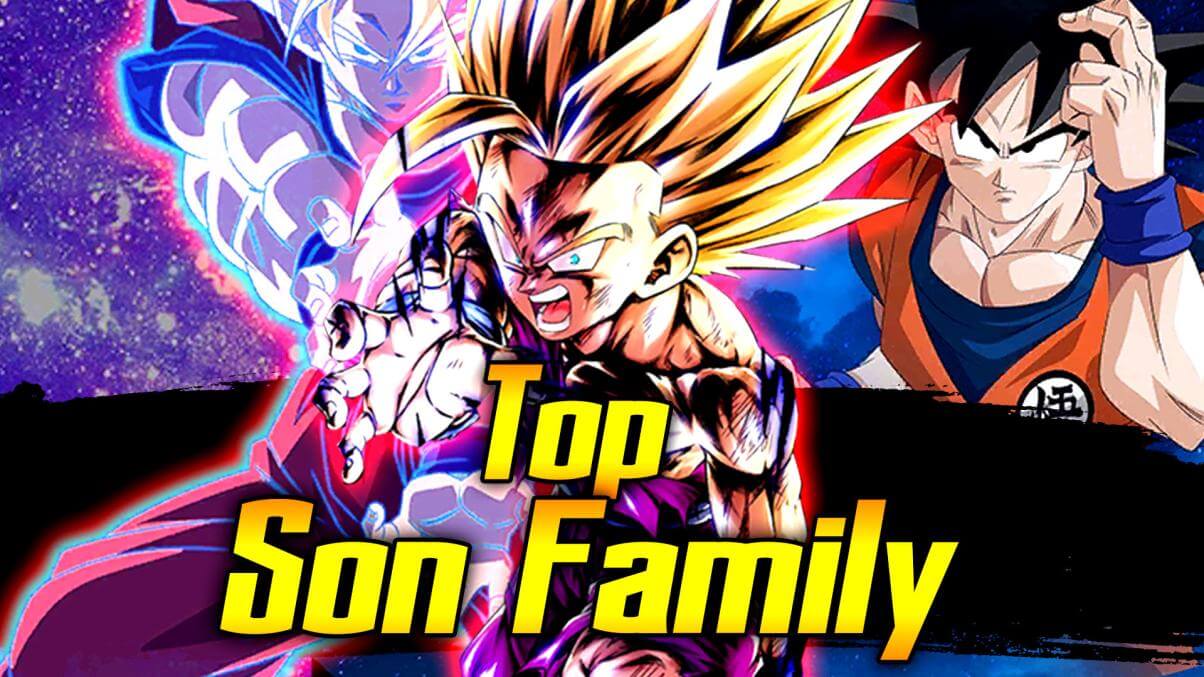
Son Family

Son Family needed a GRN Fighter for the longest time and now they have a top-five Fighter as their GRN. The team has an array of options that you can bring into battle. From LL SP SSJ3 Goku (Dragon Fist) GRN to SP LL MUI Goku RED to SP LL SSJ4 Goku YEL to SP LL SSJ Youth Gohan PUR. All these Fighters are offensive powerhouses so there’s nothing to worry about in that department however, they do not have a designated “tank” or support Fighter which makes it a kill or be killed, team.
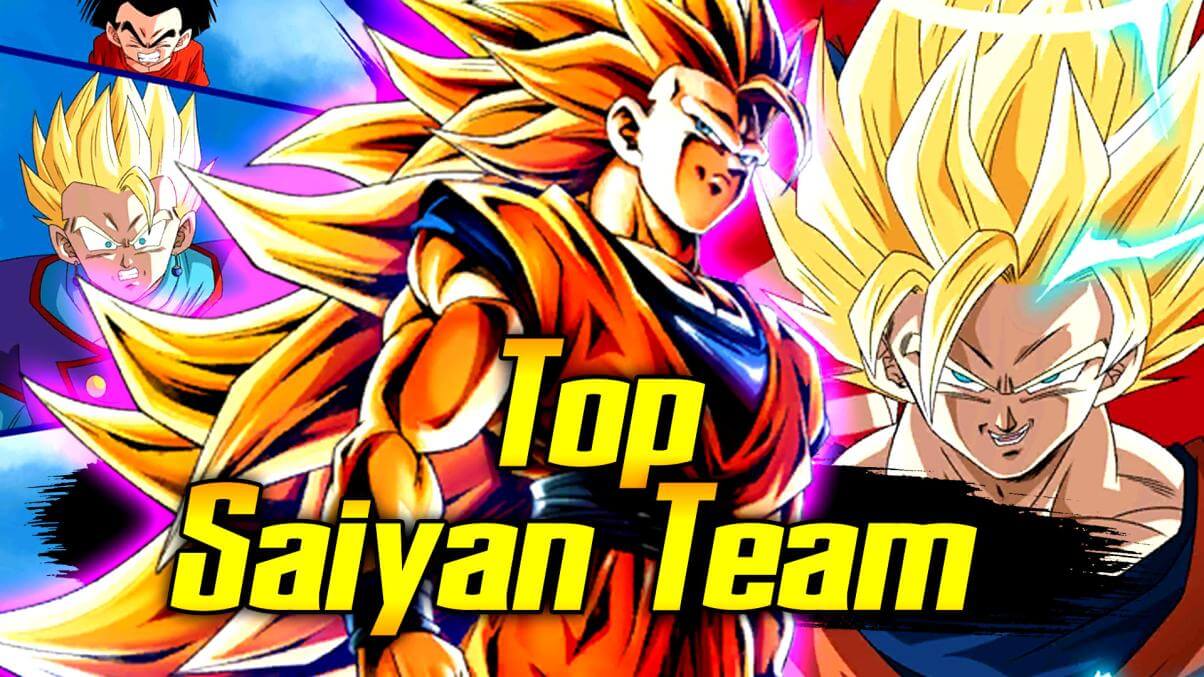
Saiyans

The release of LL SP SSJ3 Goku (Dragon Fist) GRN alongside LL SP MUI Goku RED has made the Saiyan team a cohesive team that can decimate the opposition. Alongside UL Gogeta BLU, SSJ3 Goku can plow through the competition with his insane Damage output. The Saiyan team doesn’t have much going for them in regards to defense, but their offensive capabilities are amongst some of the best in the game. SSJ3 Goku also has a fantastic Z-Ability for the team with his double offense Z-Ability.
Teams Featured In
Parent ID: 44301
Parent ID: 82091
Equippable Items
Main Ability
| I'm still standing! Come on! |
|---|
Randomly destroys one of your own Cards. The following additional effects occur if this character's Unique Gauge is full: Restores own Vanishing Gauge by 100%. Requirements: 25 timer counts must elapse. |
Unique Ability
| A Guardian's Duty |
|---|
Applies the following effects to self when battle starts: +90% to damage inflicted (cannot be cancelled). Applies the following effects to self when this character enters the battlefield: Restores Ki by 30. Charges own Unique Gauge by 100% when this character uses a Strike or Blast Arts Card if there are 2 defeated battle members (activates once). |
| Winning Trump Card |
Knocks enemy back to long range if cover change is performed against their Strike Arts attack (activates during assists). [Comboable Arts] Applies the following effects to self every time this character uses a Strike or Blast Arts Card: Restores health by 3%. Slightly charges own Unique Gauge every time this character uses a Strike or Blast Arts Card while on the battlefield. Restores health by 20%. |
Z Ability
|
Character(s) Affected
|
|
|
Character(s) Affected
|
|
|
Character(s) Affected
|
|
|
Character(s) Affected
|
Special
|
 Super Dragon Meteor Super Dragon Meteor
|
|---|
Deals massive Impact damage. *Blast Armor when charging forward. Inflicts all enemies with "No Switching" for 3 timer counts upon activation if this character's Unique Gauge is full. Cost 50 |
Extra
|
 Enraged Fighting Spirit Enraged Fighting Spirit |
|---|
Draw a Strike Arts card next. Restores own health by 10% if this character's Unique Gauge is full. Cost 20 |
Ultimate Special
|
|
 Dragon Fist Dragon Fist |
|---|
Deals supreme Impact damage. +40% to Ultimate damage inflicted for 3 timer counts. *Blast Armor when charging forward. Nullifies own unfavorable Element factors for 3 timer counts upon activation if this character's Unique Gauge is full. Cost 20 |
Resistance
| Slice |
|
|---|---|
| Pierce |
|
| Impact |
|
| Explode |
|
Soul Boost Stats
| Stat | 100% | 200% | 300% | 400% | 500% | 600% | 698% |
|---|---|---|---|---|---|---|---|
| Health | 21748 | 45040 | 79522 | 122734 | 177234 | 247382 | 328350 |
| Strike Attack | 1895 | 3924 | 6932 | 10701 | 15453 | 21573 | 28635 |
| Blast Attack | 1828 | 3783 | 6685 | 10320 | 14912 | 20820 | 27642 |
| Strike Defense | 1553 | 3219 | 5688 | 8783 | 12683 | 17709 | 23505 |
| Blast Defense | 1507 | 3123 | 5512 | 8512 | 12299 | 17177 | 22805 |
| Critical | 176 | 386 | 702 | 1054 | 1442 | 1846 | 2262 |
| Strike Art Level | 2 | 3 | 4 | 5 | 5 | 5 | 5 |
| Blast Art Level | 2 | 3 | 4 | 5 | 5 | 5 | 5 |
| Special Art Level | 1 | 1 | 2 | 2 | 2 | 2 | 2 |
| Extra Art Level | 1 | 1 | 2 | 2 | 2 | 2 | 2 |
| Ultimate Art Level | 1 | 1 | 2 | 2 | 2 | 2 | 2 |
| Equipment Slots | 1 | 2 | 2 | 2 | 3 | 3 | 3 |
Recommended Soul Boosts
 |  |  |  |  |
|---|---|---|---|---|