


Event History
| Start | End |
|---|---|
Map
- Normal
- Infernal
Bound Hero Battle: Elincia and Nephenee
Following the trend of the last few Bound Hero Battles being a bit less difficult, Elincia and Nephenee enter the scene! Featuring no reinforcements (thank goodness) and only a smattering of trickier Skills to deal with, this map shouldn’t give most players a lot of trouble – especially if they take advantage of the fliers’ weakness to archers. The usual strategies apply here: buff stacking or striking and retreating are both good options that will be relatively easy for most players to use.
Before you begin teambuilding, it’s completely possible you already possess everything you need to beat this map. Created by Gamepress staff member RedFerrari1998, the video guide below uses only F2P units – see the description for more details. If it doesn’t work for you, though, then read on!
Who to Choose
As is generally true of Bound Hero Battles, the individual units used is very important as they will primarily inform your strategy. There are a few routes you can take depending on what units are available to you, and, of course, adjustment based on the units you possess is always a possibility.
Tanks
Even though you’ll likely want to make use of a striker to get this Bound Hero Battle started, making use of a tank is rarely – if ever – a bad idea. On this map, the relatively high amount of ranged foes makes tanks who natively carry Distant Counter a particularly versatile choice.
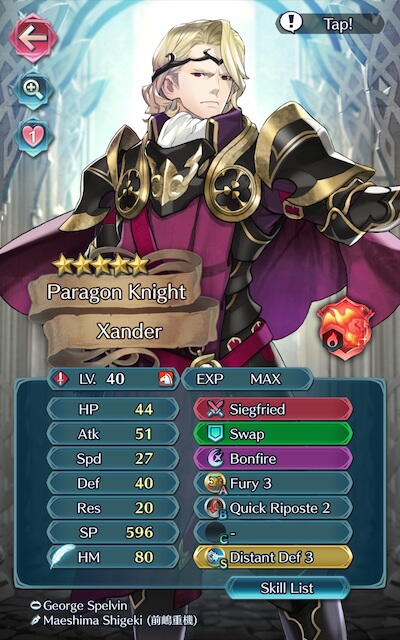
Armors such as Zelgius, Winter Tharja, Legendary Tiki, and Legendary Hector are able to hit hard very upon attacking and counterattacking, especially if they’re making use of Bold Fighter, Quick Riposte, or Vengeful Fighter. Black Knight is a powerful F2P option due to his powerful semi-exclusive Special, Black Luna, with Xander and Camus following close behind in utility. Really, though, most armors or cavalry will be useful here, with their utility being more informed by their color than anything else. Armors will have to be careful of Nephenee though, as her Dauntless Lance will deal effective damage to them.
Similarly, infantry F2P options really are functionally limited to Legendary Ike, whose native Warding Breath grants him accelerated cooldown and extra Resistance, and Fjorm, who can easily tank ranged damage due to her exclusive Special, Ice Mirror. Fjorm’s ability to tank most ranged foes makes her a particularly good choice (as per usual) though she may need to make use of Quick Riposte and a healer in order to put in the work she needs to. Non-F2P choices largely vary, but Nailah and Tibarn are quite bulky and are very powerful in their own rights, though Tibarn will have to be wary of the archer if he's not using Iote's Shield.
Dragons are also very strong tanks, especially when they’re equipped with Lightning Breath (or another Breath and Distant Counter, if you’re feeling fancy). They are also incredibly useful due to their damage-seeking effect against ranged foes, meaning that they’re more likely to net you those tricky KOs.
Strikers
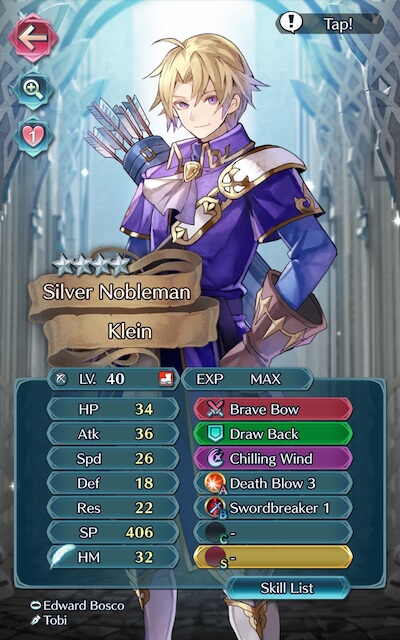
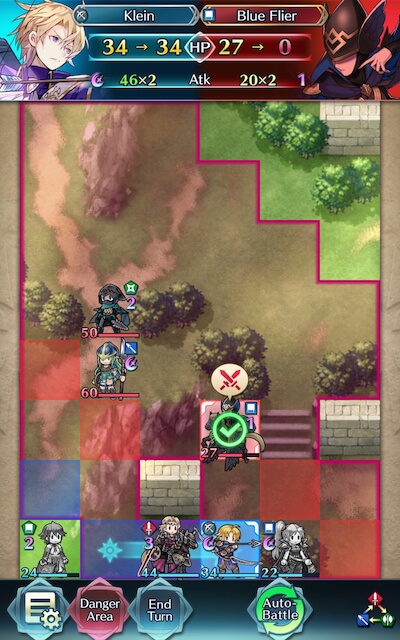
Fliers compose half the foes you’ll be facing on this map, and since none of them carry Iote’s Shield, that means that a Brave Bow archer will easily check all of them. Brave Lyn, WF Hinoka, Halloween Jakob, Summer Takumi, Setsuna, and Klein are potential strikers you may want to use, with a special mention going to Brave Lyn given her potential F2P status. Really, any Brave Bow archer should do the trick though, even if they’re not at five star rarity. Colored archers like Legendary Lucina, Legendary Lyn, and NY Fjorm may perform well, but will have to watch out for the Weapons Triangle – which is a distinct disadvantage when compared to their colorless counterparts.
Alternatively, melee Brave users are able to hit foes twice without retaliation, and may even quad hit if they outspeed an enemy. Cherche, Cordelia, and Elincia are all great melee Brave users who can make excellent use of class-specific buffs, and when equipped with Hit and Run or Drag Back they are able to retreat once attacking. WT Reinhardt may also prove useful due to his weapon granting him follow-ups regardless of phase.
Brave and Blade tome wielders can also serve to be useful if your team composition provides them with the appropriate buffs, though other mages can also be powerful strikers. Tharja, Reinhardt, Tailtiu, Ishtar, Ophelia, WT Olwen, Lewyn, SF Nino, and Nino are potential options here, especially if they are equipped with a Breaker skill to add to their coverage.
Refreshers
Refreshers help provide support, may even have a decent offensive presence themselves, and can usually tank a hit or two, if need be. Any of them will work, since they really shouldn’t be battling too many foes anyways – though Legendary Azura is particularly notable due to her ability to grant her flying and infantry allies 1 extra movement when she sings for them. Infantry tome users like Inigo and Young Azura are also great choices if they’re toting the Gronnraven/ Triangle Adept/ Bowbreaker combo, which makes them an easy check to the bow cavalry.
Healers
Due to every healer having access to the Wrathful Staff refinement, they can serve as incredibly potent colorless pseudo-mages – who can heal to boot! Brave Veronica is known as the scourge of Aether Raids for good reason: her excellent exclusive weapon prevents counterattacks, buffs allies, and debuffs foes after she attacks, and her access to Wrathful Staff makes her a potent offensive force in her own right. If you don’t have her, though, other healers like Genny, Loki, Elise, Ethlyn, Wrys, and Lissa are potential additions to a team that may serve you well. Flying healers like Halloween Mia and Hostile Springs Sakura have the unique quality of being able to provide Guidance support to armored and infantry foes, granting you extra flexibility.
Strategy
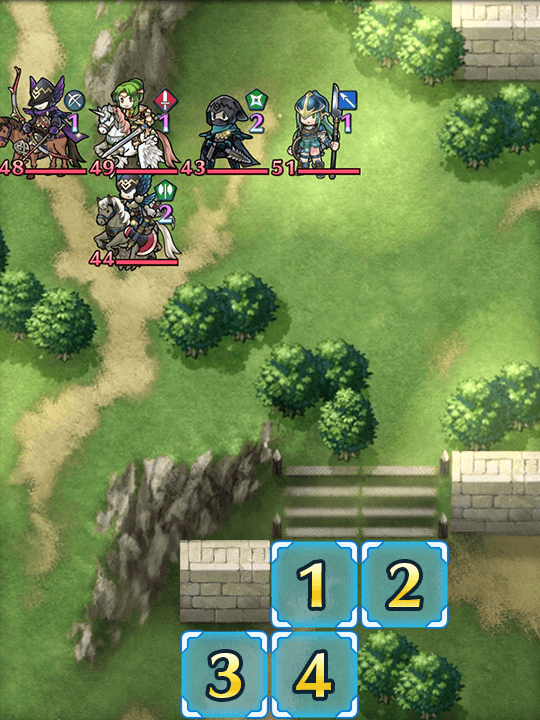
Strategizing for this Bound Hero Battle may be a bit complicated due to the presence of reinforcements, but the relatively weak foes you’ll be facing on Infernal shouldn’t be as frustrating as they usually are. While it can be difficult to exactly predict what will happen due to IV / Merge variance, here’s some general tips to get you started.
Rout the Enemy!
If you’re a dedicated reader of these guides, you’ll know by now that most of these maps are won or lost before they even start. While it may be tempting to jump right in, knowing (and loving!) your foes will help you not only choose your units, but also figure out where to begin.
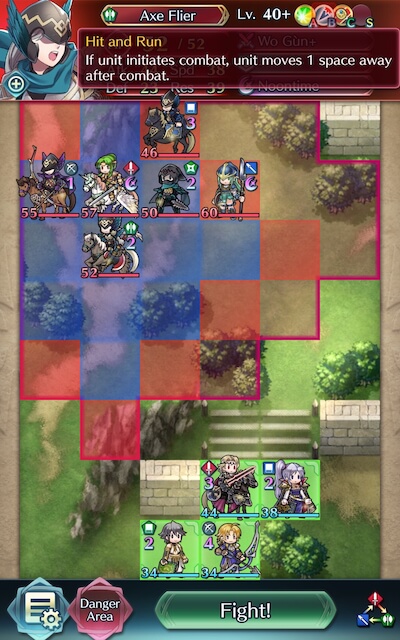
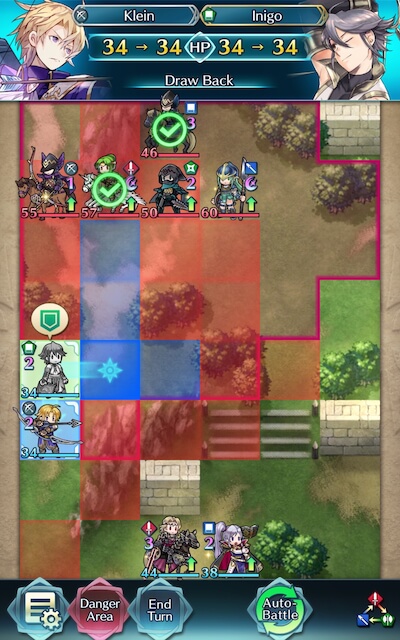
As per usual, there’s a few things to watch out for on this map, though you’ll most likely find yourself not putting in too much involved thought. First on the list is the Axe Flier with Hit and Run – if you don’t KO them in one round, they may shuffle out of your range. Given their unimpressive statline, though, taking them out in one round shouldn’t prove to be too difficult. Although…
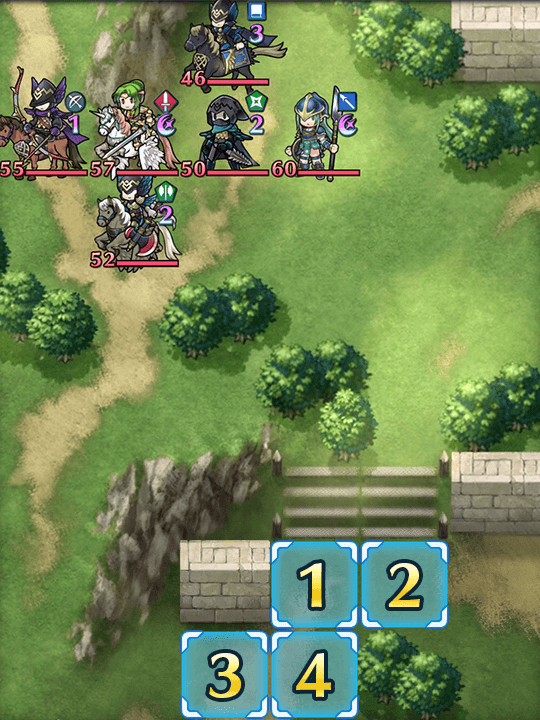
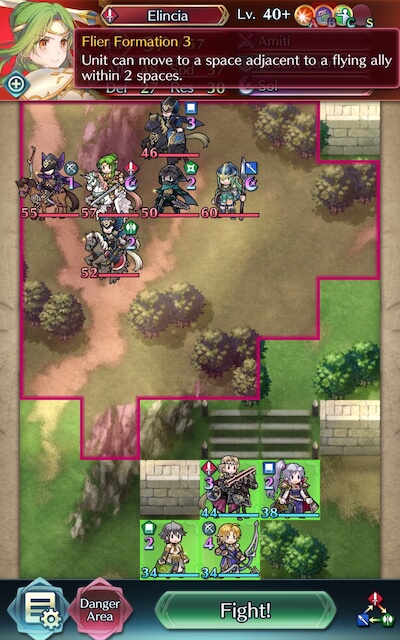
This Skill becomes a lot more useful for your foes when coupled with Elincia’s Flier Formation, which allows her to move adjacent to any flying ally within two spaces. If you decide to tank in the far left space below the trees, for instance, you better prepare to withstand Elincia’s onslaught as well.
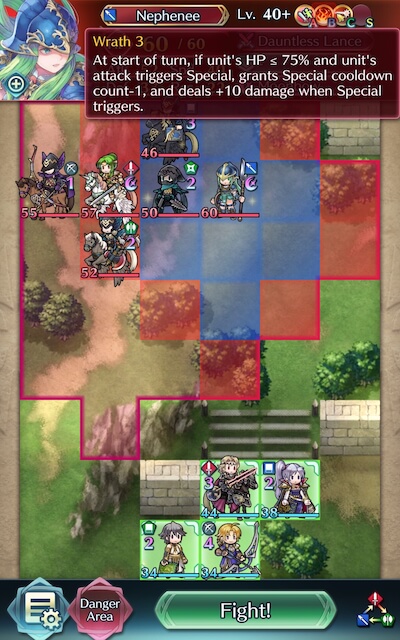
Lastly, Nephenee carrying Wrath means that her Special activations will be hefty if her HP is less than or equal to 75%. Moreover, her fully charged Moonbow will lay on the pain to any unit unfortunate enough to get in her way, plus her Dauntless Lance grants her a permenant -1 cooldown and will deal effective damage to armors.
Bravely Default
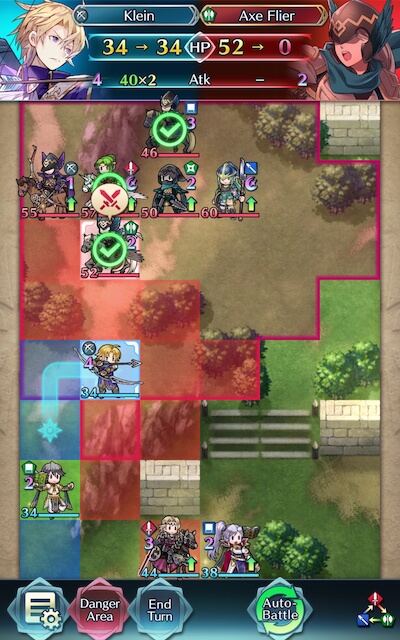
Luckily, the easiest way to get this map going requires almost no investment; just break out your four star Klein (or Gordin), target the axe flier, and you should be good to go.
The archetypical strike and retreat method will most likely be your next move – meaning you’ll want to inherit Draw Back or Reposition on your archer – unless your Dancer is kitted with Gronnraven / Triangle Adept / Bowbreaker. Again, though, given the accessibility of these Skills, this shouldn’t be much of an issue.
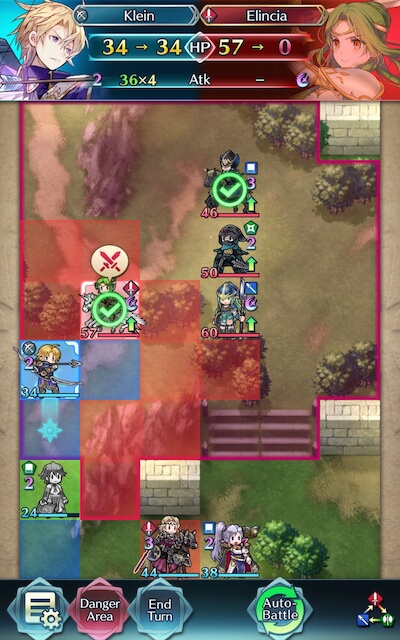
Well Excuse Me, Princess!
Elincia is another easy unit to deal with if you’re using an archer, though one with lower Attack lacking Death Blow may struggle to break through her inflated HP. If that’s the case, the first tier of Swordbreaker will allow you to quad and KO her with little to no effort.
Saving Something Special
Though you may be tempted to use a Special right away once it’s charged, you may want to consider saving it for later if you don’t absolutely have to use the proc. You never know when it may come in handy, especially if you’re in a clutch – plus, this will give your other units opportunities to charge their Specials as well (assuming their Special isn’t charged already).
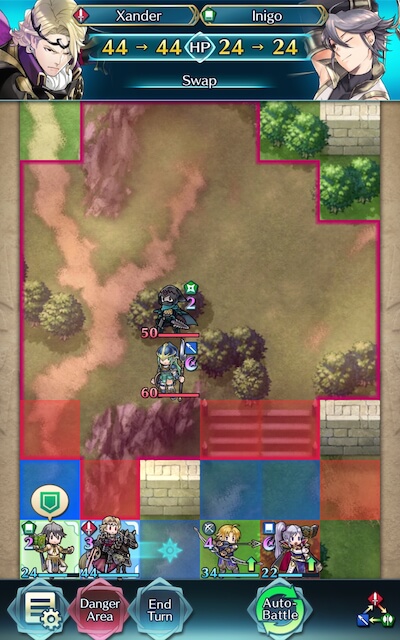
Swapping Sortie
If you ever have a unit in your team that’s just sort of… there, keep in mind they can still provide valuable support in the form of Drives, Spurs, and Assists. A few extra points of Attack, Defense, Speed, or Resistance can make all the difference, and Swap/Reposition is almost always useful for getting your units who are doing the heavy lifting where they need to go. Moreover, their ability to influence the enemy’s AI can be much more useful than you may expect; as anyone who’s had their strategy fall apart upon swapping a unit can no doubt tell you.
Terrain Trouble
If you’re using cavalry units, be aware of the trenches here – though they’re pretty easy to navigate around, they may trip you up if they catch you unawares. Forests are another ubiquitous obstacle that can potentially prove troublesome; fliers can avoid them completely, but refreshers can also be a way of overcoming their movement penalty.

If At First You Don’t Succeed
Don’t be fooled by video walkthroughs of any Bound Hero Battle that you watch -- it’s very rare for anyone to beat high-difficulty content (or record a video of themselves doing so!) on their first try. Additionally, the potential variance in unit builds that Skill Inheritance brought along with the random nature of summoning has resulted in pretty much every single summoner having different building blocks to work with. This, when combined with the high difficulty level of Infernal, may prove frustrating while someone is trying to find the right combination of units and moves. The key thing to keep in mind is that it may take some light Skill Inheritance and seal shuffling as well as multiple tries of the map to find a strategy that works for you. Every single turn you complete gets you one step closer to completing the puzzle. Finally, reading about or watching videos of successful strategies may also help you break through a particularly difficult turn that you can’t complete, or may give you ideas of a new unit to use.
Map Enemies
- Hard
- Lunatic
- Infernal
| HP | ATK | SPD | DEF | RES | |
|---|---|---|---|---|---|
| 36 | 37 | 26 | 17 | 20 | |
| Weapon | Amiti | A | Death Blow 3 | ||
| Support | Ardent Sacrifice | B | Flier Formation 3 | ||
| Special | Sol | C | Spd Tactic 3 | ||
| HP | ATK | SPD | DEF | RES | |
|---|---|---|---|---|---|
| 39 | 40 | 29 | 26 | 14 | |
| Weapon | Dauntless Lance | A | Atk/Spd 2 | ||
| Support | B | Wrath 3 | |||
| Special | Moonbow | C | Close Guard 3 | ||
| HP | ATK | SPD | DEF | RES | |
|---|---|---|---|---|---|
| 35 | 38 | 19 | 20 | 21 | |
| Weapon | Slaying Bow | A | Fury 3 | ||
| Support | B | Bowbreaker 2 | |||
| Special | Moonbow | C | Hone Atk 2 | ||
| HP | ATK | SPD | DEF | RES | |
|---|---|---|---|---|---|
| 31 | 29 | 30 | 9 | 25 | |
| Weapon | Barb Shuriken | A | Attack/Res 1 | ||
| Support | B | Poison Strike 2 | |||
| Special | Iceberg | C | Spur Spd/Res 2 | ||
| HP | ATK | SPD | DEF | RES | |
|---|---|---|---|---|---|
| 33 | 29 | 27 | 15 | 28 | |
| Weapon | Wo Gùn | A | Steady Blow 1 | ||
| Support | B | Hit and Run | |||
| Special | Noontime | C | Drive Res 2 | ||
| HP | ATK | SPD | DEF | RES | |
|---|---|---|---|---|---|
| 49 | 45 | 34 | 24 | 27 | |
| Weapon | Amiti | A | Death Blow 3 | ||
| Support | Ardent Sacrifice | B | Flier Formation 3 | ||
| Special | Sol | C | Spd Tactic 3 | ||
| HP | ATK | SPD | DEF | RES | |
|---|---|---|---|---|---|
| 51 | 49 | 37 | 34 | 20 | |
| Weapon | Dauntless Lance | A | Atk/Spd 2 | ||
| Support | B | Wrath 3 | |||
| Special | Moonbow | C | Close Guard 3 | ||
| HP | ATK | SPD | DEF | RES | |
|---|---|---|---|---|---|
| 48 | 50 | 25 | 27 | 26 | |
| Weapon | Slaying Bow+ | A | Fury 3 | ||
| Support | B | Bowbreaker 3 | |||
| Special | Moonbow | C | Hone Atk 3 | ||
| HP | ATK | SPD | DEF | RES | |
|---|---|---|---|---|---|
| 43 | 42 | 38 | 13 | 34 | |
| Weapon | Barb Shuriken+ | A | Attack/Res 2 | ||
| Support | B | Poison Strike 3 | |||
| Special | Iceberg | C | Spur Spd/Res 2 | ||
| HP | ATK | SPD | DEF | RES | |
|---|---|---|---|---|---|
| 44 | 41 | 35 | 21 | 36 | |
| Weapon | Wo Gùn+ | A | Steady Blow 2 | ||
| Support | B | Hit and Run | |||
| Special | Noontime | C | Drive Res 2 | ||
| HP | ATK | SPD | DEF | RES | |
|---|---|---|---|---|---|
| 57 | 48 | 37 | 27 | 30 | |
| Weapon | Amiti | A | Death Blow 3 | ||
| Support | Ardent Sacrifice | B | Flier Formation 3 | ||
| Special | Sol | C | Spd Tactic 3 | ||
| HP | ATK | SPD | DEF | RES | |
|---|---|---|---|---|---|
| 60 | 52 | 40 | 37 | 22 | |
| Weapon | Dauntless Lance | A | Atk/Spd 2 | ||
| Support | B | Wrath 3 | |||
| Special | Moonbow | C | Close Guard 3 | ||
| HP | ATK | SPD | DEF | RES | |
|---|---|---|---|---|---|
| 55 | 53 | 27 | 30 | 28 | |
| Weapon | Slaying Bow+ | A | Fury 3 | ||
| Support | B | Bowbreaker 3 | |||
| Special | Moonbow | C | Hone Atk 3 | ||
| HP | ATK | SPD | DEF | RES | |
|---|---|---|---|---|---|
| 50 | 45 | 42 | 15 | 37 | |
| Weapon | Barb Shuriken+ | A | Attack/Res 2 | ||
| Support | B | Poison Strike 3 | |||
| Special | Iceberg | C | Spur Spd/Res 2 | ||
| HP | ATK | SPD | DEF | RES | |
|---|---|---|---|---|---|
| 46 | 42 | 41 | 17 | 35 | |
| Weapon | Blárowl+ | A | Atk/Res Bond 3 | ||
| Support | B | Wings of Mercy 3 | |||
| Special | Iceberg | C | Goad Fliers | ||
| HP | ATK | SPD | DEF | RES | |
|---|---|---|---|---|---|
| 52 | 44 | 38 | 23 | 39 | |
| Weapon | Wo Gùn+ | A | Steady Blow 2 | ||
| Support | B | Hit and Run | |||
| Special | Noontime | C | Drive Res 2 | ||
User Submitted Teams
This team mainly Tanks, then retaliates. Substitutions can be made, but the core revolves with Hector. Best Part, doesn't really require any SI; Base kits work wonderfully.
Mainly use Fallen Robin for attacking most of the enemies.
I oly used a Lv.40 no merge Fallen Robin
The main idea here, is that you will send a green tank (such as Hector) to the left side of the map, within range of the axe flier and ranger. You will want to back him up with a good bow unit such as Klein. Then, on the second turn, you will use a red tank (such as my man Burger King) to bait the green dagger. The rest is clean up.


