Time to Get Completely Annihilated!
Annihilation is a large-scale combat mode where 400 enemies come in waves until you kill them all, or 10 of them reach the Doctor. The mode has tiered rewards for each map based on how many of the 400 Enemies the player is able to take down.

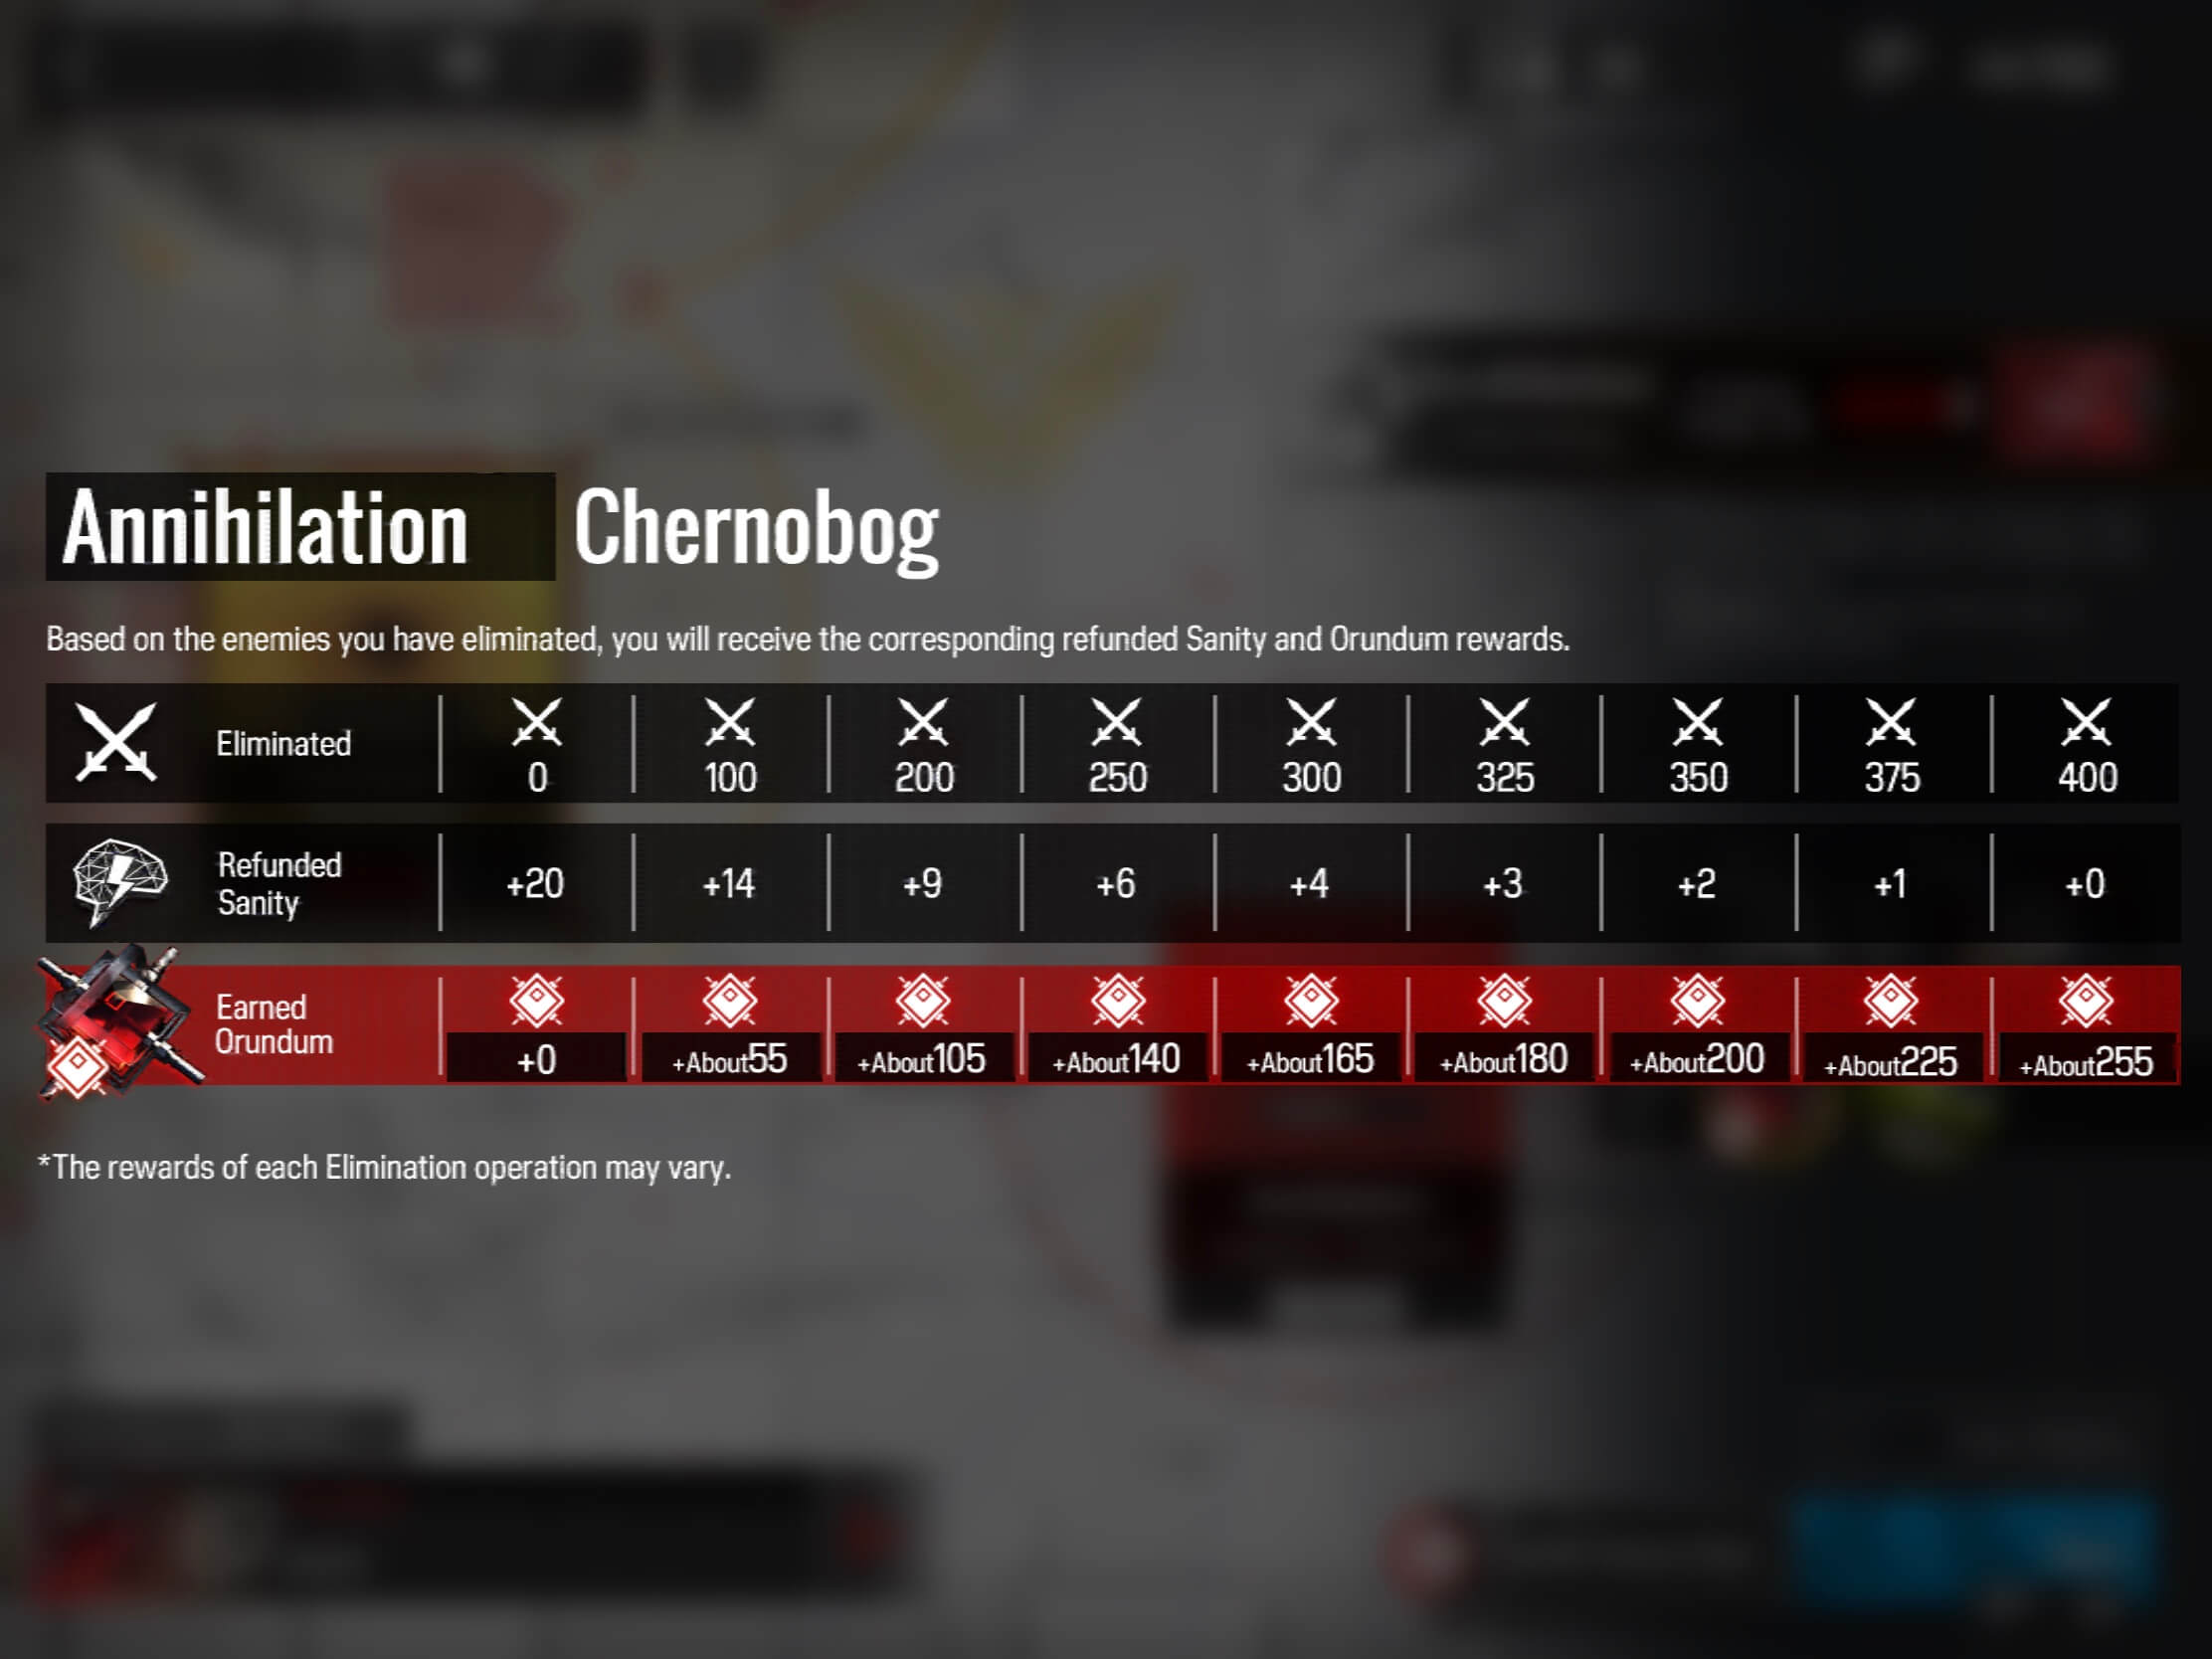
Annihilation Mode is one of the main sources of free Orundum, initially allowing 1200 to be earned each week. This amount can be increased up to 1600 as players clear the tiered rewards in later Annihilation stages. Each run of Annihilation awards the player Orundum based on the number of enemies killed. Totals from each run are accumulated until reaching the cap, at which point no more can be earned. If you do not complete the stage, Orundum is still awarded, and some Sanity is returned, the amount depending on how much had been cleared.
In this guide we present a strategy for getting a 400-kill clear for the first Annihilation Stage: Chernobog. This is not the only way to clear this map, several different strategies may work, so we encourage you to search for other strategies if you are failing to succeed with this one.
First we will go over recommended team composition, followed by a step-by-step walkthrough including screenshots of Operator positions.
Team Composition
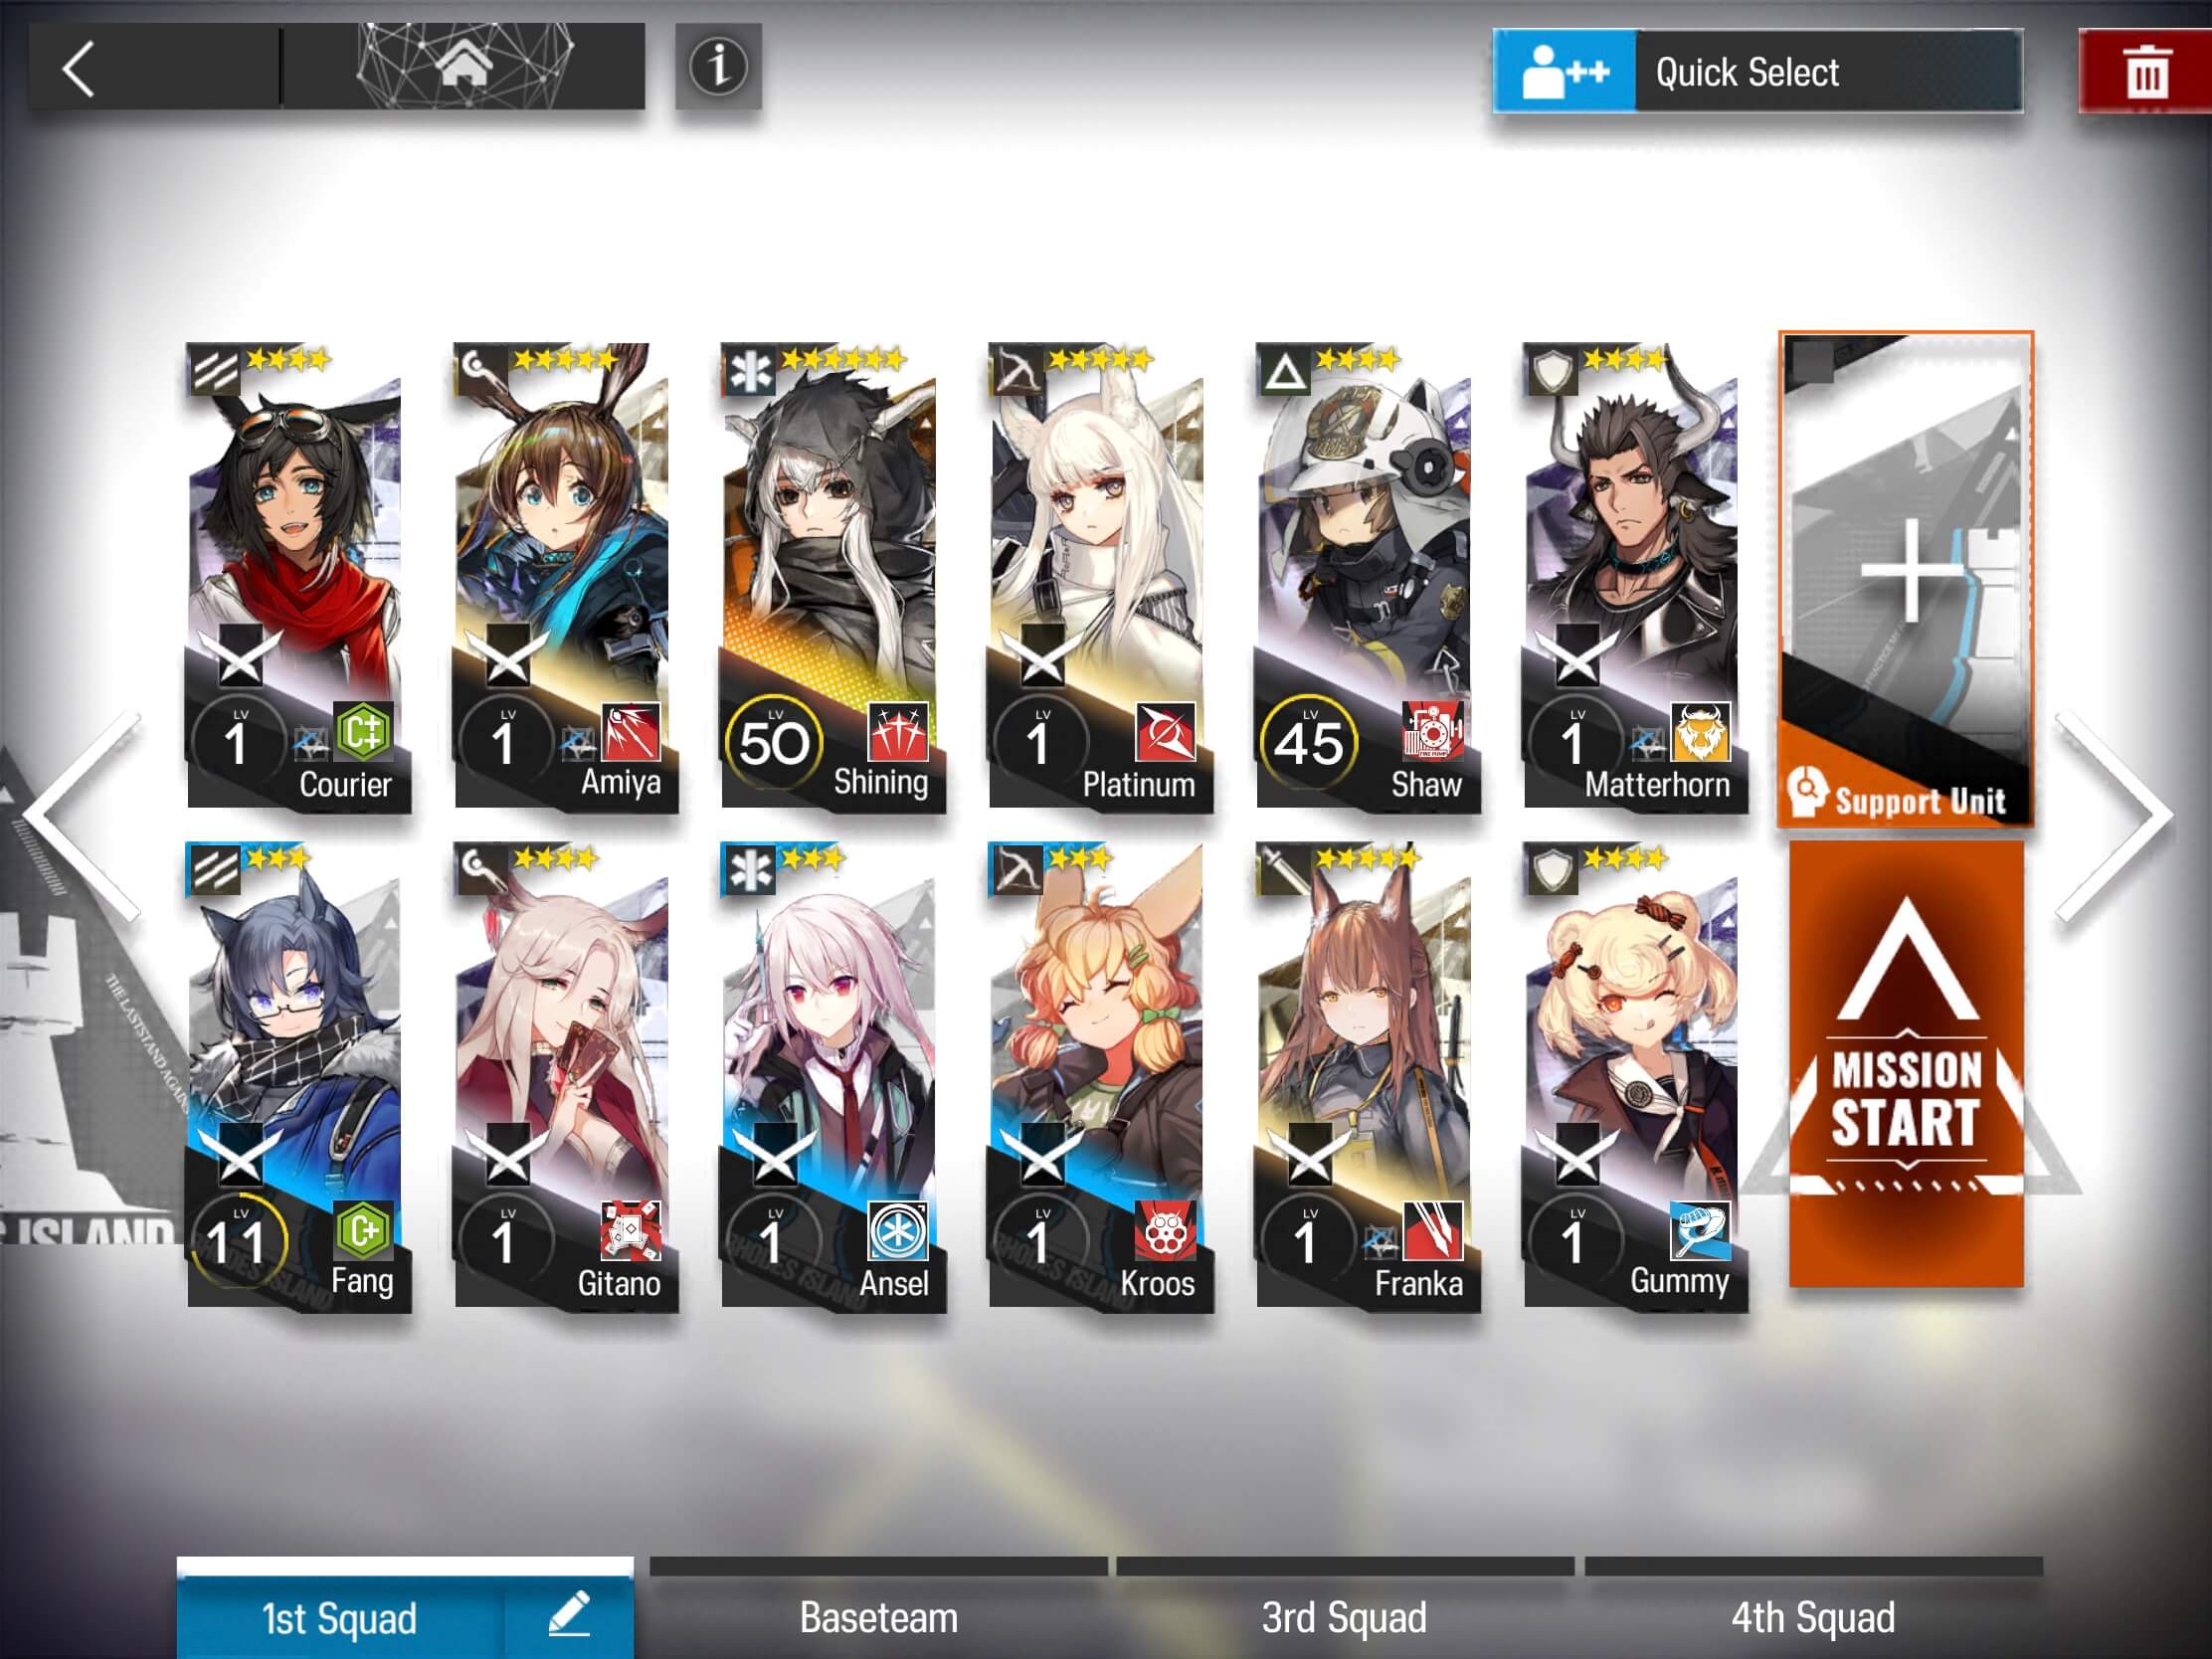
V1 and V2: 2 Skill-Recovery Vanguards: Vanilla = Fang < Courier = Scavenger < Zima = Texas < Siege. Their primary job for us is going to be to Block 2 and return as much DP as possible. So pick talents that maximize DP recovery. Since there is no real danger of dying, ATK can be prioritized over Def. For the purposes of the guide, your stronger Vanguard will be V1 and your weaker Vanguard will be V2.
D1 and D2: 2 Defenders. D1 must be able to block at least 3. Higher Def is preferable. D2 Can be literally any Defender even block 2 is usually sufficient. The biggest threat for both Defenders comes from hard hitting physical enemies, so high Defense and Defense Skills are preferable. Being able to block 4 is a huge advantage to give the player some breathing room on the dps checks, so Cuora is a great 4 Star Choice if you have her. For D1 Beagle = Matterhorn = Gummy (E1SK2) < Liskarm (SK1) < Cuora = Croissant < Hoshiguma. D2 Can literally be any Defender, even Noir Corne.
G1: 1 Guard, the stronger single target damage the better. Melantha is a sufficient and very accessible option.
Recommended Levels
The levels required of your Operators to succeed will depend somewhat on which Operators you have, their rarities, strengths, etc. A good guideline would be to have your Damage dealers and Defenders at least at E1. Vanguards and Medics can be at slightly lower levels, and Shaw mostly just needs the Skill levels. It is possible to do it with lower levels, but, obviously, the higher their levels and skill development, the easier success will be achieved. If you are failing and making no mistakes, then it might be best to enhance your Operators!
Tip:
- While it is recommended to eventually clear Annihilation: Chernobog with your own units to unlock auto-redeploy, it is worth using a strong friend support if it will help you get more kills and more rewards.
Here is an example of a team that can work (It is not a recommended team, just an example of a team comp that can work):
Common Troubles
Here are some of the problems players may have while implementing the strategy in this guide. Preview them now to avoid mistakes, and come back to them after failed attempts for insights on how to improve.
Enemy units are leaking past Defenders.
-
Better DPS is needed, typically from C1 and S1. Choose burst Skills if possible and use them at appropriate times. Develop to at least E1Lvl1, possibly up to E1lvl20, and raise skills to 3 or 4.
Defenders are dying.
-
Time Defensive Skills to coincide with the high incoming damage periods.
Defenders are dying even with their Defensive Skills up.
-
Develop them to at least E1Lvl1, possibly up to E1Lvl20, and raise skills to Lvl 3 or 4.
-
Choose Medic skills that provide burst healing, and time the use to coincide with high incoming damage periods. It usually isn’t necessary to Promote them to Elite1, but if you are struggling, higher levels can leave more room for error.
S2/G1 are failing their assassination mission.
-
If S2 is dying, drop G1 after the first hit and the Casters will focus on the Guard instead. The Guard will usually live long enough for the Logger to be finished off.
-
If not, another option is to raise your S2 to have at least 901 HP so they can survive another hit.
-
If neither of these is working, increase the levels of your S2 and G1 to at least E1Lvl1 up to E1Lvl20.
An Operator other than my Defender is dying first.
-
The Defenders must be deployed last! Enemies prioritize attacking the latest-deployed unit in their range. Follow the deploy order exactly as described in the guide (don’t deploy too early or too late) and enemy aggro will properly target the Operators we want them to (here it is typically the Defender or Medic).
Strategy
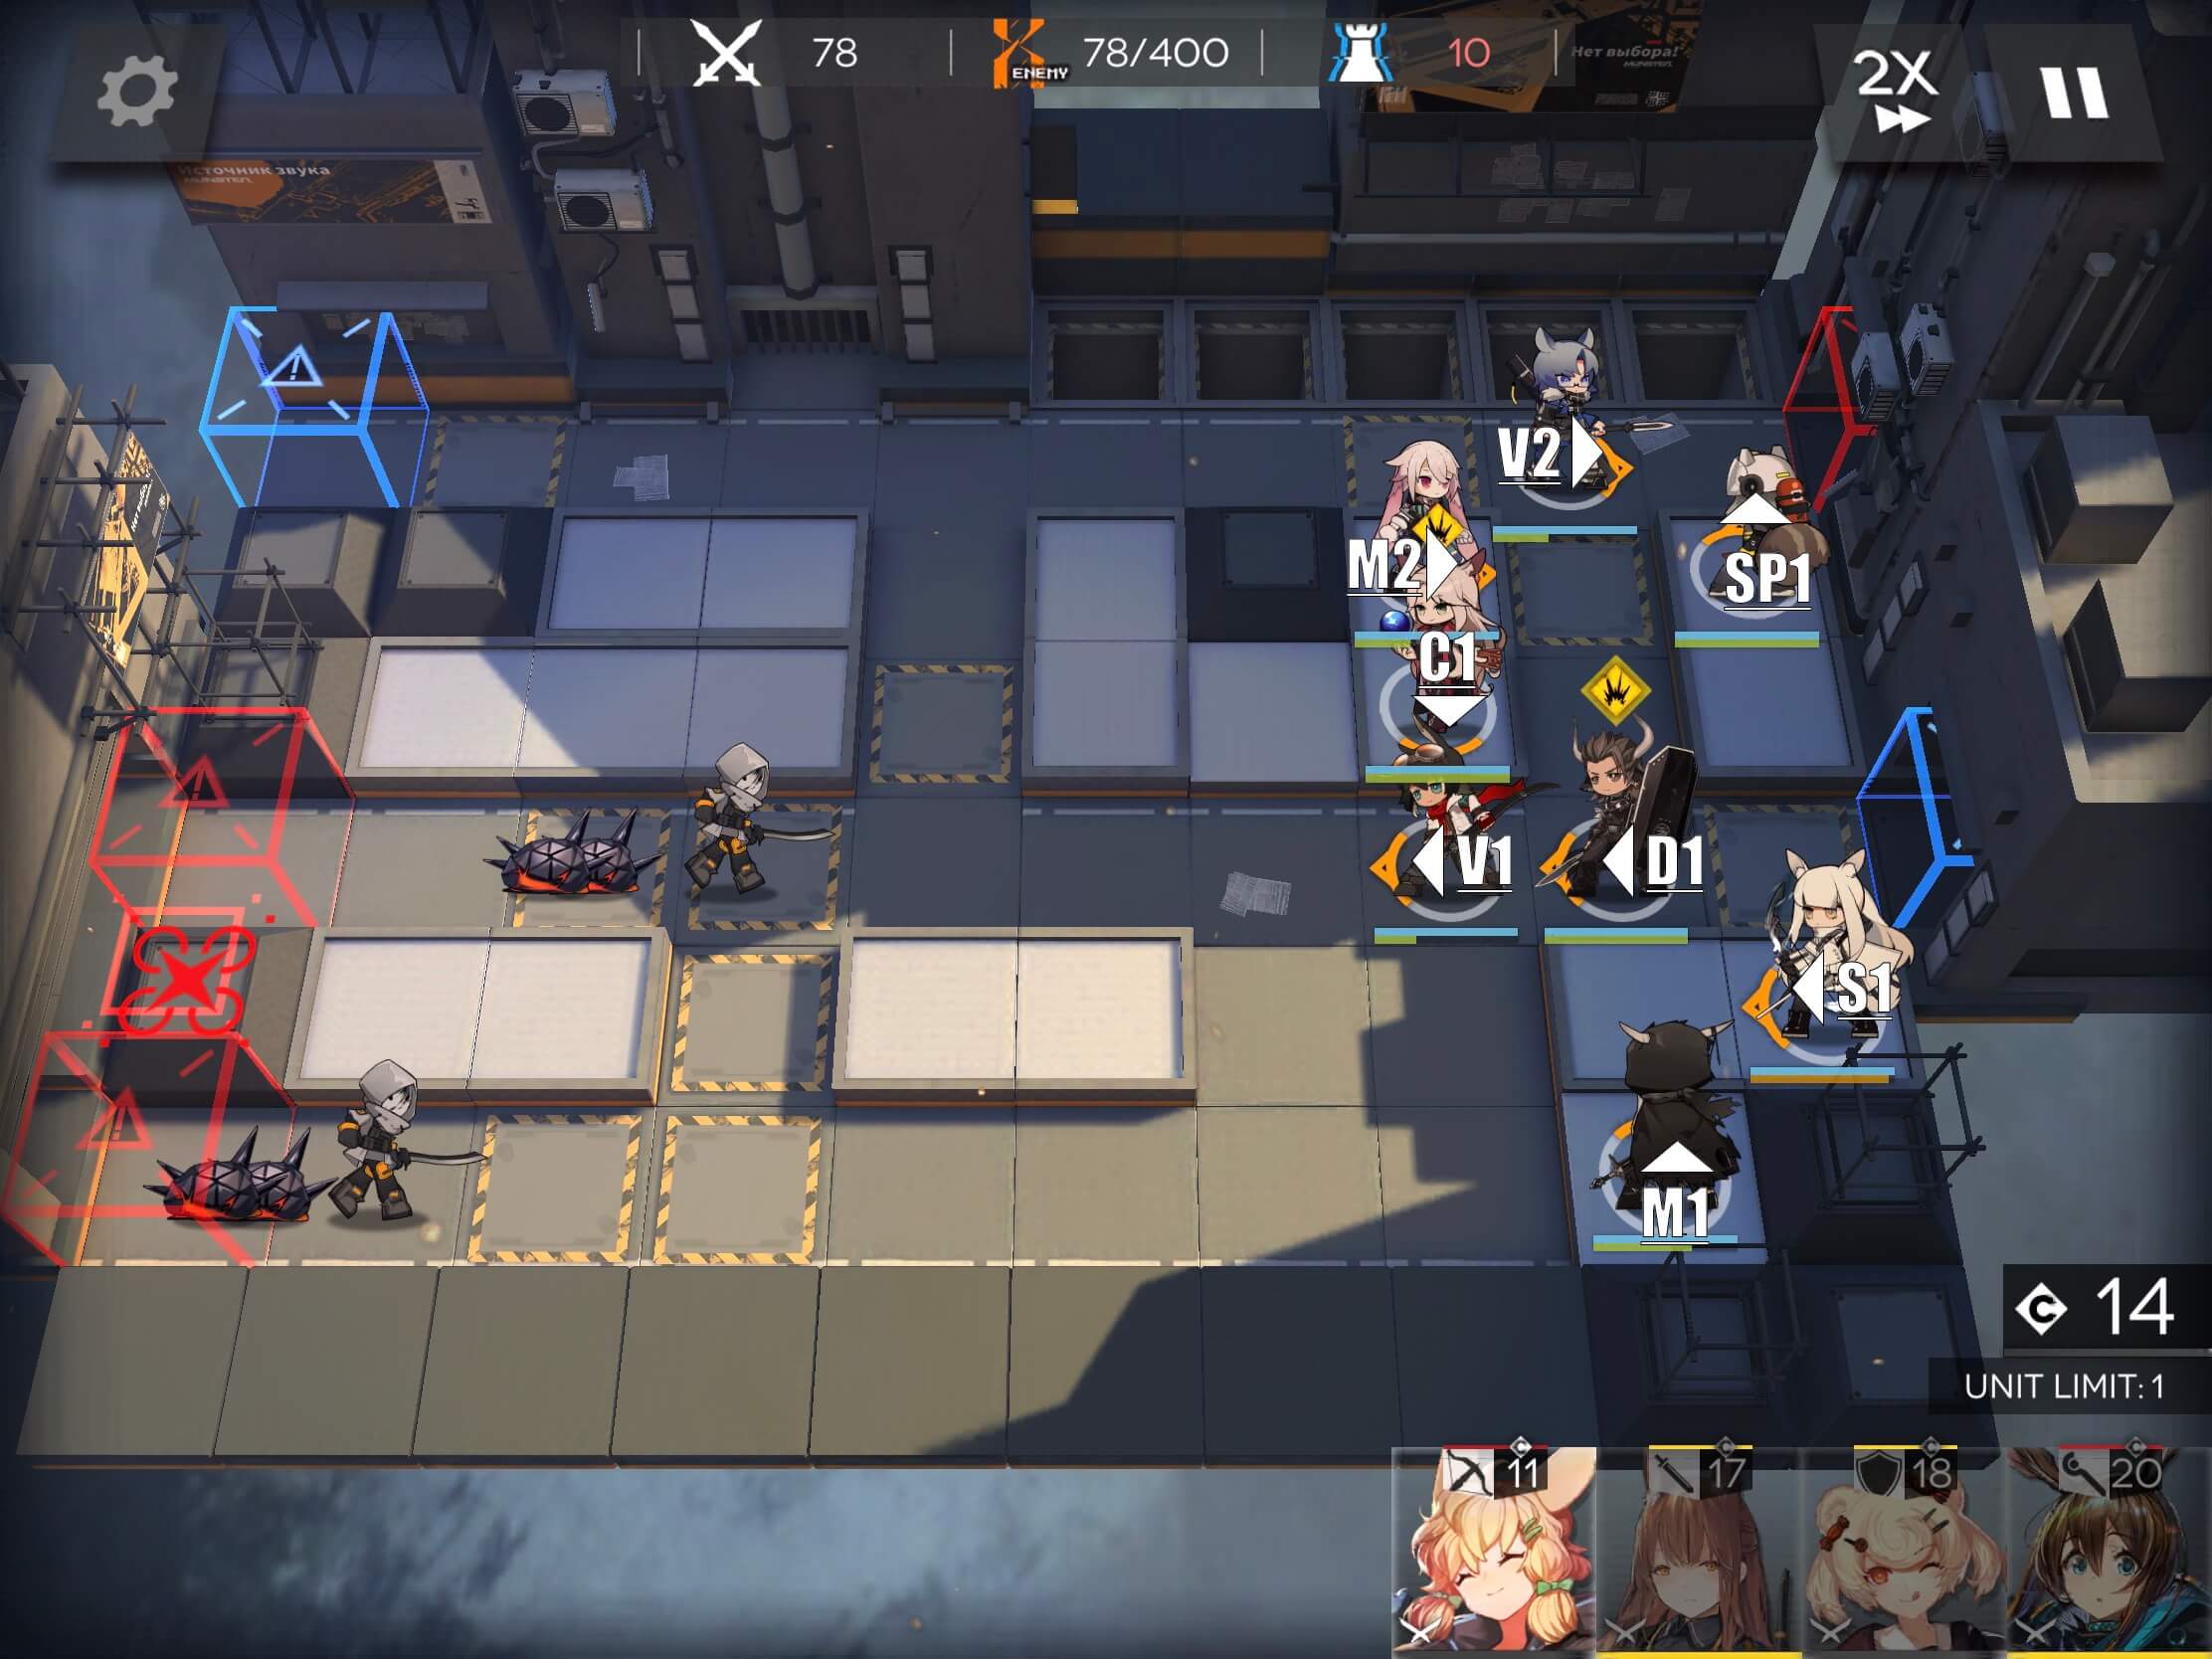
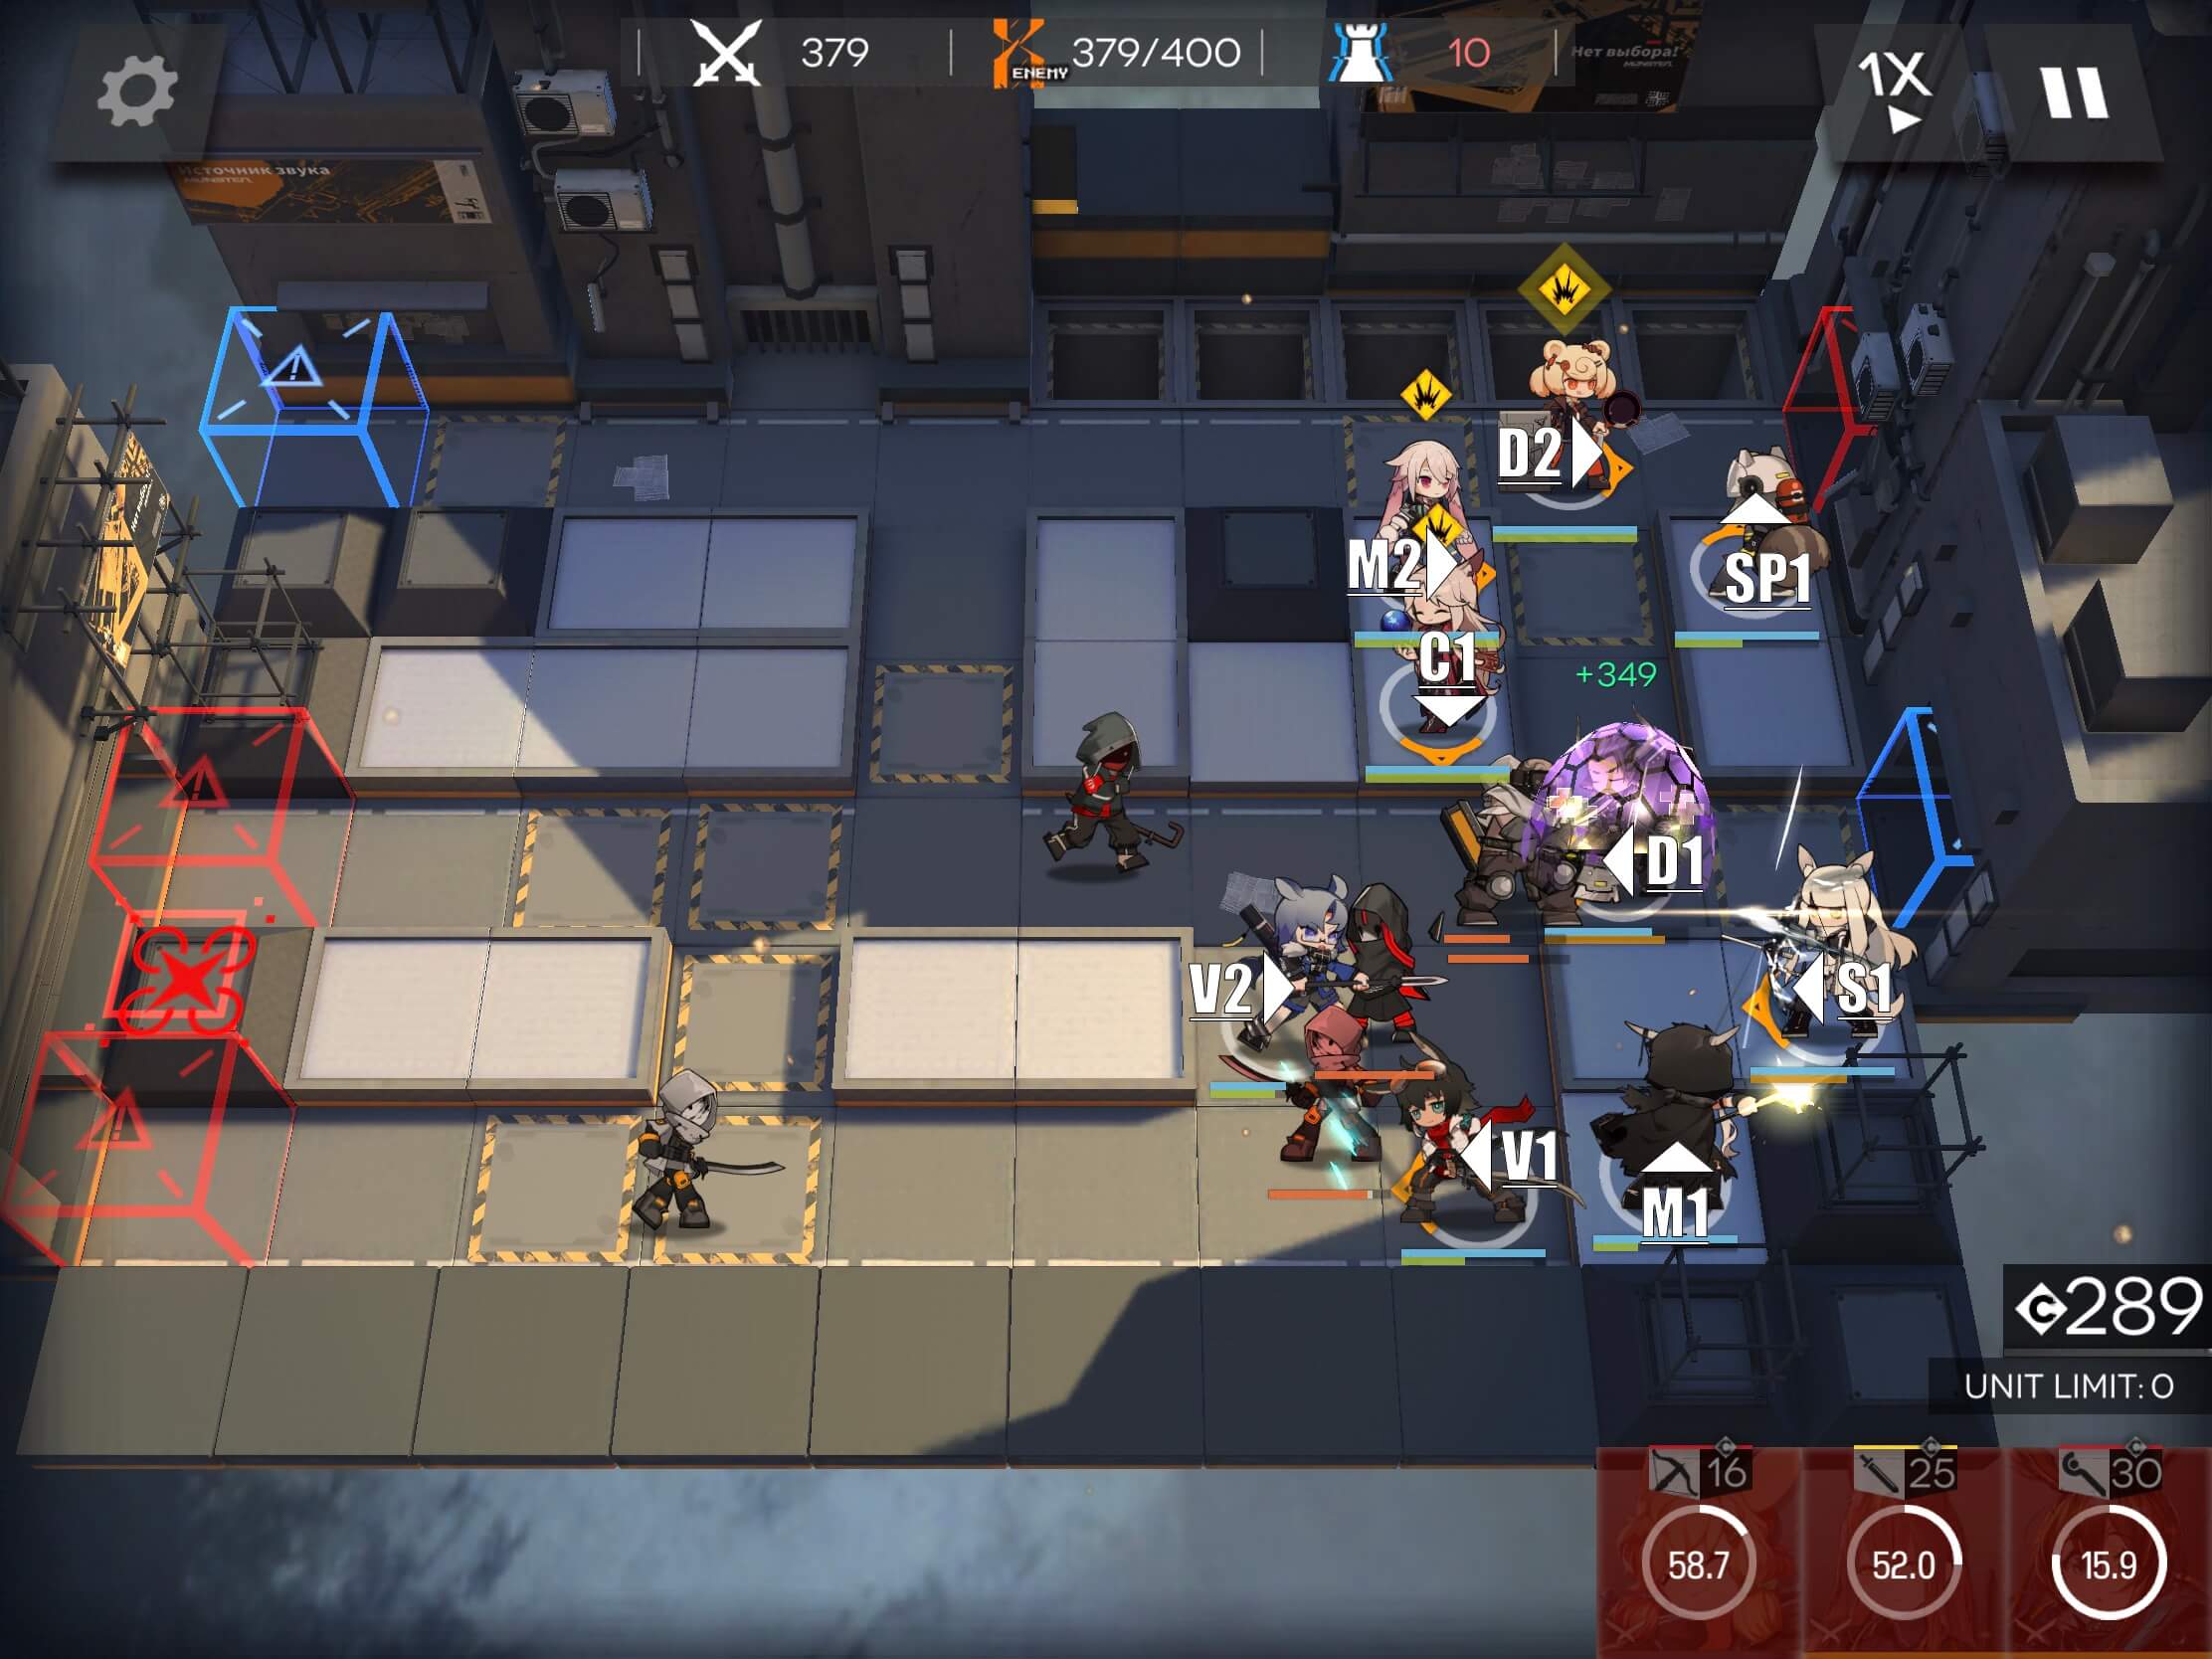
Set up your first formation as seen in the image below. Placement order should be done as follows, and can be placed as soon as there is sufficient DP. Note that placement order is important, as enemies will target the most recently placed Operator in their range. Placement can be seen in the image below.
V1 -> V2 -> M1 -> S1 -> C1 -> D1 -> SP1 -> M2
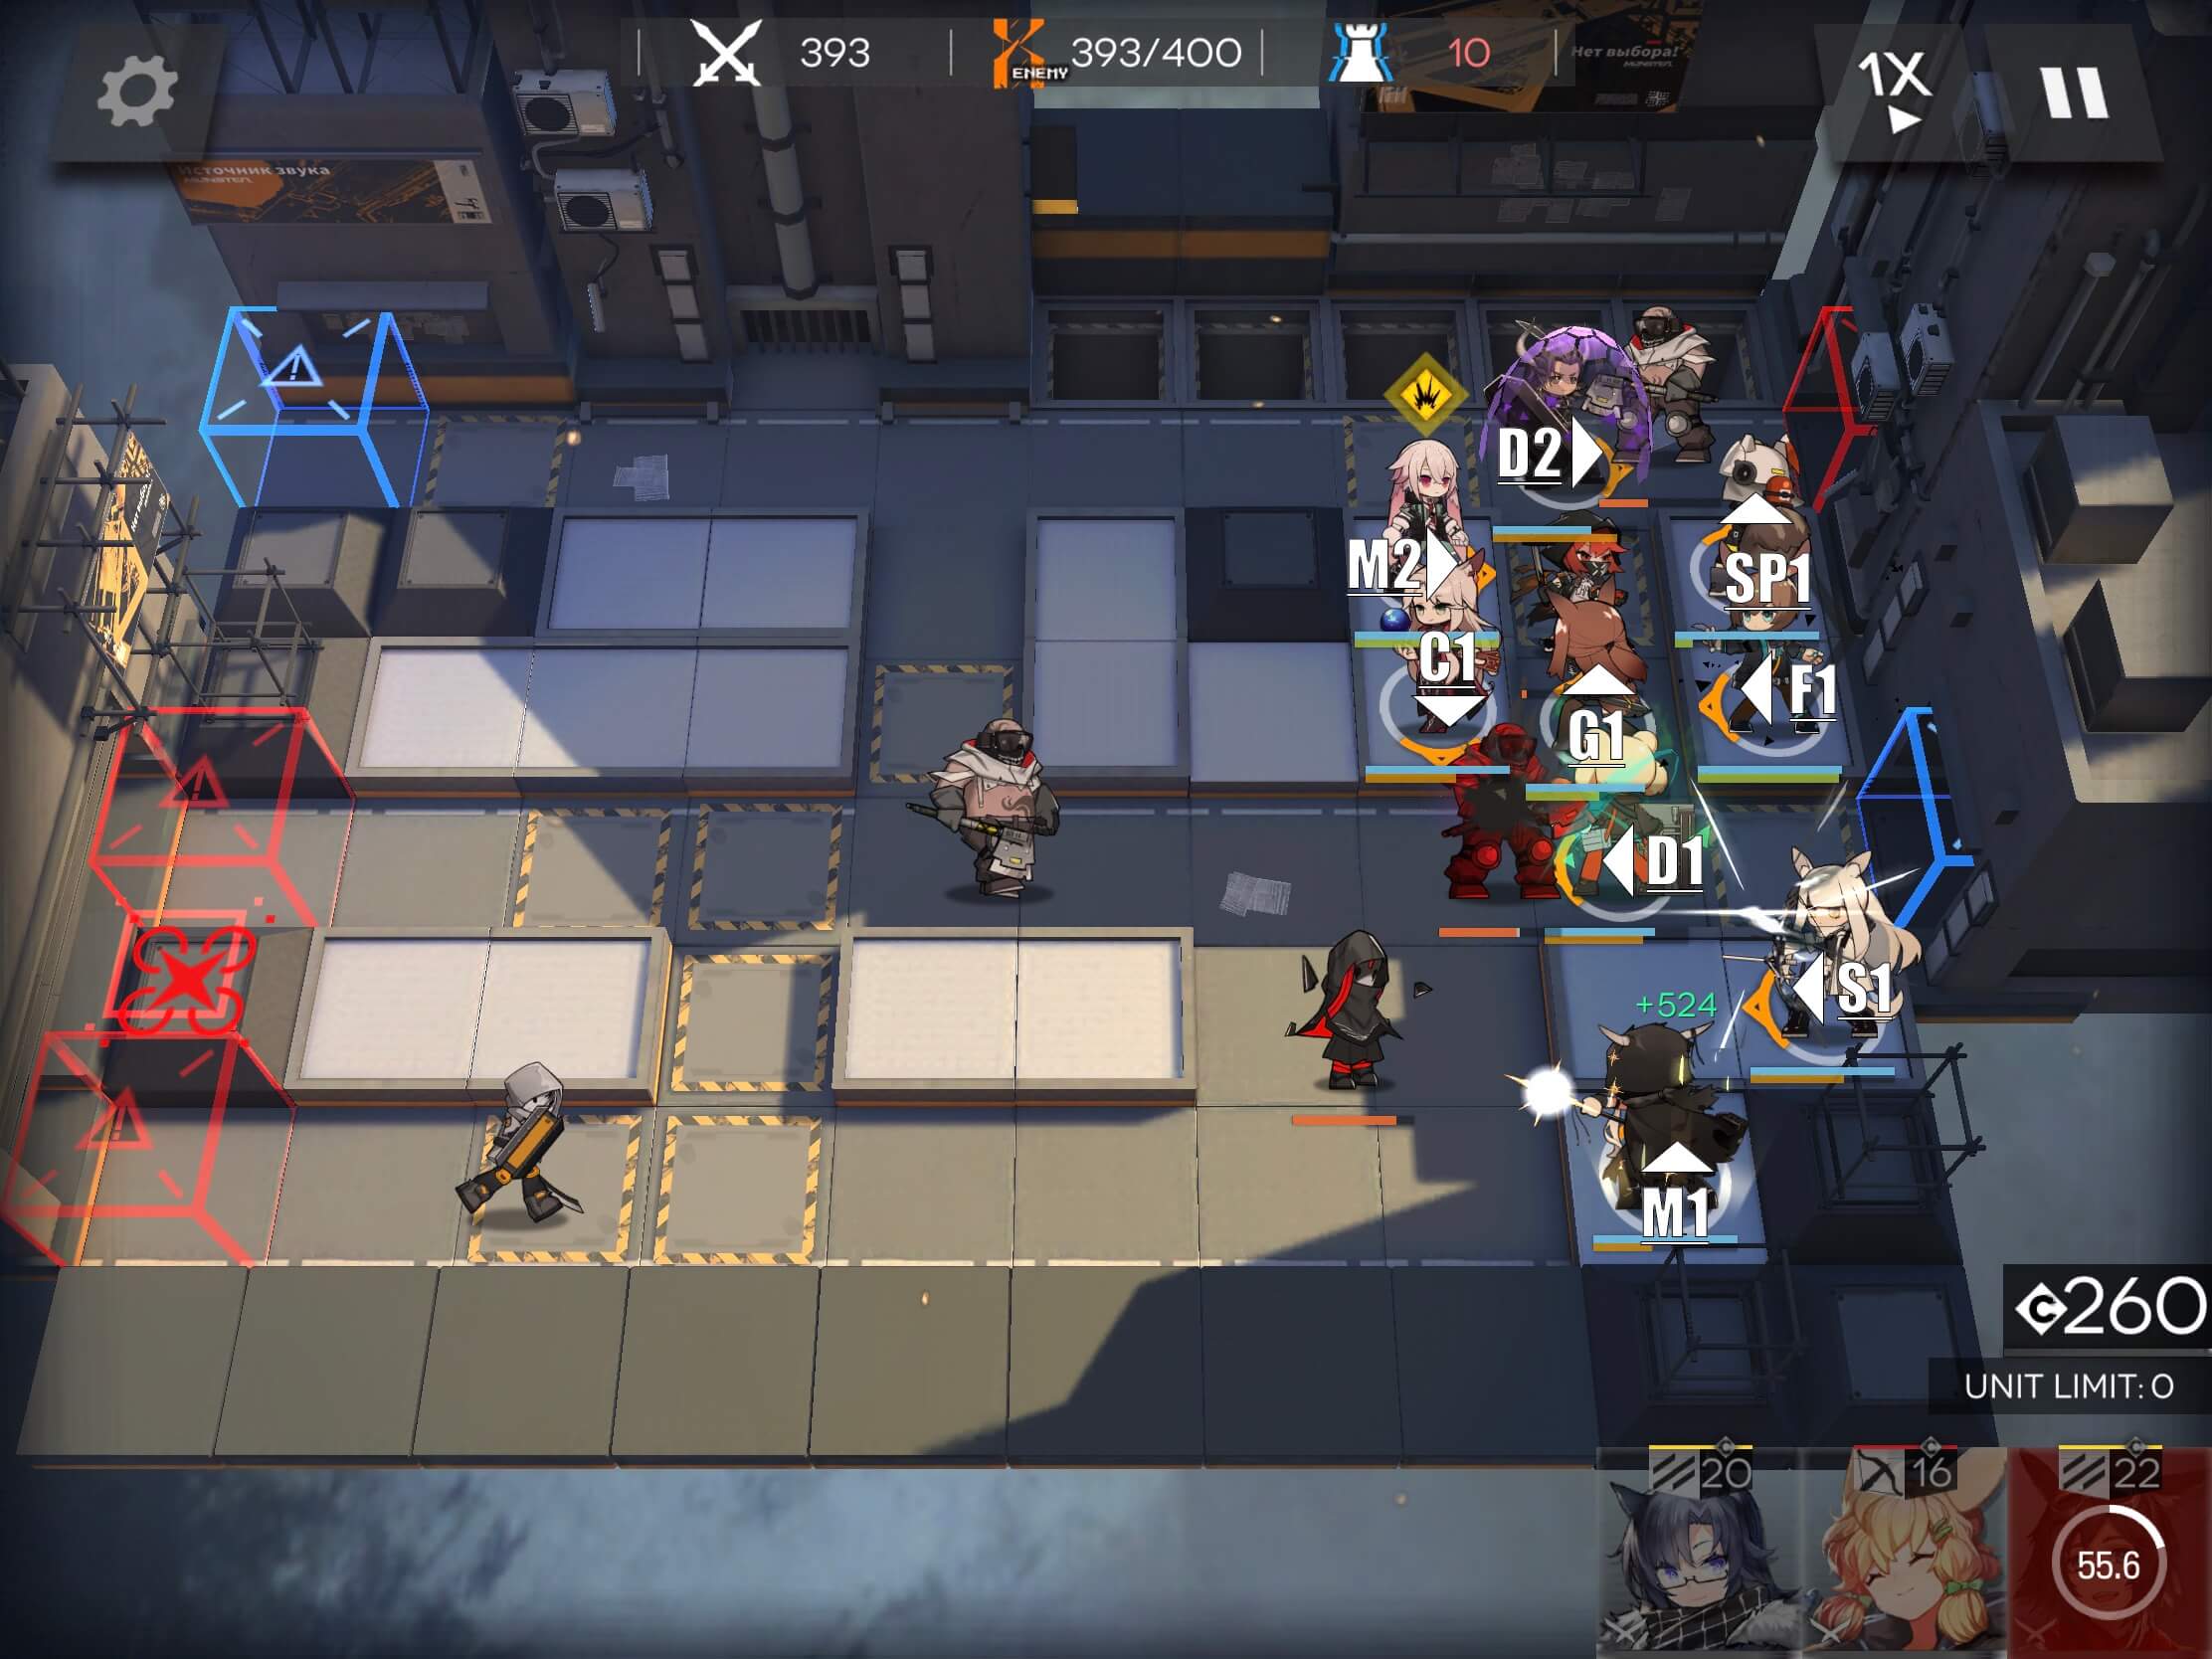
At this point you can do laundry, make a sandwich, or run a short errand, because your next action will be at 305 kills when we retreat our V1 as the 2 Senior Casters approach. We will also switch V2 to D2 as a Heavy Defender will soon emerge from the top-right entrance. Also because of that, we bring out our F1. Our new formation should look like this:
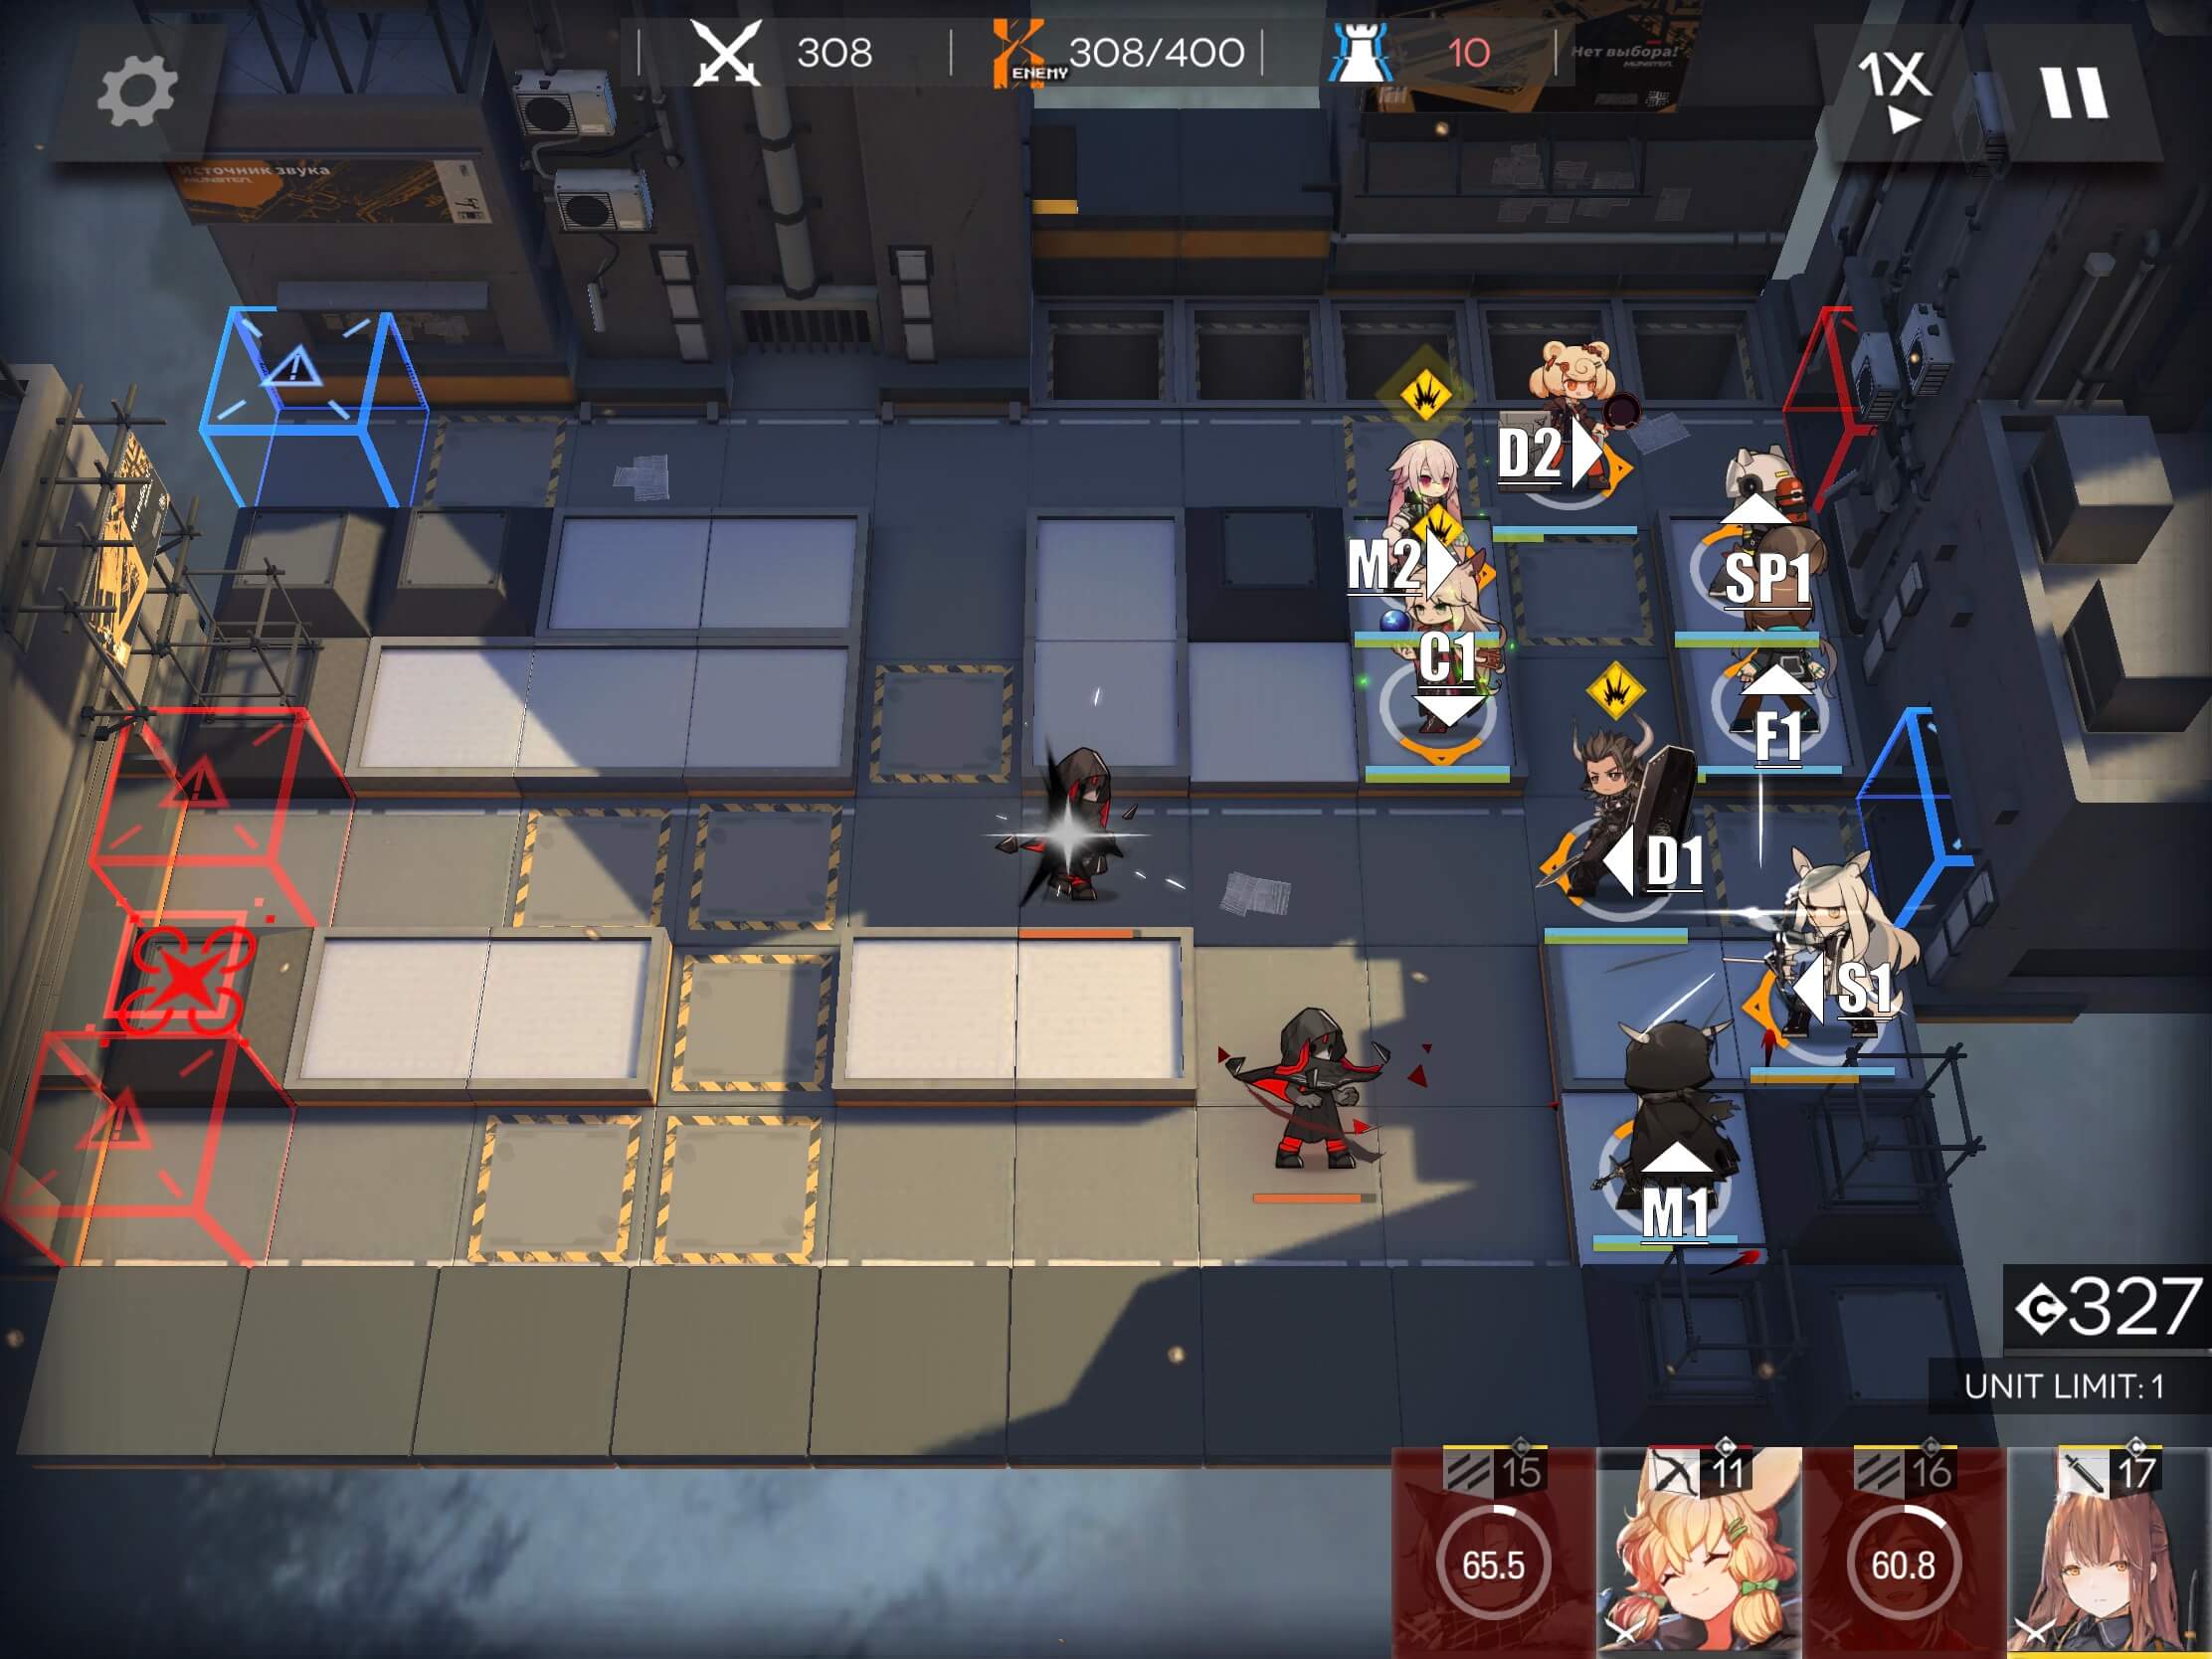
At around 325 kills,you will get a rush of enemies that can overwhelm low dps or Medics, so be ready to use skills at that point.
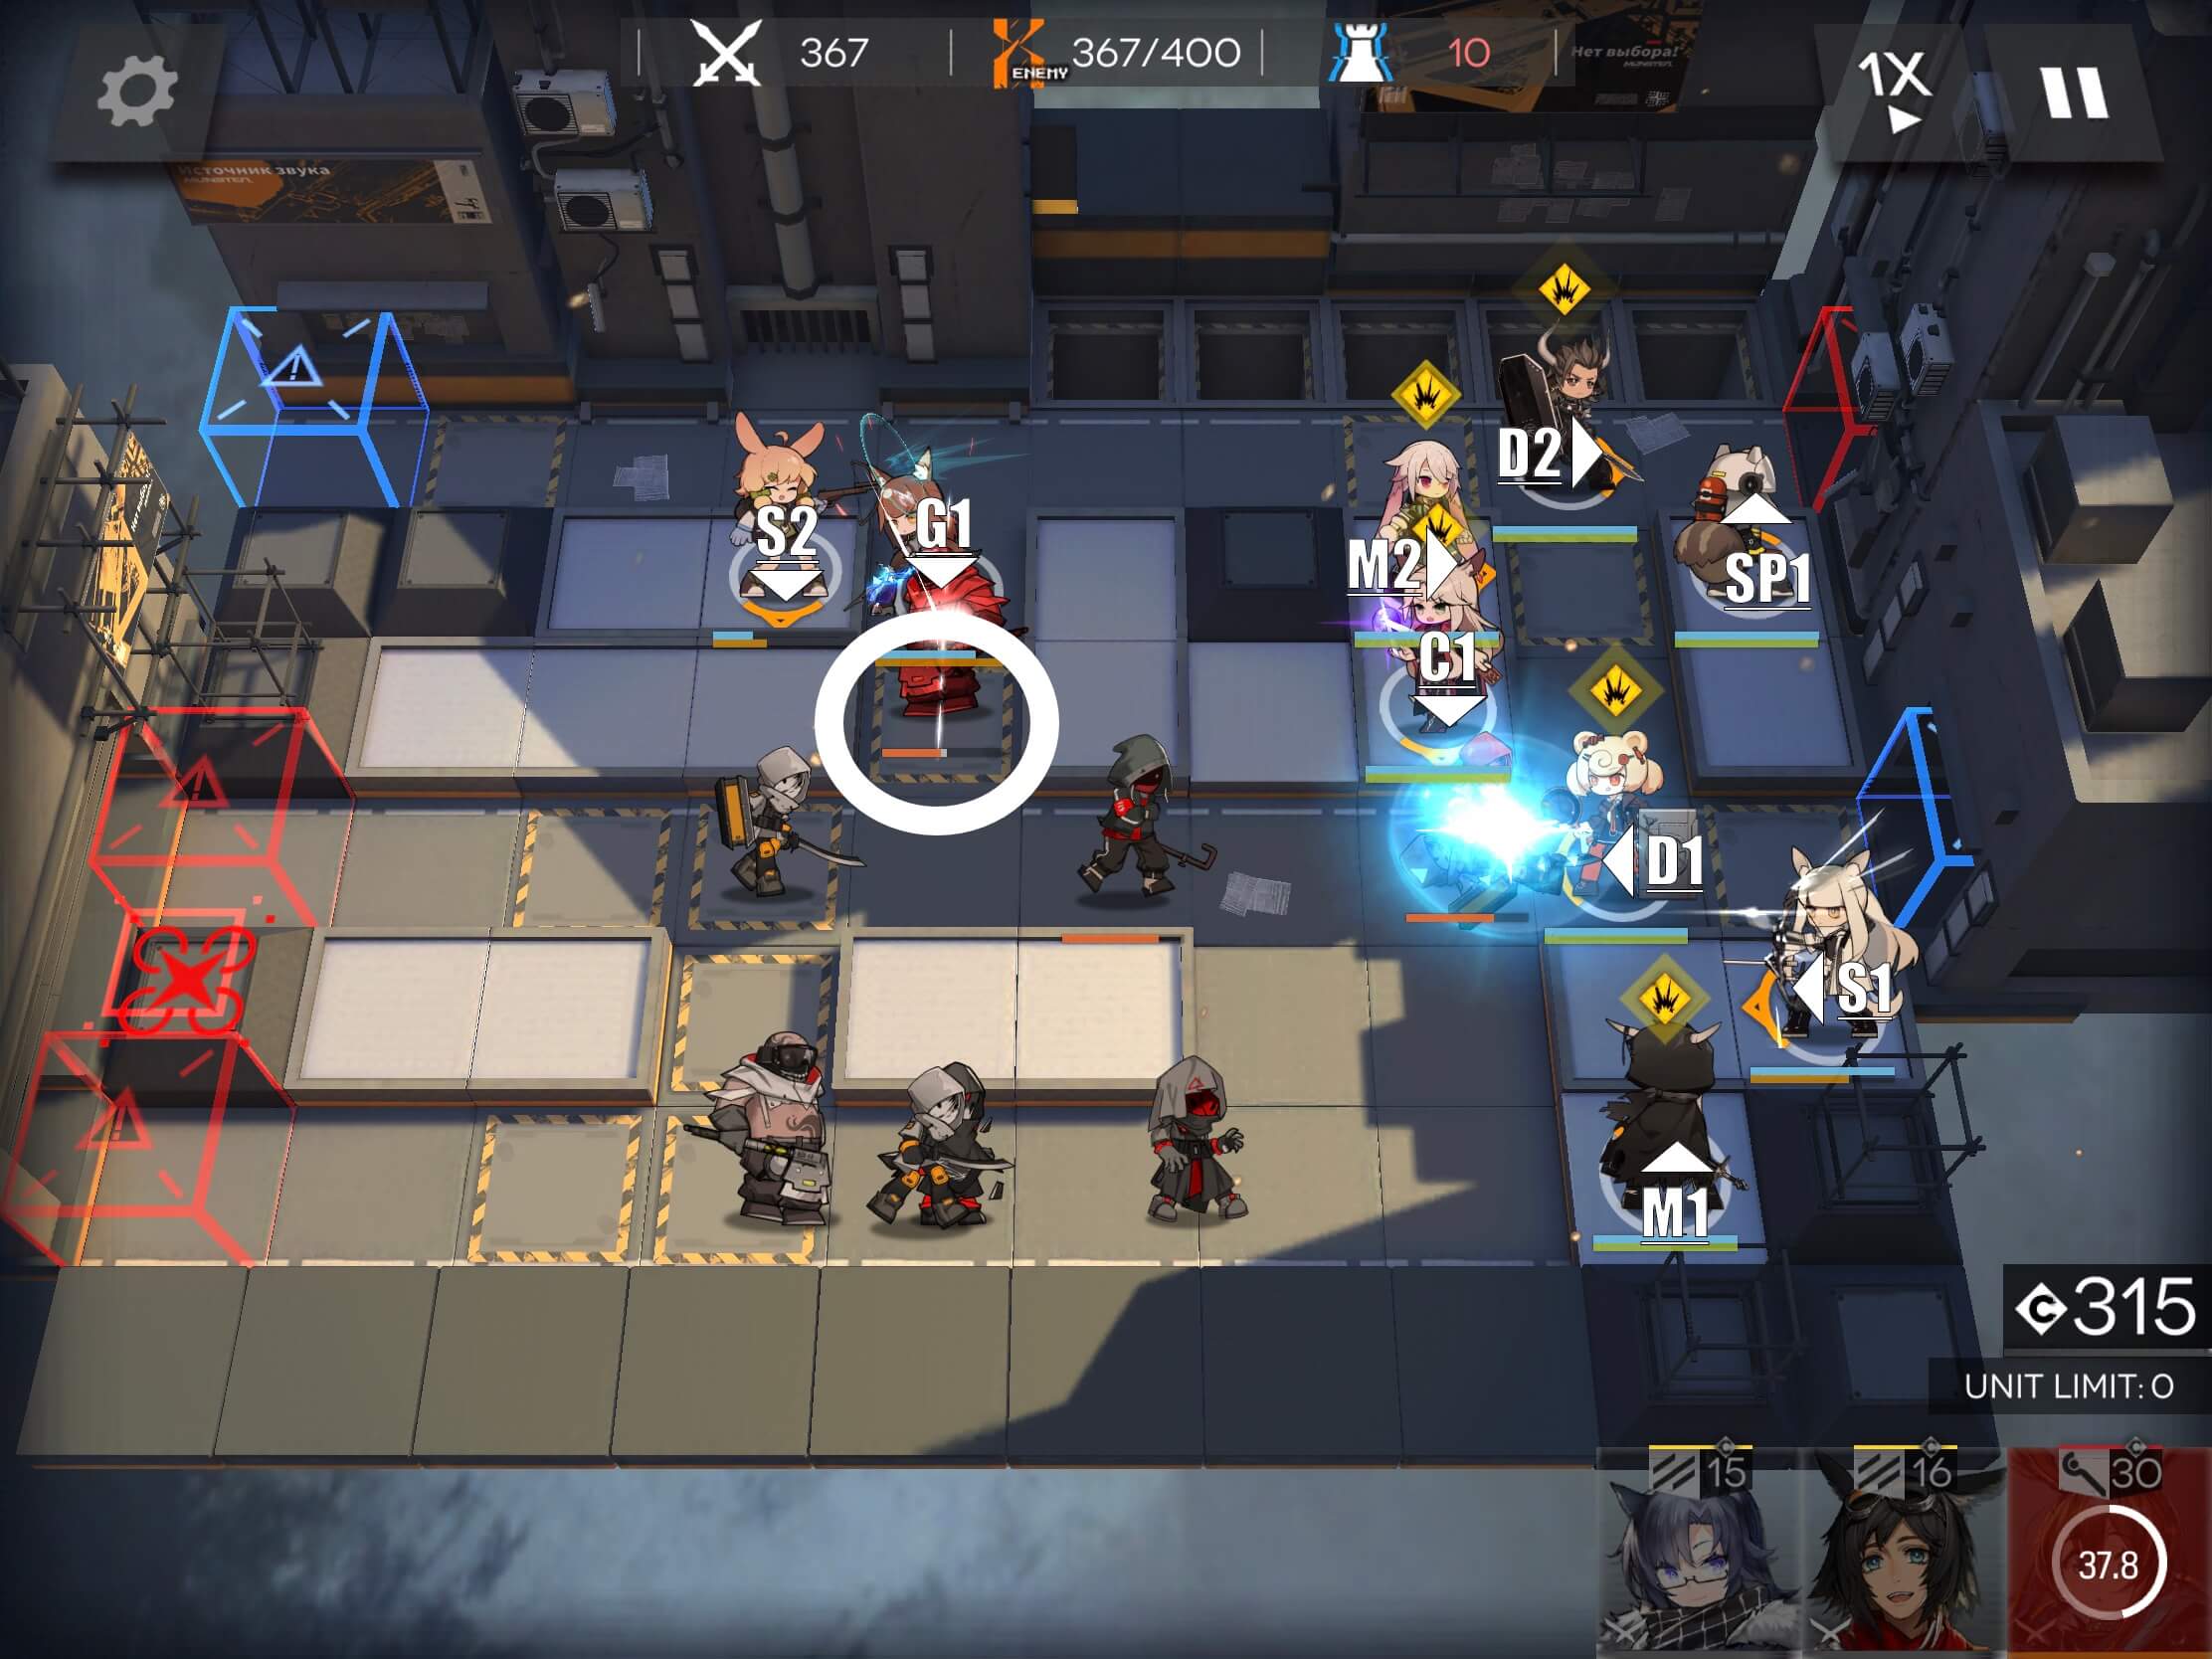
At 350 kills 2 Caster Leaders and a Logger will emerge from the top left door. Wait until the casters get to the third square with yellow and black stripes (the one that is alone in the middle, marked with a white circle in the image below). Retreat your F1. Then drop your S2 followed by your G1 for an assassination mission. Be prepared to use a defensive Skill on D2 as they might be tanking a Logger if your F1 wasn’t able to finish it off. After dropping your S2 and G1, your map will now look like this:
Once the Logger is down, retreat S2 and G1, and we will place V1 and V2 to help plug the rush on the main lane. Place them after the Logger passes, but as soon as you can to delay the enemies coming after him. Your far Vanguard may die, and that is ok. Your new formation should be as follows, place whichever of your Vanguards have higher dps in the V1 position:
Crownslayer will come out and stop directly in front of V1 in the image above. After pausing a while to conveniently take damage, Crownslayer will move up and to the left and stop again for a while. After a short break, she will continue up and to the right, heading toward your D2. At this point, retreat your remaining Vanguard, and place your G1 and F1 as shown in the image below. Crownslayer will use her ability to pass through your D2 and run into your G1, where she will meet her demise. Your D1 will be trying to hold off 2 Loggers at around this time, so pop skills on all Operators to finish strong. After Crownslayer has entered the trap, the map should look like this:
If all has gone well, you will be able to finish off the map from here and celebrate a sweet tasting victory! Congratulations!