


Map
- Normal
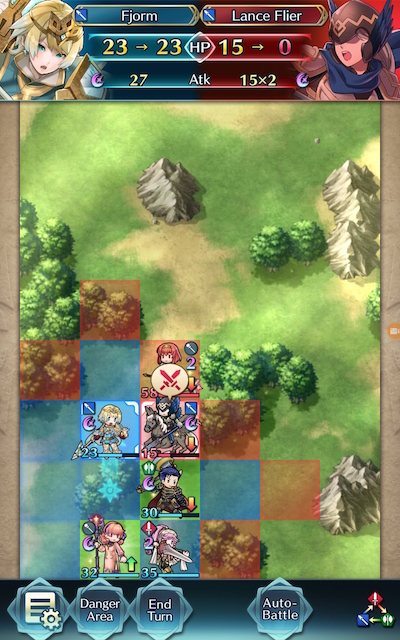
- Infernal

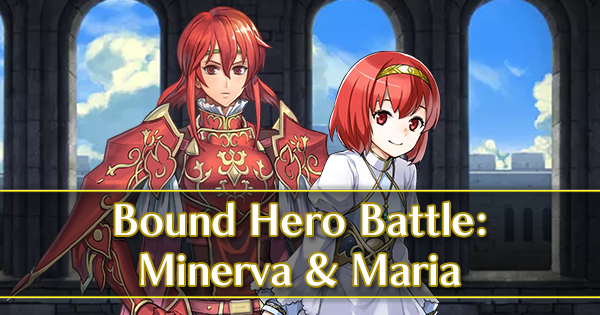
Bound Hero Battle: Minerva and Maria
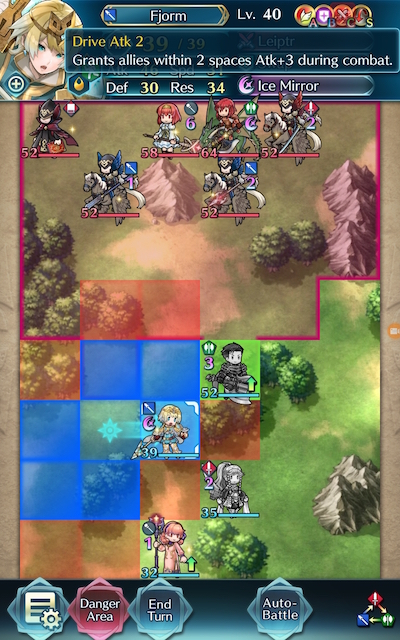
As another Bound Hero Battle that is significantly less difficult than later content, Minerva and Maria’s map features a plethora of fliers, one mage, and one healer -- that being Maria herself. There’s a few tricky aspects here like the fliers carrying Iote’s Shield, the one Firesweep Lance wielding flier, and the fact that Maria totes Dazzling Staff. The fact that, however, none of these foes are particularly well-rounded makes them easy to pick off if one targets their weaker defensive stat.
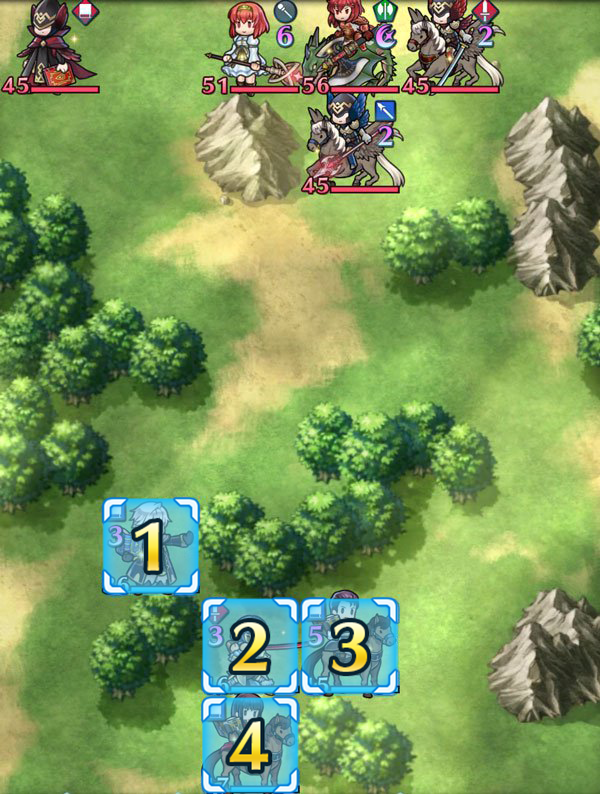
What makes this map even easier is that there are no reinforcements and the foes advance on their own, meaning that it is not necessary to strike or bait to get this Bound Hero Battle started. Because of this, you can choose to play offensively or defensively. It’s rare for an Infernal map to allow you to use whatever style suits you best given the units you possess, so try to enjoy the breather and have fun -- and gain some orbs in the process!
Before you begin teambuilding, it’s completely possible you already possess everything you need to beat this map. Created by Gamepress staff member RedFerrari1998, the video guide below uses only F2P units, no Skill Inheritance, and one Seal -- see the description for more details. If it doesn’t work for you, though, then read on!
Who to Choose
As is generally true of Bound Hero Battles, the individual units used is very important as they will primarily inform a strategy. There are a few routes one can take depending on what units are personally available, and, of course, adjustment based on the units one possesses is always a possibility.
Baiters
Since the enemies on this map will start moving regardless of whether you bait or not, it’s not strictly necessary for you to have a tank on this map. If you choose to use one or more of them, though, be mindful that most of the foes on this map (barring Minerva) have high Resistance, so you’ll want to target their Defense instead.
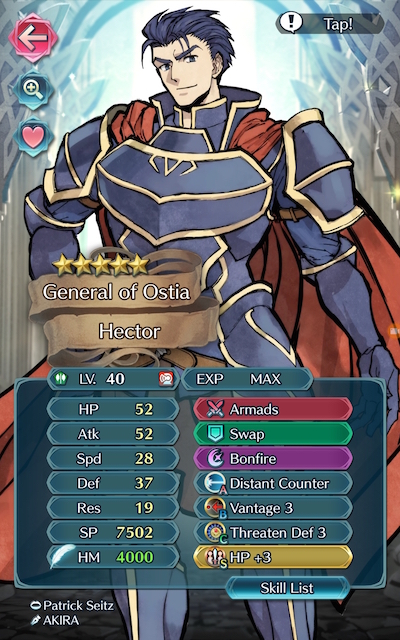
Armors such as Hector, Valentine Hector, Fallen Hardin, and Zelgius are able to easily withstand hits and hit hard upon counterattacking. Sigurd (despite his low Speed) is a powerful physical tank who is able to even absorb a fair bit of magic damage due to Divine Tyrfing and Crusader’s Ward. Brave Ike, in comparison, is a consistently amazing self-sustaining melee specialist due to his native Steady Breath -- just be sure to keep him away from magic users. Great F2P options include Legendary Ike, Black Knight, Xander, Valentine Eliwood, and Fjorm. Once promoted to 5 star rarity, Anna also has decent Attack and high enough Speed to avoid getting doubled, but may require healer support due to her low Defense.
Strikers
Archers are very useful in this Bound Hero Battle because of the effective damage they’ll deal to the fliers who don’t carry Iote’s Shield. In particular, however, Brave Bow users can be incredibly potent on this map due to their ability to overpower finish off any foes your tanks may otherwise struggle with. It’s worth noting that due to the relatively low Defense that most foes on this map possess, archers are more useful than Brave and Blade tome users due to their ability to deal physical damage. New Year Corrin, Brave Lyn, Bridal Cordelia, Klein, and Setsuna are potential strikers you may want to use, with a special mention going to New Year Corrin and Brave Lyn given their F2P status.
Alternatively, melee Brave users are able to hit foes twice without retaliation in their weaker Defense. Cherche, Cordelia, Hinoka, and Elincia are all great Brave users who can make excellent use of class-specific buffs.
While Brave and Blade tome wielders can be less useful due to the magic damage they deal, they can also serve to be useful if your team composition provides them with the appropriate buffs. Tharja, Reinhardt, Tailtiu, and Nino are potential options here, especially if they are equipped with a Breaker skill to add to their coverage and are accompanied by a buffbot like Eirika or Ephraim.
Dancers
Dancers help provide support, may even have a decent offensive presence themselves, and can usually tank a hit or two, if need be. Olivia, Performing Olivia, Performing Inigo, Performing Shigure, Performing Azura, Azura, New Year Azura, and Ninian all give the refreshment that high-firepower units need while also possessing the ability to provide an assist to KO an enemy.
Healers
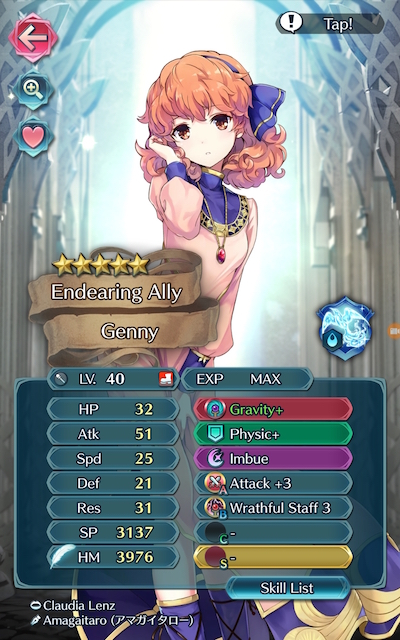
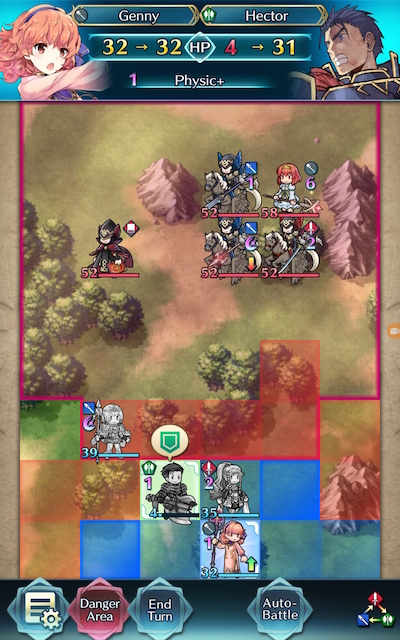
While not generally a great choice over units who can deal heavy damage or dancers, Healers can be incredibly useful in this Bound Hero Battle due to their ability to provide valuable healing to your tanks. Genny, Priscilla, Elise, Wrys, and Lissa are potential additions to a team that may serve you well on this map.
Strategy
Strategizing for this Bound Hero Battle shouldn’t be too challenging due to the absence of reinforcements. While it can be difficult to exactly predict what will happen due to IV / Merge variance, here’s some general tips to get you started.
Irons In The Fire
Since the enemies on this map will move on their own regardless of if you damage / KO one of them or bait, the team that you’re using will primarily inform what move you make on the first turn. An archetypical striker / dancer team will want to account for granting any helpful buffs and set up their positioning -- depending on a team’s composition, that will mean either setting up to sweep or baiting problematic foes away from the group. Alternatively, a tanking team will likely prefer to move into the enemy’s range to KO a foe or two this turn.
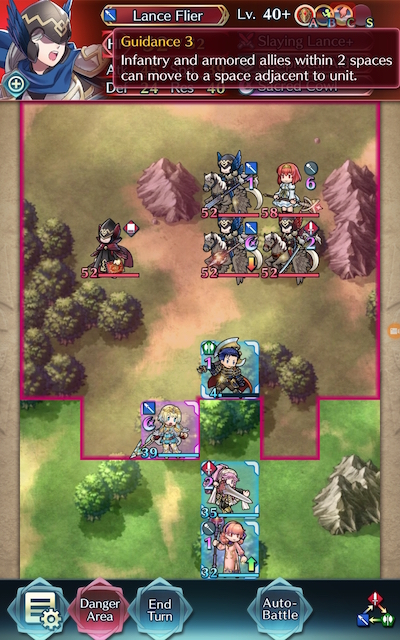
There’s a few things to be aware of, though. The left lance flier is carrying Guidance, while the Minerva possesses Flier Formation. Both of these skills may cause another foe to catch you by surprise, so be aware that when you tangle with either of these fliers, you may be getting more than you bargained for.
Positioning Positive
If an enemy doesn’t move the way you expected (or wanted) them to, don’t panic! Positioning is a key element that informs the AI’s decision making, and it’s entirely possible that moving one of your units into a different space will give you a result that’s more to your liking. Dancers and healers are particularly useful for this purpose, as the AI usually targets them with priority.
Trading Places
Like most Grand Hero Battles and Bound Hero Battles, the trees on this map can result in your maneuvering quarters being rather tight. This problem is compounded if you use armor units, as their one movement can make retreating with them rather tricky.
Thankfully, this issue can be solved by utilizing movement assists like Swap or Reposition. Swap allows you to extend the range of a unit that has low movement ( since you can Swap with an ally that is one space away) while Reposition enables you to sling an ally across terrain to safety.
Timing Is Everything
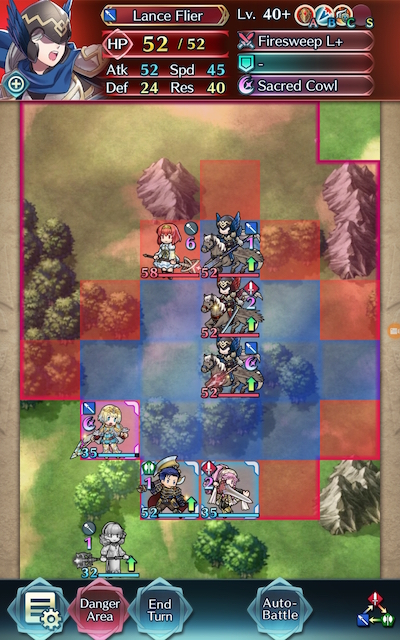
Sometimes, it may be worthwhile for your units to take a hit if it results in your netting a KO in one move that would otherwise take two. If you notice that one of your units is almost ready to fire off their Special, consider allowing them to take a bit of unnecessary damage even when retreating is possible. Doing so will either allow them to KO a foe on Enemy Phase, or, in the case of this Firesweep Lance flier, get an easy KO on the next Player Phase.
Looking Ahead
Although usually the color triangle rules all, in certain situations it’s adviseable to enter a neutral matchup in order to deal heavy damage to another enemy. If you’ve damaged one foe and they can be picked off by one of your units with lower Attack, it will likely prove worth your while to save your heavy hitter’s turn for when it really counts.
If At First You Don’t Succeed
Don’t be fooled by video walkthroughs of any Bound Hero Battle that you watch -- it’s very rare for anyone to beat high-difficulty content (or record a video of themselves doing so!) on their first try. Additionally, the potential variance in unit builds that Skill Inheritance brought along with the random nature of summoning has resulted in pretty much every single summoner having different “building blocks” to work with. This, when combined with the high difficulty level of Infernal, may prove frustrating while someone is trying to find the right combination of units and moves. The key thing to keep in mind is that it may take some light Skill Inheritance and seal shuffling, multiple tries of the map, and a few stamina potions to find a strategy that works for you. Every single turn you complete gets you one step closer to completing the puzzle. Finally, reading about or watching videos of successful strategies may also help you break through a particularly difficult turn that you can’t complete, or may give you ideas of a new unit to use.
Map Enemies
- Hard
- Lunatic
- Infernal
| HP | ATK | SPD | DEF | RES | |
|---|---|---|---|---|---|
| 34 | 33 | 25 | 15 | 20 | |
| Weapon | Bolganone | A | Swift Strike 2 | ||
| Support | B | Bowbreaker 2 | |||
| Special | C | Drive Def 1 | |||
| HP | ATK | SPD | DEF | RES | |
|---|---|---|---|---|---|
| 39 | 23 | 27 | 19 | 25 | |
| Weapon | Panic | A | Fortress Def 3 | ||
| Support | Rehabilitate | B | Dazzling Staff 3 | ||
| Special | Miracle | C | Fortify Res 3 | ||
| HP | ATK | SPD | DEF | RES | |
|---|---|---|---|---|---|
| 41 | 44 | 31 | 20 | 11 | |
| Weapon | Hauteclere | A | Life and Death 3 | ||
| Support | B | Flier Formation 3 | |||
| Special | Sacred Cowl | C | Ward Fliers | ||
| HP | ATK | SPD | DEF | RES | |
|---|---|---|---|---|---|
| 34 | 31 | 28 | 15 | 29 | |
| Weapon | Firesweep Lance | A | Iote's Shield | ||
| Support | B | Hit and Run | |||
| Special | Sacred Cowl | C | Fortify Fliers | ||
| HP | ATK | SPD | DEF | RES | |
|---|---|---|---|---|---|
| 34 | 30 | 28 | 15 | 29 | |
| Weapon | Slaying Edge | A | Death Blow 2 | ||
| Support | B | Hit and Run | |||
| Special | Aegis | C | Hone Fliers | ||
| HP | ATK | SPD | DEF | RES | |
|---|---|---|---|---|---|
| 45 | 44 | 32 | 20 | 28 | |
| Weapon | Bolganone+ | A | Swift Strike 2 | ||
| Support | B | Bowbreaker 3 | |||
| Special | C | Drive Def 2 | |||
| HP | ATK | SPD | DEF | RES | |
|---|---|---|---|---|---|
| 51 | 31 | 35 | 24 | 32 | |
| Weapon | Panic | A | Fortress Def 3 | ||
| Support | Rehabilitate | B | Dazzling Staff 3 | ||
| Special | Miracle | C | Fortify Res 3 | ||
| HP | ATK | SPD | DEF | RES | |
|---|---|---|---|---|---|
| 56 | 52 | 38 | 27 | 18 | |
| Weapon | Hauteclere | A | Life and Death 3 | ||
| Support | B | Flier Formation 3 | |||
| Special | Sacred Cowl | C | Ward Fliers | ||
| HP | ATK | SPD | DEF | RES | |
|---|---|---|---|---|---|
| 45 | 42 | 36 | 22 | 37 | |
| Weapon | Slaying Edge+ | A | Life and Death 3 | ||
| Support | B | Flier Formation 3 | |||
| Special | Sacred Cowl | C | Ward Fliers | ||
| HP | ATK | SPD | DEF | RES | |
|---|---|---|---|---|---|
| 45 | 43 | 36 | 22 | 37 | |
| Weapon | Firesweep Lance+ | A | Iote's Shield | ||
| Support | B | Hit and Run | |||
| Special | Sacred Cowl | C | Fortify Fliers | ||
| HP | ATK | SPD | DEF | RES | |
|---|---|---|---|---|---|
| 52 | 47 | 35 | 22 | 31 | |
| Weapon | Bolganone+ | A | Swift Strike 2 | ||
| Support | B | Bowbreaker 3 | |||
| Special | C | Drive Def 2 | |||
| HP | ATK | SPD | DEF | RES | |
|---|---|---|---|---|---|
| 52 | 45 | 39 | 24 | 40 | |
| Weapon | Slaying Lance+ | A | Iote's Shield | ||
| Support | Reciprocal Aid | B | Seal Spd 3 | ||
| Special | Sacred Cowl | C | Guidance 3 | ||
| HP | ATK | SPD | DEF | RES | |
|---|---|---|---|---|---|
| 58 | 34 | 38 | 26 | 35 | |
| Weapon | Panic | A | Fortress Def 3 | ||
| Support | Rehabilitate | B | Dazzling Staff 3 | ||
| Special | Miracle | C | Threaten Def 3 | ||
| HP | ATK | SPD | DEF | RES | |
|---|---|---|---|---|---|
| 64 | 55 | 41 | 30 | 20 | |
| Weapon | Hauteclere | A | Life and Death 3 | ||
| Support | B | Flier Formation 3 | |||
| Special | Sacred Cowl | C | Ward Fliers | ||
| HP | ATK | SPD | DEF | RES | |
|---|---|---|---|---|---|
| 52 | 46 | 39 | 24 | 40 | |
| Weapon | Firesweep Lance+ | A | Iote's Shield | ||
| Support | B | Hit and Run | |||
| Special | Sacred Cowl | C | Fortify Fliers | ||
| HP | ATK | SPD | DEF | RES | |
|---|---|---|---|---|---|
| 52 | 45 | 39 | 24 | 40 | |
| Weapon | Slaying Edge+ | A | Death Blow 3 | ||
| Support | B | Hit and Run | |||
| Special | Aegis | C | Hone Fliers | ||
User Submitted Teams
First of all, a reminder. This is a new team I just barely assembled, and 90% of the skills will be replaced.
Caeda
Wing Sword(eff)
Rally Speed (IK, IK, it has no use there)
Luna
Darting Blow 3
Green Tomebreaker 2
Fortify Fliers
---
Hinoka
Hinoka's Spear (+eff)
Draw Back
Blazing Wind
Renewal 1
Hone Fliers
Iote's Shield SS
Cordelia
Brave Lance+
Pivot
Galeforce
Triangle Adept 3
Escape Route 2
---
Quickened Pulse SS
NY! Azura
Hagoita+(+res)
Sing
Moonbow
Iote's Shield
Wings of Mercy 3
Hone Fliers
---
After seeing how badly Corrin broke this BHB, I decided to start trying with the other teams, from less solid to most solid. This was the weakest one I am willing to try (behind would go the shit armor emblem I have solely for the monthly quests).
I can't really believe it myself, but these four misfits actually managed to win this BHB on Infernal, on the first try no less! It's come a long way since Narcian gave them trouble last time.
The main thing was having Hinoka take on the left side, and use Blazing Wind on the Sword Flier to soften Minerva so Caeda could finish her off. Then Cordelia proceeded to kill the remnants, and for fun I trapped Maria with Caeda, Cordelia and Hinoka to properly set up and sort-of execute the titular combination attack.
(now it's just a question of getting bridal caeda so her, lyn and cordelia can execute the Love-Triangle Attack)
F!Corrin:(+atk -HP)+2
Dark Breath+(res bonus)
Pivot
Blazing Wind
Distant Counter
Quick Riposte 3
Savage Blow 3
Distant Defense 2 SS
Marth:(-HP +Res) (40 HP)
Falchon (effect bonus)
Reposition
Luna
Close Def 3
Swordbreaker 3
Drive Speed 2
Drive Def 1 SS
+1 Bridal Lyn (-atk +HP)
Candlelight+ (Wrathful bonus)
Rehabilitate+
Swift-Winds Balm
HP+5
Dazzling Staff 3
Infantry Pulse 3
HP+5 SS
Azura:(-spd +res) (41 HP)
Slaying Lance (res bonus)
Sing
Sol
Spd+3
Geyser Dance 2
Spur Atk 3
Spur Spd 3 SS
You will notice Panic Ploy and got removed, to allow me to merge Corrin without loosing Infantry Pulse. Deflect Magic got replaced by Distant Defense and the Breath got the Res effect this time. This way Corrin can still take Reinhardth on, while Deflect Magic is left open for someone else that might need it on the future. Blazing Wind is used this time mostly because the name sounds better. Growing Wind is best used on maps with a lot of weak enemies... Thinking again maybe Growing Wind is better here.
Usually, I want to showcase the bare minimum, but in this case just went TOO far:
F!Corrin:(+atk -HP)+2
Dark Breath+(res bonus)
---
Distant Defense 2 SS
Random Spur/Drive fodder.
I won't say the detailed strategy, because there literally was none. Corrin just sat there in front of Azura and Marth and took all the hits.
Corrin took literally zero damage from anything on the map other than Minerva, and a clean sweep would have been possible with Blazing Wind equipped. I mean, I get it, she has summoner support, two merges, and half the time was under the Drive effects of Falchion, but come on... At least, Minerva SHOULD have been able to deal more than just 24-28 damage.
you just need to take care of 2 flier using brave lyn, bait minerva with alfonse and use fjorm to take care of mage and maria, any dancer can be used, i used 5* alfonse with axebreaker and his prf weapon and the rest is on basic skill set
BLyn:
-IVs: Neutral
-Weapon: Firesweep Bow+
-Assist: Draw Back
-Special: Draconic Aura
-A Skill: Swift Sparrow 2
-B Skill: Guard 2
-C Skill: Fortify Cavalry (irrelevant)
-Sacred Seal: HP +4
Tana:
-IVs: +Spd -Res
-Weapon: Vidofnir
-Assist: Reposition
-Special: Moonbow
-A Skill: Fury 3
-B Skill: Desperation 3
-C Skill: Guidance 3
-Sacred Seal: Quickened Pulse
Tiki(A) (partly built):
-IVs: +Atk -Def (I know they're bad but they still work rather well)
-Weapon: Lightning Breath+ (Def Refine)
-Assist: Reposition
-Special: Aether
-A Skill: Steady Breath
-B Skill: N/A
-C Skill: Threaten Attack 3
-Special Skill: Close Def 3
Hector(LA) (still mostly unbuilt):
-IVs: +Def -Spd
-Weapon: Berserk Armads
-Assist: N/A
-Special: Glimmer
-A Skill: Close Counter
-B Skill: Wary Fighter 2
-C Skill: N/A
-Sacred Seal: N/A


