


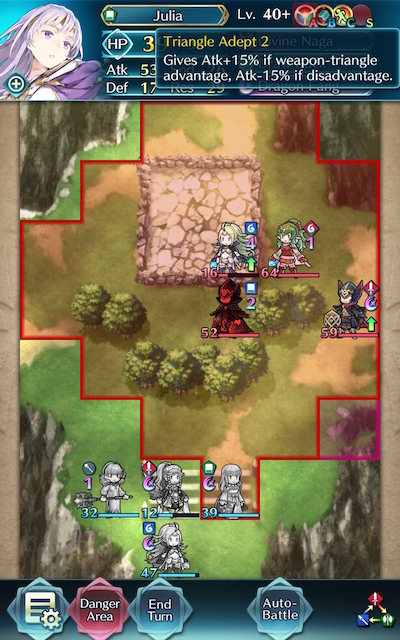
Map
- Normal
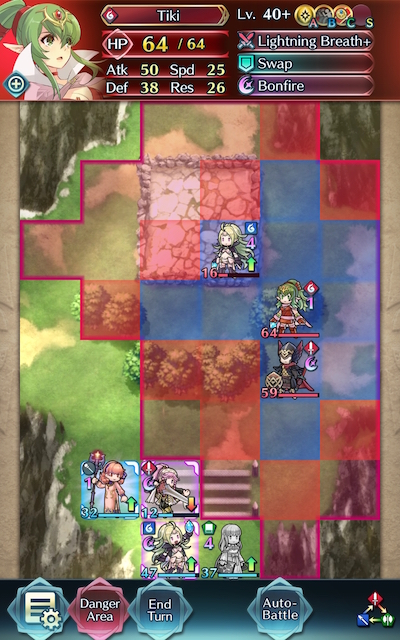
- Infernal
Bound Hero Battle: Tiki and Nowi
Another month brings yet another Bound Hero Battle, and this time it is named for the dauntless duo of Nowi and Tiki! Featuring three dragons, a Guidance flier, and the presence of the new skill Chill Spd, while this map is made easier by the lack of reinforcements, you’ll definitely want to take caution as you work through taking down your foes. There’s a few more tricky aspects like the trenches and the trees, but if you use your ingenuity and play smart, this map will no doubt fall to your strategic prowess.
Who To Choose
As is generally true of Bound Hero Battles, the individual units used is very important as they will primarily inform a strategy. There are a few routes one can take depending on what units are personally available, and, of course, adjustment based on the units one possesses is always a possibility.
It’s important to note that the presence of trees and trenches on this map do make maneuvering with cavalry allies rather difficult. Because of this -- and while they are more powerful while in a cavalry-exclusive team -- it’s a good idea to either use a mixed team composition or to leave horse-mounted heroes to take a breather in your barracks.
Baiters
Since the enemies on this map won’t start moving unless you KO, damage, or bait a foe, it’s advisable that you use a dedicated baiter if you’re not using a striker. It’s wise to keep mindful of the fact that ⅔ of the foes on this map deal magic damage, though -- so if you do decide to use a tank, make sure they either have good Resistance or will easily chew through any foes who dare stand in their way.
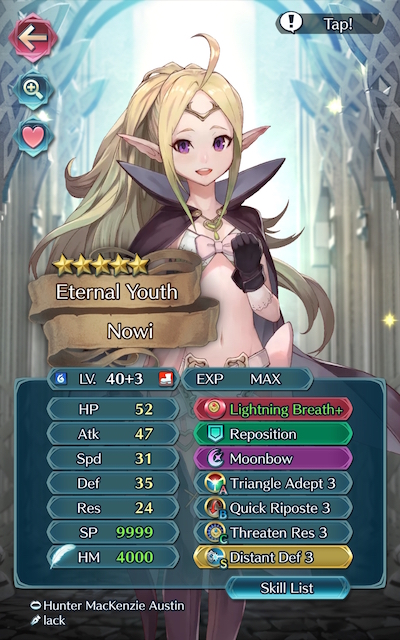
Armors such as Hector, Valentine Hector, Fallen Hardin, and Zelgius are able to easily withstand physical hits and hit hard upon counterattacking, but they may struggle because most of their enemies will be targeting their relatively low Resistance. Dragons such as Nowi, Young Tiki, and Fae all boast decent mixed defenses, especially if they tote skills such as Triangle Adept to grant them more polarizing matchups. Legendary Robin is also a potential choice, but may struggle due to her lack of color advantage. Great F2P options include Legendary Ike, who natively sports Warding Breath which boosts his Resistance and grants him cooldown reduction, and Fjorm, who possesses naturally high Resistance. Once promoted to 5 star rarity, Anna also has decent Attack and reasonably good Resistance, but may struggle if Chill Spd hits her with a debuff.
Strikers
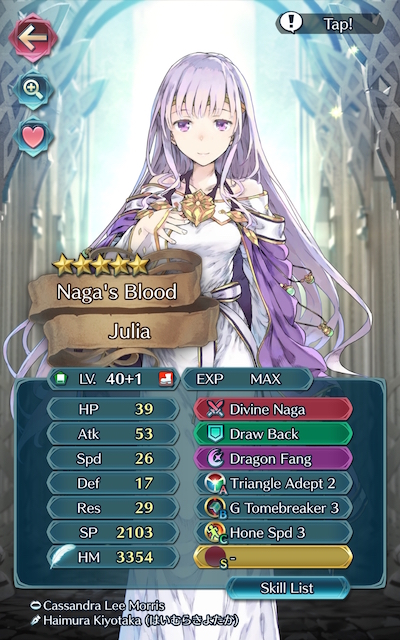
First and foremost, the fact that a good portion of your foes are composed of dragon units means that strikers who can deal effective damage to them will prove to be incredibly useful here. Lucina, Masked Marth, Marth, Chrom, Exalted Chrom, Alm, and Roy with the refined Binding Blade are all red units who deal effective damage to dragons when wielding the appropriate weaponry. Deirdre and Julia are green options who also deal effective damage when they carry the tome Naga or Divine Naga.
Alternatively, melee Brave users are able to hit foes twice without retaliation, though be mindful of foes that have particularly high Defense. Moreover, those who are fliers are able to bypass the movement penalties the trees would normally cause. Cherche, Cordelia, Hinoka, and Elincia are all great Brave users who can make excellent use of class-specific buffs. WT Reinhardt is also a powerful striker with a good Enemy Phase presence as well, but may struggle somewhat due to the trenches and trees on this map.
Brave and Blade tome wielders can also serve to be useful if your team composition provides them with the appropriate buffs. Tharja, Reinhardt, Tailtiu, and Nino are potential options here, especially if they are equipped with a Breaker skill to add to their coverage and are accompanied by a buffbot like Eirika or Ephraim. Be warned, however, that the presence of Chill Spd on this map will somewhat complicate things for most Blade users given their usually high Speed and their preference to perform follow-ups.
Dancers
Dancers help provide support, may even have a decent offensive presence themselves, and can usually tank a hit or two, if need be. Olivia, Performing Olivia, Performing Inigo, Performing Shigure, Performing Azura, Azura, New Year Azura, and Ninian all give the refreshment that high-firepower units need while also possessing the ability to provide an assist to KO an enemy.
Healers
While not generally a great choice over units who can deal heavy damage or dancers, Healers can be incredibly useful in this Bound Hero Battle due to their ability to provide valuable healing to your tank. Genny, Elise, Wrys, Lissa, and Sakura are potential additions to a team that may serve you well on this map.
Strategy
Strategizing for this Bound Hero Battle shouldn’t be too challenging due to the absence of reinforcements. While it can be difficult to exactly predict what will happen due to IV / Merge variance, here’s some general tips to get you started.
First Blood
Since this map won’t start moving unless you bait, damage, or KO an enemy, your team composition will change how you decide to begin. Since a unit will have to weather damage from at least two colors if they bait, it’s suggested that the map is begun by using a striker instead.
Unfortunately, striking is made somewhat complicated because the most obvious targets (that being Nowi and the green dragon) are seated on defense tiles, which increases the bulkiness exponentially. Moreover, Nowi and Tiki have reduced cooldown, and are almost ready to fire off powerful Specials. Don’t panic -- even if you don’t net a KO this turn, this map should still be manageable. Just take your time and make your move methodically -- assuming significant damage is still dealt to a foe, this turn will be far from wasted.
Guiding Light
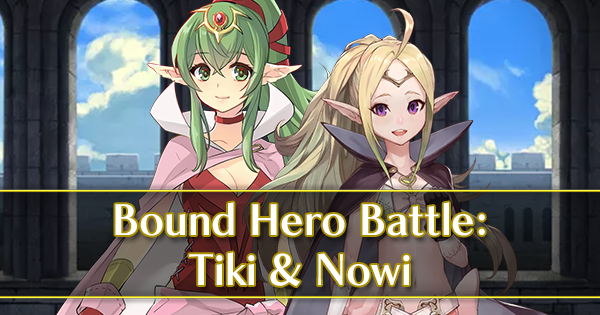
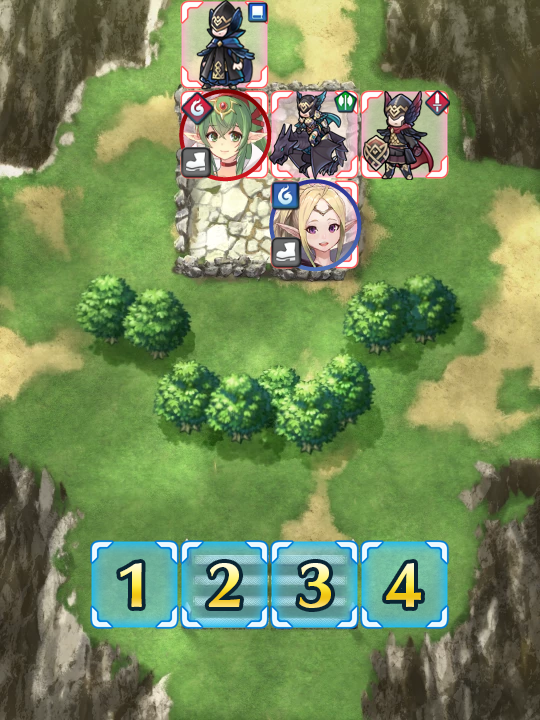
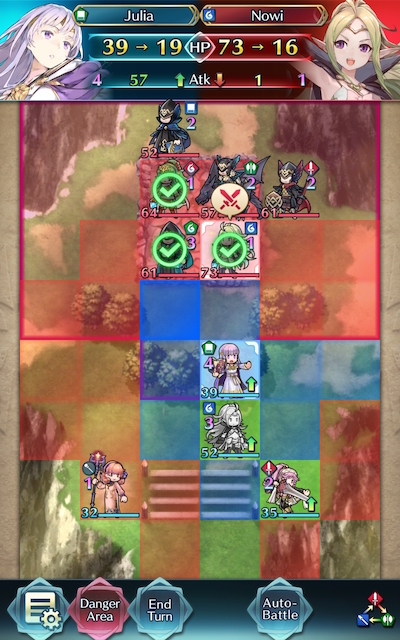
Another thing of note is that the flier on this map is carrying Guidance, which may allow a foe that you didn’t see coming to launch an ambush. If that happens, don’t give up yet! That enemy may be putting themselves into a position that allows you to KO them more easily than if they had just stayed within their ranks. You can even use this to your advantage -- below, the green dragon is baited with Nowi so that Julia can KO them with Genny’s help.
Living Life Dangerously
Although it may seem counterproductive, there are situations where it may actually suit your purposes to allow one of your allies to be low on health. Skills like Wings of Mercy and Escape Route can help piggyback your dancer to refresh another unit, or allow any one of your units to retreat when they’ve overextended. If one of your units takes damage at a specific point of this map and you're later stuck in a precarious situation, try giving them one of your allies these skills. After all, there's very few situations where teleporting across the map won't come in handy.
Flipping The Switch
If you think they can handle it, don’t be afraid to let your striker bait, especially if they have a color advantage and are running Triangle Adept. While it makes sense to be reluctant to allow any foe to initiate on them, the fact that this map costs no stamina means that you can afford to take risks. Besides, what is more likely is that your striker will come out of the engagement with another KO under their belt -- assuming you make sure to play to their strengths. As long as their presence on Enemy Phase isn’t non-existent, they should be fine, and you’ll be one step closer to conquering this map for good.
Two For The Price Of One
Once you’re in a situation where one of your units is a hard counter for two or more foes, it’s advisable to do everything you can to finish off those foes as quickly as possible. This is when you can afford to play more aggressively and dive deep into the enemy lines. You don’t want to put yourself into a situation, after all, where winning is more difficult because a troublesome unit moved into range. You may want to consider tanking more than one foe on enemy phase… if your tank can handle it. Dancers can be a great way to ensure you’re in the proper position, but movement assists can also help out with this in a pinch.
If At First You Don’t Succeed
Don’t be fooled by video walkthroughs of any Bound Hero Battle that you watch -- it’s very rare for anyone to beat high-difficulty content (or record a video of themselves doing so!) on their first try. Additionally, the potential variance in unit builds that Skill Inheritance brought along with the random nature of summoning has resulted in pretty much every single summoner having different “building blocks” to work with. This, when combined with the high difficulty level of Infernal, may prove frustrating while someone is trying to find the right combination of units and moves. The key thing to keep in mind is that it may take some light Skill Inheritance and seal shuffling, multiple tries of the map, and a few stamina potions to find a strategy that works for you. Every single turn you complete gets you one step closer to completing the puzzle. Finally, reading about or watching videos of successful strategies may also help you break through a particularly difficult turn that you can’t complete, or may give you ideas of a new unit to use.
Map Enemies
- Hard
- Lunatic
- Infernal
| HP | ATK | SPD | DEF | RES | |
|---|---|---|---|---|---|
| 33 | 31 | 26 | 16 | 22 | |
| Weapon | Blárowl | A | Fury 2 | ||
| Support | B | Swordbreaker 2 | |||
| Special | Reprisal | C | Fortify Def 3 | ||
| HP | ATK | SPD | DEF | RES | |
|---|---|---|---|---|---|
| 41 | 38 | 17 | 27 | 18 | |
| Weapon | Lightning Breath+ | A | Steady Stance 3 | ||
| Support | Swap | B | Chill Spd 3 | ||
| Special | Bonfire | C | Drive Res 2 | ||
| HP | ATK | SPD | DEF | RES | |
|---|---|---|---|---|---|
| 36 | 37 | 19 | 28 | 13 | |
| Weapon | A | Bracing Blow 2 | |||
| Support | B | Hit and Run | |||
| Special | Noontime | C | Guidance 2 | ||
| HP | ATK | SPD | DEF | RES | |
|---|---|---|---|---|---|
| 38 | 32 | 22 | 23 | 16 | |
| Weapon | Wo Dao | A | Swift Sparrow 2 | ||
| Support | B | Wrath 3 | |||
| Special | Moonbow | C | Breath of Life 2 | ||
| HP | ATK | SPD | DEF | RES | |
|---|---|---|---|---|---|
| 46 | 34 | 19 | 22 | 24 | |
| Weapon | Lightning Breath+ | A | Fortress Res 3 | ||
| Support | Rally Defense | B | Dull Ranged 3 | ||
| Special | Iceberg | C | Drive Def 2 | ||
| HP | ATK | SPD | DEF | RES | |
|---|---|---|---|---|---|
| 44 | 44 | 35 | 23 | 31 | |
| Weapon | Blárowl | A | Fury 3 | ||
| Support | B | Swordbreaker 3 | |||
| Special | Reprisal | C | Fortify Def 3 | ||
| HP | ATK | SPD | DEF | RES | |
|---|---|---|---|---|---|
| 56 | 46 | 23 | 35 | 24 | |
| Weapon | Lightning Breath+ | A | Steady Stance 3 | ||
| Support | Swap | B | Chill Spd 3 | ||
| Special | Bonfire | C | Drive Res 2 | ||
| HP | ATK | SPD | DEF | RES | |
|---|---|---|---|---|---|
| 49 | 49 | 27 | 36 | 19 | |
| Weapon | Slaying Hammer+ | A | Bracing Blow 2 | ||
| Support | B | Hit and Run | |||
| Special | Noontime | C | Guidance 3 | ||
| HP | ATK | SPD | DEF | RES | |
|---|---|---|---|---|---|
| 52 | 44 | 31 | 30 | 22 | |
| Weapon | Wo Dao+ | A | Swift Sparrow 2 | ||
| Support | B | Wrath 3 | |||
| Special | Moonbow | C | Breath of Life 3 | ||
| HP | ATK | SPD | DEF | RES | |
|---|---|---|---|---|---|
| 63 | 42 | 27 | 30 | 32 | |
| Weapon | Lightning Breath+ | A | Fortress Res 3 | ||
| Support | Rally Defense | B | Dull Ranged 3 | ||
| Special | Iceberg | C | Drive Def 2 | ||
| HP | ATK | SPD | DEF | RES | |
|---|---|---|---|---|---|
| 52 | 47 | 38 | 25 | 34 | |
| Weapon | Blárowl+ | A | Fury 3 | ||
| Support | B | Swordbreaker 3 | |||
| Special | Reprisal | C | Fortify Def 3 | ||
| HP | ATK | SPD | DEF | RES | |
|---|---|---|---|---|---|
| 64 | 50 | 25 | 38 | 26 | |
| Weapon | Lightning Breath+ | A | Steady Stance 3 | ||
| Support | Swap | B | Chill Spd 3 | ||
| Special | Bonfire | C | Drive Res 2 | ||
| HP | ATK | SPD | DEF | RES | |
|---|---|---|---|---|---|
| 57 | 52 | 30 | 39 | 21 | |
| Weapon | Slaying Hammer+ | A | Bracing Blow 2 | ||
| Support | B | Hit and Run | |||
| Special | Noontime | C | Guidance 3 | ||
| HP | ATK | SPD | DEF | RES | |
|---|---|---|---|---|---|
| 61 | 47 | 34 | 33 | 24 | |
| Weapon | Wo Dao+ | A | Swift Sparrow 2 | ||
| Support | B | Wrath 3 | |||
| Special | Moonbow | C | Breath of Life 3 | ||
| HP | ATK | SPD | DEF | RES | |
|---|---|---|---|---|---|
| 61 | 46 | 33 | 32 | 31 | |
| Weapon | Lightning Breath+ | A | Darting Blow 3 | ||
| Support | B | Windsweep 3 | |||
| Special | Glimmer | C | Threaten Spd 3 | ||
| HP | ATK | SPD | DEF | RES | |
|---|---|---|---|---|---|
| 73 | 46 | 30 | 33 | 35 | |
| Weapon | Lightning Breath+ | A | Fortress Res 3 | ||
| Support | Rally Defense | B | Dull Ranged 3 | ||
| Special | Iceberg | C | Drive Def 2 | ||
User Submitted Teams
https://www.youtube.com/watch?v=QIN5NLGTUlk
Heheh, puns. This team works for every single stage. If you want, just post a Question in the Q&A section, and I send videos of me solving the battles. I have the clips, but I'm too lazy to put them on YouTube unless someone needs them.
Anyways, there's three caveats to this team: It requires a very high-investment Blue unit (like my Nowi), an NY Azura (any dancer might work, but I used Guidance a bit in my solutions I think), and of course, an Alm.
Alm is +Spd -Res. Refined Falchion (+Eff), Reposition, Glimmer, Death Blow 2, Drag Back, Threaten Def 3, and Atk+1 seal. Drag Back is absolutely critical - it's the linchpin of this whole team.
Any lvl 40 Olivia should be fine; she doesn't really have to do anything. Mine has Hone Atk 1 and Spur Res 1 seal, both of which probably came into play at some point during the battle.
NY Azura has Hagoita+ (Def), Sing, Moonbow, Triangle Adept 3, and the Guidance 3 seal. All Azura does is Dance and position folks, while tanking Nowi's hits at the end. Mine is +Res -Spd.
Nowi.... so, I'm not sure how much of Nowi's set came into play. Probably most of it. But she's a +Def -Res, and has Lightning Breath+ (Def), Reposition, Aether, Steady Breath, Guard 3, Infantry Pulse 3, and Quick Riposte 3. She's Lvl40+1. And Summoner supported. So yeah. She does half the work, including the Blue mage. I think in one of my videos I have her running a Rally skill instead, but no Rally skills are needed. Reposition makes it all easier.
Felicia is using her plates, which weren't refined. She's +spd, with the skills Draw Back, Mirror Strike, Desperation, and a double dose of Savage Blow 3. Myrrh (neutral IVs) and the dancers have Wings of Mercy, while Myrrh also possessed Harsh Command to reverse Tiki's Chill Spd, which will trigger on Felicia.
Start an attack on Nowi, but retreat Felicia with the dancers after. You may need to watch for the Guidance user, as they may assist the green dragon, so Myrrh can take it on. Continue the hit-and-run until cleanup.
Roy does basically everything. Klein takes out the mage but Roy does everything else.
Link: https://youtu.be/P349cAVRk-Q
Palla +10: +ATK -RES
Wo Dao+ +spd, Reposition, Aether, Life & Death, Hone Speed 3 seal.
Cordelia +7: +RES -HP
Reposition, Life & Death, Wings of Mercy, Goad Fliers, Heavy Blade Seal.
Cherche +9: +ATK -SPD
Brave Axe, Reposition, Aether, Death Blow, Wings of Mercy, Goad Fliers, Deflect Magic 3 Seal.
Catria +7: +ATK -HP
Slaying Lance +SPD, Reposition, Ignis, Fury, Escape Route, Goad Fliers, Hone Atk seal.


