


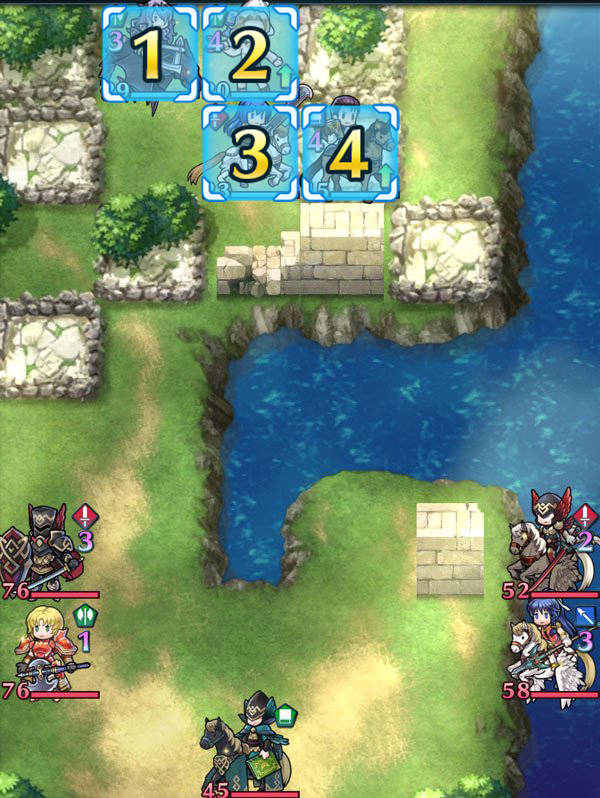
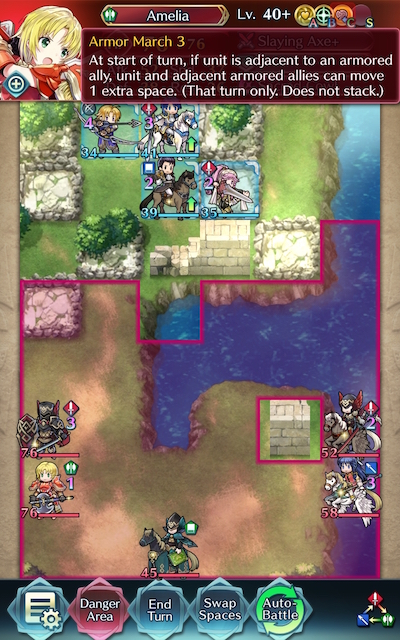
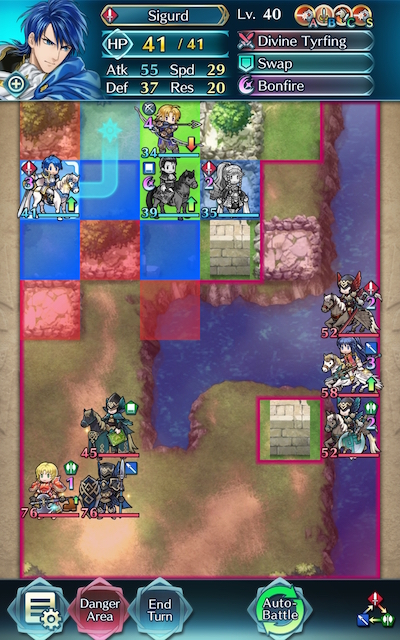
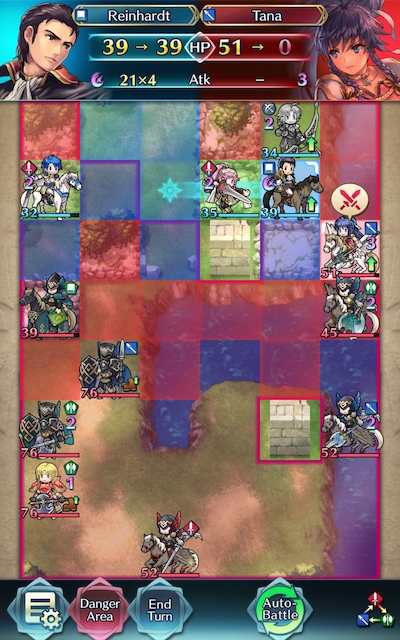
Map
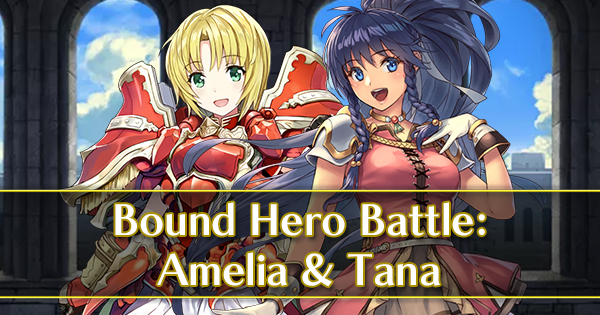
Bound Hero Battle: Amelia and Tana
Another month brings us another Bound Hero Battle revival, and this time we’re facing off against Amelia and Tana! As another reinforcements map that forces you into tight maneuvering quarters, there’s a fair number of factors here that aren’t in your favor -- you’ll be doing battle against a battalion of fliers, far-reaching armors (more on that later), and a few mages, just to make things more difficult. A cakewalk this definitely isn’t, but that isn’t to say all hope is lost.
Thankfully (and presumably because the map designers weren’t in a particularly sadistic mood), none of the fliers carry Iote’s Shield, meaning that they’re vulnerable to bows. Plus, although some of the armours possess decent Resistance, they’re still reasonably weak to magic, and the ones carrying Wary Fighter can still be hit twice at full HP by utilizing Brave weapons. With a little guidance, you should be able to blaze a path to victory.
Who to Choose
As is generally true of Bound Hero Battles, the individual units used is very important as they will primarily inform a strategy. There are a few routes one can take depending on what units are personally available, and, of course, adjustment based on the units one possesses is always a possibility.
Baiters
Since the enemies on this map approach your units with a pincer tactic, it’s advisable that you include a dedicated tank in your team composition. This will allow you to keep your strikers (and refresher/refreshers) somewhat safe while you adjust your positioning.
Armors such as Fallen Hardin, Distant Counter Effie, Zelgius, and Fallen Robin are able to hit hard very upon counterattacking, especially if they’re making use of Quick Riposte or Vengeful Fighter. Calvary tanks like Camus, Xander, and Sigurd perform particularly well with class-specific buffs. Nowi, Female Corrin, Male Kana, Fae, Myrrh, Female Kana, Adult Tiki, and Young Tiki all boast decent mixed defenses, especially if they tote skills such as Triangle Adept to grant them more polarizing matchups with reds. Legendary Robin is also a potential choice, but may struggle due to her lack of color advantage. An amazing F2P option is Fjorm, who is able to tank the mages with her high Resistance and her exclusive Special, Ice Mirror, Legendary Ike, who’s native Warding Breath grants him accelerated cooldown, and Black Knight, who is able to net key KOs with devastating procs of Black Luna.
Strikers
Given that a consistent stream of foes take effective damage from archers, it logically follows that they’d be incredibly useful. In particular, however, Brave Bow users can be incredibly potent on this map due to their ability to overpower finish off any enemies your tank or tanks may otherwise struggle with. New Year Corrin, Brave Lyn, WF Hinoka, Bridal Cordelia, Klein, Gordin, and Setsuna are potential strikers you may want to use, with a special mention going to New Year Corrin and Brave Lyn given their F2P status, and Gordin / Klein for their native Brave Bow and 3-4 star availability.
Alternatively, melee Brave users are able to hit foes twice without retaliation, and may even quad hit if they outspeed an enemy. They also override the effects of Wary Fighter, making them a good choice to battle the armors who carry that skill. Cherche, Cordelia, Hinoka, and Elincia are all great Brave users who can make excellent use of class-specific buffs. Finn is an F2P option who would work particularly well in a cavalry team.
Speaking of the armors, any unit who can deal effective damage to them may serve you well in this Bound Hero Battle. Units carrying the Armorslayer or Armorsmasher, the Hammer or Slaying Hammer, or the Heavy Spear or Slaying Spear can potentially help you power through trickey foes.
Brave and Blade tome wielders can also serve to be useful if your team composition provides them with the appropriate buffs, though speedy mages can also be useful. Tharja, Reinhardt, Tailtiu, Ishtar, Linde, and Nino are potential options here, especially if they are equipped with a Breaker skill to add to their coverage and/or are accompanied by a buffbot like Eirika or Ephraim.
Refreshers
Refreshers help provide support, may even have a decent offensive presence themselves, and can usually tank a hit or two, if need be. Lene, Olivia, Performing Olivia, Performing Inigo, Performing Shigure, Performing Azura, Azura, New Year Azura, Bridal Ninian, and Ninian all give the refreshment that high-firepower units need while also possessing the ability to provide an assist to KO an enemy.
Healers
While not generally a great choice over units who can deal heavy damage or dancers, Healers can be incredibly useful in this Bound Hero Battle due to their ability to provide valuable healing to your tanks. Genny, Priscilla, Elise, Nanna, Wrys, and Lissa are potential additions to a team that may serve you well on this map, though any healer who has inherited Rehabilitate will likely do the trick.
Strategy
Strategizing for this Bound Hero Battle may be challenging due to reinforcements, but don’t worry -- with enough practice you’ll find a solution. While it can be difficult to exactly predict what will happen due to IV / Merge variance, here’s some general tips to get you started.
March Madness
At first, this map may seem like a breeze. There’s only a few fliers and some armors, so what’s the issue? The answer lies in Amelia’s C-skill, Armor March. This extends the armors’ range to 2, and since they ignore terrain penalties, they can trudge straight over trees that your units stumble through. To make matters worse, the danger zone somewhat confusingly displays Armor March range in preparation for the first turn it will be active -- as in, it doesn’t display it at all! This may get furstrating, so if two armors are adjacent you’ll have to manually check if one of those armors has Armor March. If they do, prepare accordingly by manually adding one more space to their range in your head.
Elbow Room
Since it will be a struggle to reach any unit on this turn (without being KO’d on Enemy Phase, that is), your next focus should likely be giving yourself some more room to maneuver. While attacking the breakable wall may seem like a bad idea due to the protection it provides, these obstacles often end up as a hindrance rather than a help due to the control they take away from you. Generally, the more options you have in Infernal mode, the better, and having one more space to work with may save you from a sticky situation.

Terrific Tiles
While the enemies you face may be hard to conquer, fortunately this map still has some gifts to give you -- and these come in the form of defense tiles! Unfortunately, though, your foes won’t hesitate to use these against you, so it’s a good idea to park your chosen tank on one of them if you’re able. This also has the added effect of helping you establish a chokepoint to protect your squishier strikers and refreshers -- assuming your tank can hold the line.
Limit Breaker
A great way to take care of foes that you may have trouble handling otherwise are Breaker skills -- especially if they’re toted by a same-color unit. Breakers expand your unit’s favourable matchups and, when used in conjunction with a Brave weapon, can even allow you to hit a foe not once, not twice, but rather four times! So if a particular foe is causing your strategy to collapse, don’t fret; Breaker skills can be an easy solution.
Special Surprise
Damaging armors can be difficult, especially when you’re used to using Defense or Attack scaling Specials like Glimmer and Moonbow. The reason these Specials -- though powerful in their own right -- can be inconsistent is because they don’t add a flat increase onto the damage dealt to a foe. While this isn’t a problem in most cases, the inflated stats that enemies possess on Infernal can make these skills less effective than they normally would be.
The solution to this is simple -- try to have a Special that adds flat damage to damage dealt ready and waiting for when you need it. This can be a lifesaver in a pinch, especially against foes who possess high Resistance or Defense.
If At First You Don’t Succeed
Don’t be fooled by video walkthroughs of any Bound Hero Battle that you watch -- it’s very rare for anyone to beat high-difficulty content (or record a video of themselves doing so!) on their first try. Additionally, the potential variance in unit builds that Skill Inheritance brought along with the random nature of summoning has resulted in pretty much every single summoner having different “building blocks” to work with. This, when combined with the high difficulty level of Infernal, may prove frustrating while someone is trying to find the right combination of units and moves. The key thing to keep in mind is that it may take some light Skill Inheritance and seal shuffling as well as multiple tries of the map to find a strategy that works for you. Every single turn you complete gets you one step closer to completing the puzzle. Finally, reading about or watching videos of successful strategies may also help you break through a particularly difficult turn that you can’t complete, or may give you ideas of a new unit to use.
Map Enemies
- Hard
- Lunatic
- Infernal
| HP | ATK | SPD | DEF | RES | |
|---|---|---|---|---|---|
| 49 | 37 | 11 | 36 | 13 | |
| Weapon | Slaying Edge | A | Fortress Def 2 | ||
| Support | B | R Tomebreaker 2 | |||
| Special | Ignis | C | Goad Armor | ||
| HP | ATK | SPD | DEF | RES | |
|---|---|---|---|---|---|
| 49 | 39 | 26 | 27 | 16 | |
| Weapon | Slaying Axe+ | A | Earth Boost 3 | ||
| Support | B | Renewal 3 | |||
| Special | Sacred Cowl | C | Armor March 3 | ||
| HP | ATK | SPD | DEF | RES | |
|---|---|---|---|---|---|
| 29 | 38 | 20 | 14 | 28 | |
| Weapon | Rexcalibur | A | Fury 2 | ||
| Support | B | Vantage 3 | |||
| Special | C | Atk Ploy 2 | |||
| HP | ATK | SPD | DEF | RES | |
|---|---|---|---|---|---|
| 33 | 29 | 27 | 15 | 28 | |
| Weapon | Wo Dao | A | Death Blow 2 | ||
| Support | B | Flier Formation 2 | |||
| Special | Moonbow | C | Fortify Fliers | ||
| HP | ATK | SPD | DEF | RES | |
|---|---|---|---|---|---|
| 37 | 42 | 30 | 20 | 18 | |
| Weapon | Vidofnir | A | Spd Def 2 | ||
| Support | B | Knock Back | |||
| Special | Sol | C | Guidance 3 | ||
| HP | ATK | SPD | DEF | RES | |
|---|---|---|---|---|---|
| 66 | 49 | 16 | 45 | 19 | |
| Weapon | Slaying Edge+ | A | Fortress Def 3 | ||
| Support | B | R Tomebreaker 3 | |||
| Special | Ignis | C | Goad Armor | ||
| HP | ATK | SPD | DEF | RES | |
|---|---|---|---|---|---|
| 65 | 48 | 34 | 35 | 23 | |
| Weapon | Slaying Axe+ | A | Earth Boost 3 | ||
| Support | B | Renewal 3 | |||
| Special | Sacred Cowl | C | Armor March 3 | ||
| HP | ATK | SPD | DEF | RES | |
|---|---|---|---|---|---|
| 39 | 51 | 28 | 20 | 37 | |
| Weapon | Rexcalibur+ | A | Fury 3 | ||
| Support | B | Vantage 3 | |||
| Special | C | Atk Ploy 3 | |||
| HP | ATK | SPD | DEF | RES | |
|---|---|---|---|---|---|
| 44 | 41 | 35 | 21 | 36 | |
| Weapon | Wo Dao+ | A | Death Blow 3 | ||
| Support | B | Flier Formation 3 | |||
| Special | Moonbow | C | Fortify Fliers | ||
| HP | ATK | SPD | DEF | RES | |
|---|---|---|---|---|---|
| 50 | 50 | 38 | 27 | 25 | |
| Weapon | Vidofnir | A | Spd Def 2 | ||
| Support | B | Knock Back | |||
| Special | Sol | C | Guidance 3 | ||
| HP | ATK | SPD | DEF | RES | |
|---|---|---|---|---|---|
| 76 | 53 | 17 | 49 | 21 | |
| Weapon | Slaying Edge+ | A | Fortress Def 3 | ||
| Support | B | R Tomebreaker 3 | |||
| Special | Ignis | C | Goad Armor | ||
| HP | ATK | SPD | DEF | RES | |
|---|---|---|---|---|---|
| 76 | 52 | 37 | 38 | 26 | |
| Weapon | Slaying Axe+ | A | Earth Boost 3 | ||
| Support | B | Renewal 3 | |||
| Special | Sacred Cowl | C | Armor March 3 | ||
| HP | ATK | SPD | DEF | RES | |
|---|---|---|---|---|---|
| 45 | 54 | 31 | 21 | 40 | |
| Weapon | Rexcalibur+ | A | Fury 3 | ||
| Support | B | Vantage 3 | |||
| Special | C | Atk Ploy 3 | |||
| HP | ATK | SPD | DEF | RES | |
|---|---|---|---|---|---|
| 52 | 44 | 38 | 23 | 39 | |
| Weapon | Wo Dao+ | A | Death Blow 3 | ||
| Support | B | Flier Formation 3 | |||
| Special | Moonbow | C | Fortify Fliers | ||
| HP | ATK | SPD | DEF | RES | |
|---|---|---|---|---|---|
| 58 | 53 | 41 | 30 | 28 | |
| Weapon | Vidofnir | A | Spd Def 2 | ||
| Support | B | Knock Back | |||
| Special | Sol | C | Guidance 3 | ||
User Submitted Teams
Selena and Flying Archer Hinoka were my best units in this map. Because of this build that I made for Selena that allows her to reach really high def levels she was able to take on all of the armored units in this map. As for Hinoka she shooted down all of the fliers as well as do some damage to the armored enemies. PA!Azura was there for sing support for Hinoka. Anna was just there for the Anna quest. The same goes to Alfonse.
I was able to defeat this BHB with this team on Inf. As a side bonus, you could finish two of the missions (Lunatic or higher with Alfonse, and use him to defeat Amelia).
Alfonse carries a refined Armorsmasher to handle the armors and the green mage cavalier. Delthea is supporting him, but also sees some action. Corrin has Close Counter, allowing him to station himself at the bottom right defense tile to handle the fliers. He can remain there until the last reinforcements arrive. Don't break any walls.
Azura is there for refreshing, so any dancer unit can be used. Alfonse carries QR and Swap, while Delthea carries Reposition. Didn't need to swap seals around.
stay close get buffs take out Tana first and rely on blarblade
Effie stands on the defensive tile right at the corner of the sea, nino first positions behind effie and later between effie and the wall after baiting the green mage, genny all the way back to heal effie. This takes care of amelias bunch of people.
Jakob moves to the right to the defensive tile and obliterates all fliers
(Close counter for jakob and distant counter for effie are probably needed for this setup, and its still close, but it works)
everyones has their base kit
basically move everyone to the right and dance/reposition out of range
lyn can kill the fliers with the help of inigo


